MENU TO SERVE 6 - 8 PEOPLE
ROASTED PEPPERS, GREEN TAHINI
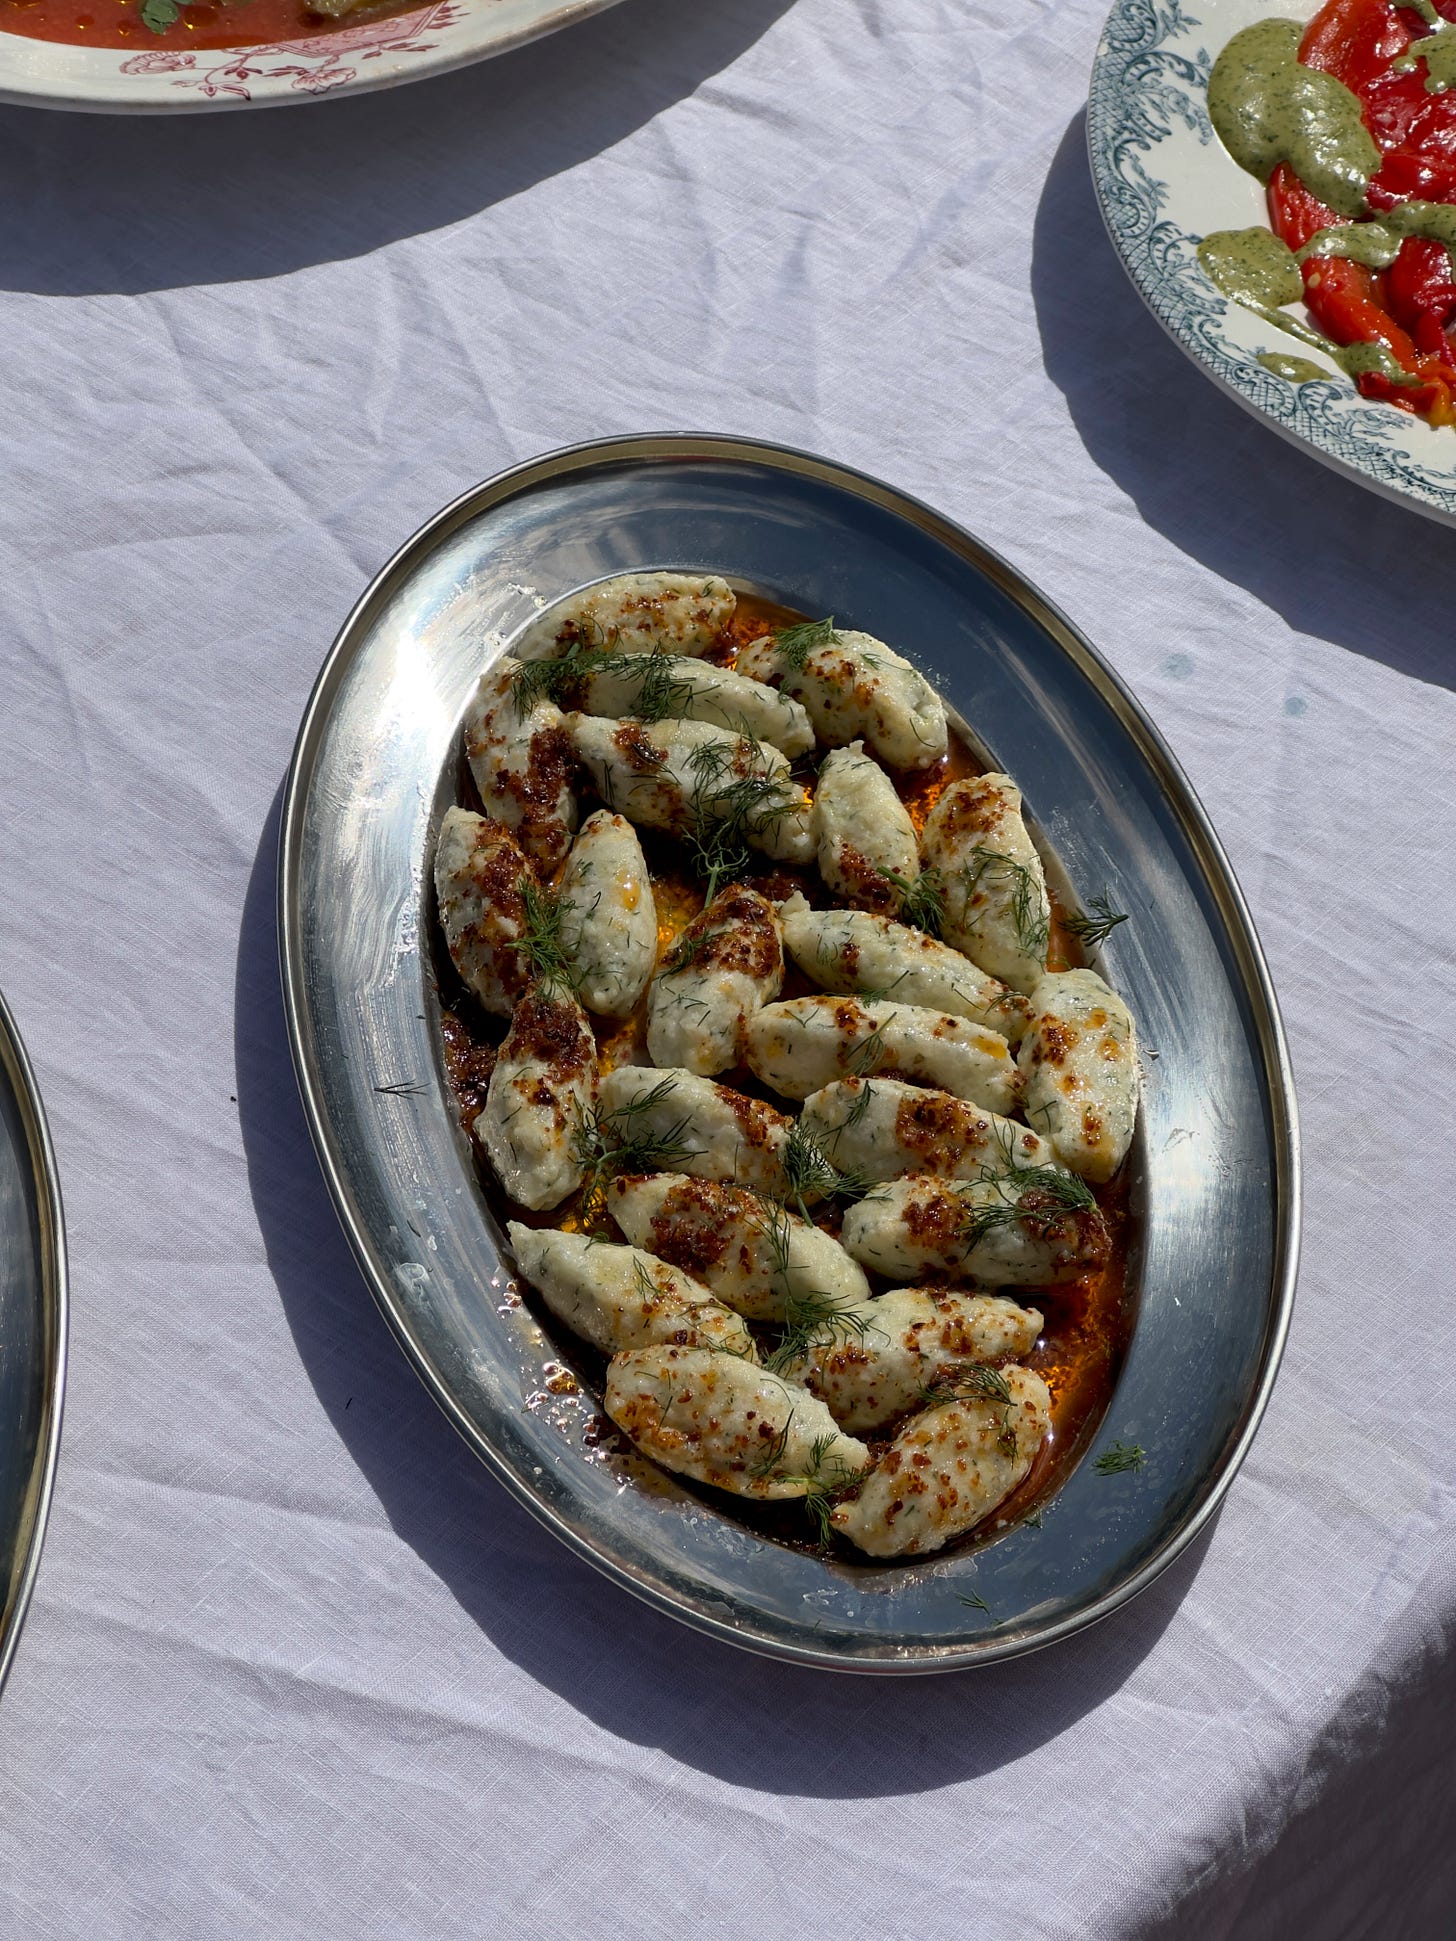
LABNEH AND DILL GNUDI, CHILLI BUTTER
VERMICELLI RICE
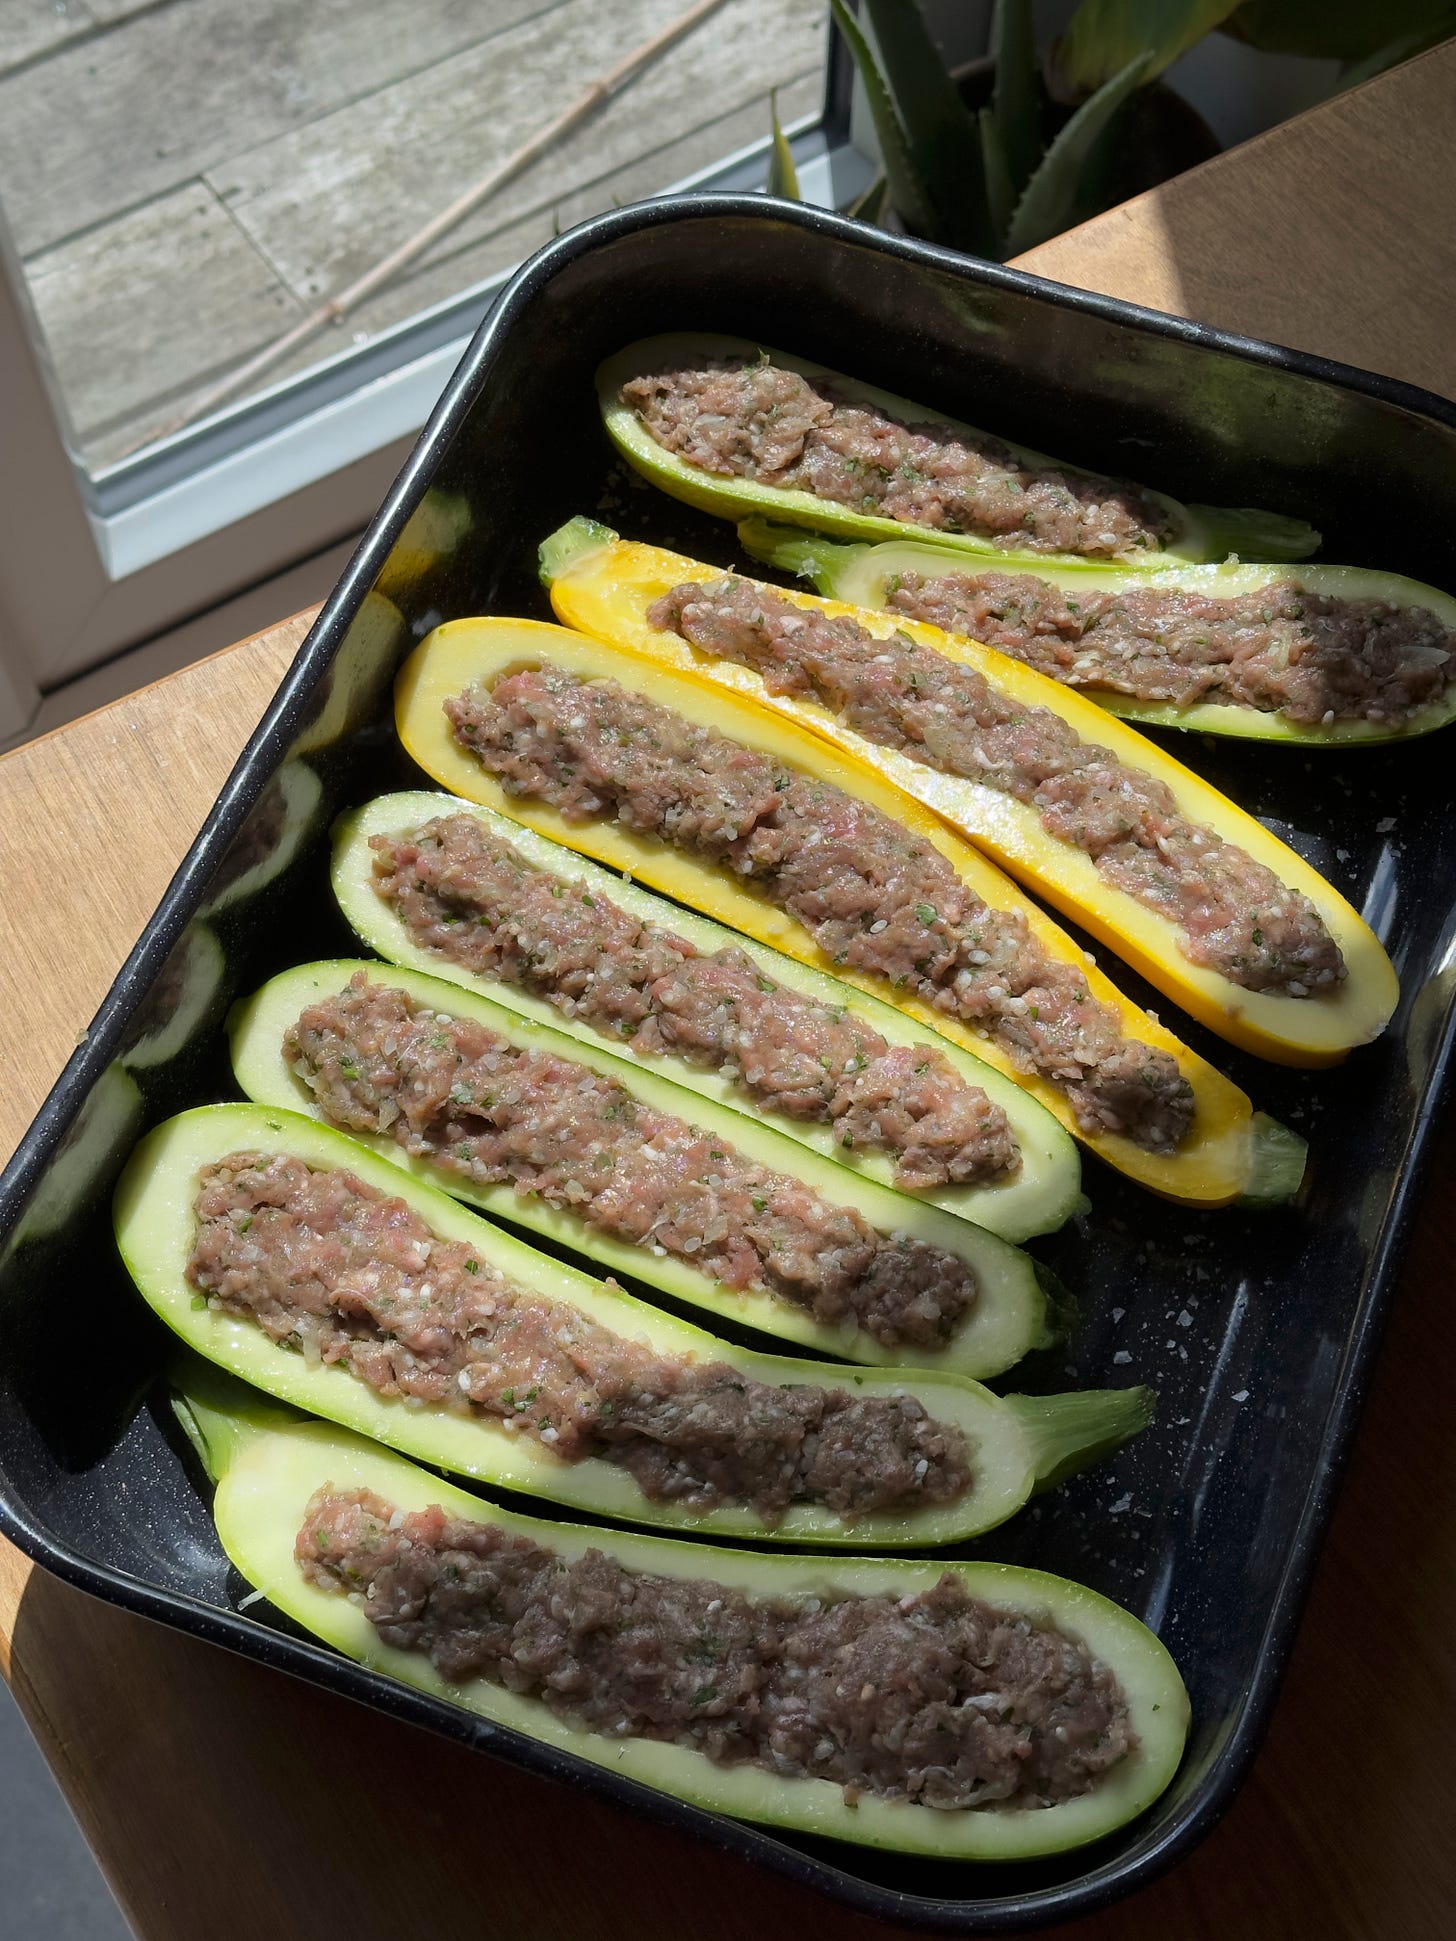
STUFFED COURGETTES, TOMATO BROTH
MANGO CREAMS
Sometimes my inspiration for menus comes from a specific need or occasion, and other times it is from a particular dish that then triggers a theme. This month's menu, a glorious sun-soaked affair for feasting, is one of those times.
Before I get going though, just a couple of things to note.
Please please keep your eyes peeled next WEDNESDAY 15TH of MAY for I have A VERY SPECIAL, EXCITING AND MIND-BLOWING ANNOUNCEMENT and you, Dinner Party subscribers, will be the first to know!
Over on More Please today, I am actually sharing a menu for a slightly more low-key feast but a feast nonetheless.
Aperifeast is my go-to meal for an informal evening with friends and plenty of friends. It’s got the recipes for my perfect sweet and sour Caponata, to be eaten with Marinated Ricotta and Garlic Flatbreads. It is the perfect picky supper and ideal for this time of year.
Right, back to today’s main event!
I really wanted to stuff some courgettes. I couldn’t get it out of my head. The pleasing shape and colours of a stuffed courgette was like a musical ear-worm twisting around in my brain. The best versions of stuffed vegetables that I have tried, in my opinion, are from Middle Eastern and Levantine cuisines. So I knew that’s where I wanted to sit with my courgettes. And then, from there, it was kind of like a little trickle of inspiration. It was important to have some rice with our courgettes, so that went on the menu, with toasted vermicelli and pine nuts. I wanted labneh to feature, and I was also still stuck on shapes - I liked the idea of little lumps catching the light on a plate, and I wanted to drench something in a hot chilli butter (when don’t I want to do that, tbf). Labneh is a thickened, salted yoghurt similar to cream cheese in texture, and I guessed that it would work well if I made it into gnudi - a type of gnocchi from Tuscany made with ricotta. And I was right!
Then I wanted to have another side dish that would be extremely easy but look impressive, so I leant on my old faithful, roasted peppers. Soft, tender and humming with sweetness, topped with a tart, fragrant green tahini sauce. And finally, pudding. This is where colour played a part - in the sketch in my head we were missing an ochre, a sunshiney brightness. Luckily, Indian mango season has just started, and the best and most fragrant mangoes are now hitting some shops. A mango cream, which sits somewhere between a mousse and a syllabub, can be made with all types of mango, to be clear, or even shop bought puree. Importantly, it is delicious and silky and decadent, and a wonderful end to this absolute feast.
This menu is for a celebration - perhaps a birthday, an anniversary or a long-awaited gathering. It’s a feast for the eyes as much as the stomach, and really lends itself to spring or summer parties. I hope you love it!
ROASTED PEPPERS, GREEN TAHINI
Peppers are just such a bloody helpful vegetable! They look and taste amazing, are a doddle to cook and go great with almost anything. This side is a gift to any meal whether it’s a sit down affair or more of a buffet vibe. If you are really pushed for time then feel free to buy jarred roasted peppers ( 2 jars should do it) and use those instead. This would also make a great sandwich filling with some feta and leaves.
Serves 6, as a side
8 romano peppers
4 tbsps olive oil
Salt and pepper to taste
For the Green Tahini
125g tahini
140ml water
1 clove of garlic
25g coriander
1 green chilli
Juice of 1 lemon
Salt to taste
Preheat the oven to 200 fan. Arrange the peppers over 2 - 3 large baking trays and toss in 2 tbsps of the oil. Roast them whole for 20 - 25 minutes, turning halfway through. When the peppers are slightly blistered, browned and soft, put them straight into a bowl and cover tightly with a tea towel or cling film. Let them sit and steam like this for 15 minutes - it will help release their skins. While still fairly warm, peel the filmy skin off the peppers and remove their tops and seeds. I like to tear them into 2 or 3 long strips when I do this. DISCLAIMER - if you don’t want to peel your peppers, don’t. It’s not a must. You should however remove their seeds regardless. Drizzle the peeled peppers with the remaining oil and season with salt and pepper.
Blitz all the green tahini ingredients together in a small blender and season to taste. You may need to add a splash more water if it is really thick.
Pop a couple of spoonfuls of tahini on your 2 serving plates, then top with the cooked peppers while still warm. Drizzle with more tahini, any of the remaining pepper juices and oil, and serve.
MAKE AHEAD -
You can cook the peppers up to 3 days ahead and reheat gently to serve.
The green tahini will keep for 2 days in the fridge.
SUBSTITUTIONS -
Use dill or mint or a mix of both instead of coriander if you prefer.
Use jarred roasted peppers if you prefer, or use bell peppers if you can’t get hold of romano. You will need to roast them for around 10 minutes longer though!
LABNEH AND DILL GNUDI, CHILLI BUTTER
I am very pleased with this creation and honestly, these would be such a lovely main course with the addition of broad beans and peas through the butter, or just as they are for a starter. In this menu, however, they make a really wonderful and substantial side that complements all the other dishes so well. They are reminiscent in flavour of Turkish manti (dumplings) in yoghurt sauce, except for they are meatless and the yoghurt is the dumpling itself. If you can buy ready made labneh then do, but it really couldn’t be easier to make at home with good greek yoghurt, just remember to do it the day before.
Serves 6-8 as a side, 4 as a main
For the labneh
900g full fat Greek yoghurt
1 tbsp flakey sea salt
For the Gnudi dough
550g labneh
20g dill, finely chopped
A good grating of fresh nutmeg
30g finely grated pecorino cheese
½ tsp flakey sea salt
150g 00 pasta flour
1 egg, beaten
100g fine semolina, for dusting
4 tbsps olive oil, for finishing
For the chilli butter
120g salted butter
2 tbsps aleppo pepper or 1 tbsp chilli flakes
2 garlic cloves, finely grated
Some extra dill for the top
The day before, make your labneh. Mix the Greek yoghurt with the salt. Line a sieve with some muslin / a cheesecloth / a couple of jay-cloths and spoon the mix into it. Twist and squeeze the mix so that it is very well compacted in the cloth and then tie it up tightly.
You can either hang the muslin over a bowl from a height (a door handle, back of a chair…) so that the liquid drains out or you can weigh it down in the sieve with something heavy on top of it and pop into the fridge for a more compact option. Either way it will need 12 hours minimum to strain and become extra thick and firm.


To make the gnudi, in a large bowl combine the labneh, dill, nutmeg, cheese, salt, and beaten egg together, then stir in the flour. It will be come a stiff, thick mix similar to a dough. You do not need to knead it though! Good practice when making things like gnocchi or gnudi is to test them before you roll them, in case you need to add more flour. So, bring a small saucepan of water to the boil and drop a walnut sized ball of the mix into the water. If it doesn’t break apart and eventually floats after a minute or so, then your mix is good to go! You can also taste it to check the seasoning at this point, add more salt if it needs it. Now take two baking trays and split the semolina between them. How you shape the gnudi is up to you - I used 2 spoons to make some very rough and ready quenelles but little balls would be just as lovely! To make the quenelles, you need 2 dessert spoons. Scoop some mix into one spoon, then by passing the mix between each spoon, scraping and flipping the dough as you do, you end up with an oval shape. Tip the dough onto the tray with semolina and shake it around to coat it on all sides. A mix of this quantity will make around 40 decent sized gnudi. Once you have rolled them all, pop them in the fridge to chill until needed.
For the chilli butter, heat the butter in a saucepan until sizzling. When it starts to foam and turn brown, add in the garlic and chilli and remove from the heat. The butter will sizzle even when not on the heat and that’s ok!
To cook the gnudi bring a large pan of water to a rolling boil and salt it generously, like you would a soup. Prep a large bowl with some olive oil in and keep the butter warm in a pan nearby. Carefully drop the gnudi into the water and stir gently so that they do not stick together. When the gnudi start to float and bob around in the water as it comes back to the boil, that means they are cooked! Use a kitchen spider or slotted spoon to transfer the gnudi into the bowl with the oil. Swirl them around in the bowl so they are all coated well in the oil. Then spoon them immediately onto your chosen platter. Heat the butter briefly until it is sizzling again and then pour it all over the gnudi. Dress with a little extra dill and serve!
MAKE AHEAD
The gnudi will keep in the fridge raw for up to 24 hours.
Once cooked they actually reheat really well in the microwave (had them for dinner most days this week) but this isn’t ideal for dinner party guests, however good to know for leftovers purposes.
The butter will keep in the fridge for 5 days.
SUBSTITUTIONS
Use ready-made labneh if you can find it.
Parmesan works instead of pecorino.
Mint, coriander or parsley or a mix would also work in the dough.
VERMICELLI RICE
Throughout Levantine and Middle Eastern cooking versions of this rice dish exist, where golden, toasted shards of fine vermicelli are cooked with long grain rice. What you get is a really complex, almost smokey rice dish that hums of both a comforting starchy scent and browned butter. Topped with butter-toasted pine-nuts, this is so luxurious, and the fatty, muted flavour works beautifully with all the brightness from everything else on the table. As always, please use the best quality rice here and take care to wash and soak it properly, you will reap the rewards and never look back.
Serves 6-8
For the rice
100g unsalted butter
2 tbsps olive oil
400g basmati rice, extra long if you can find it
125g broken vermicelli
650ml just boiled water
For the top
20g butter
50g pine-nuts
In a large bowl wash the rice thoroughly, I avoid doing this in a sieve as the grains can break. Put in the bottom of a large bowl and run cold water over it, filling the bowl to the top. Stir the rice a bit with your hands - you will notice the water will be very cloudy. Gently pour the water away until it’s almost gone - the rice is dense so will not flow away with it. Repeat over and over until the water runs clear - this usually takes around 7 - 10 goes I find. Top up the water one final time and then leave the rice to soak for a minimum of 30 minutes. I like to soak it for 1.5 - 2 hours.
To cook the rice, drain it thoroughly in a sieve. Melt the butter in a large, heavy based saucepan or casserole with a lid on a medium heat. When it starts to foam, add the oil and then stir in the vermicelli. The oil will prevent the butter from burning while you toast the vermicelli. Keep the vermicelli moving in the foaming butter, stirring well. It will take around 6 - 6 minutes to turn a deep golden. You want to make sure you toast it well as the flavour is so important, but also once the rice and water is added it will lose some of the depth of its colour. Once the vermicelli is toasted, stir in the drained rice. Let it cook in the butter for a minute, then pour in the hot water. Season with a big pinch of salt and bring to the boil. This will happen pretty quickly so don’t go anywhere! As soon as it is boiling, cover with a tight fitting lid and turn the heat down to low - move to a smaller burner if this is possible for you. Cook for 15 minutes, then turn the heat off but do not open the lid. Leave to steam for 15 more minutes. While the rice is steaming, heat the remaining butter in a small pan until sizzling and add the pine nuts. Cook together on a medium heat until the pine nuts are golden and toasted, around 4 minutes. Remove from the heat. Serve the rice piled onto a platter and then top with the pine nuts in their butter.
MAKE AHEAD -
This is best made fresh, but will be fine in the pan for around 1 hours with the lid on after it has been cooked.
SUBSTITUTIONS -
Use olive oil instead of butter to make this vegan.
STUFFED COURGETTES, TOMATO BROTH
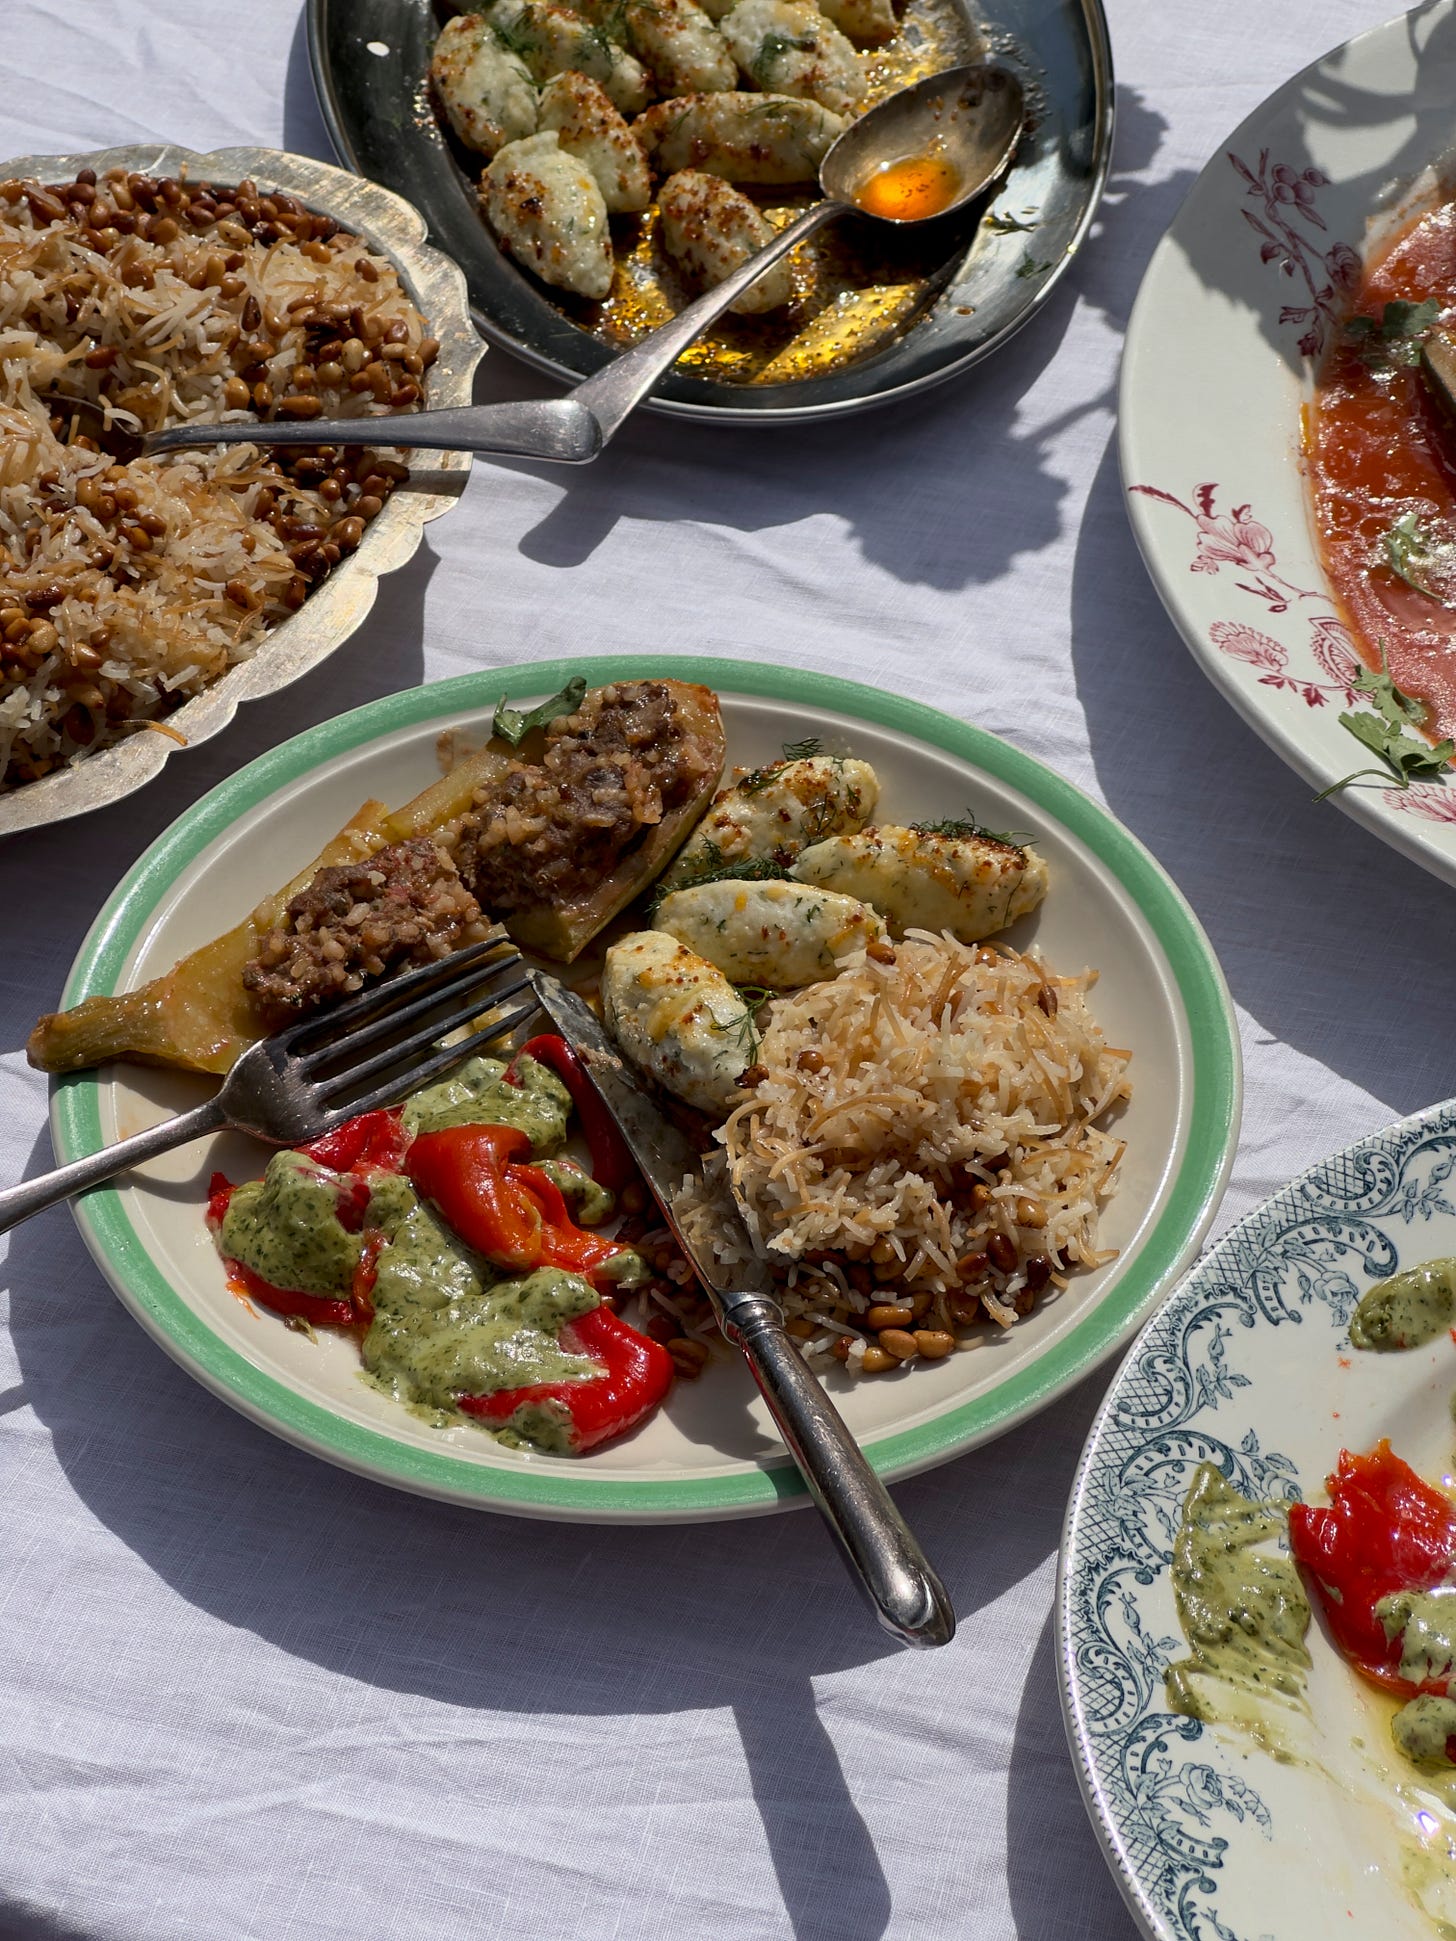
Courgettes, which are actually part of the squash family, are really the perfect vegetable for stuffing.They are hardy enough that they don’t break when you’re doing it, but then when cooked they become soft, unctuous and giving - a flavour soaked cushion. They also look spectacular, I think. Kousa Mahshi is the Arabic name for stuffed courgettes and every country in the Middle East has their own recipe. When taking inspiration from a dish that is ancient, sacred and also found in many different ways, I think it is important to note where you have and haven’t deviated, so that people can understand what has been changed. Similar to the classic versions, I have used lamb mince and a small amount of short grain rice in my filling, as well as fragrant spices. I’ve also made a light tomato broth to cook the courgettes in. What have I changed? Firstly I have cut my courgettes in half for ease, where more traditional recipes use smaller, younger courgettes that are hollowed out and stuffed whole. I have cooked mine in a tray in the oven, where most other recipes would involve slow stewing / boiling in a pot in said tomato broth. This is a wonderful sharing dish for our feast - light yet wholesome and comforting and so, so good with the vermicelli rice to soak up the juices. These also hold remarkably well, you could cook them a few hours ahead and reheat to serve and no one would notice.
Serves 6-8 as a sharing dish, 4 as a generous main
4 large courgettes - use different colours if you like!
500g good quality lamb mince (at least 20% fat)
50g pudding rice, washed and soaked for 30 minutes
3 tbsps olive oil
1 onion, coarsely grated
2 cloves of garlic, finely grated
1 tbsp cumin
1 tsp ground cardamom
½ tsp cinnamon
Large handful of parsley, finely chopped, plus extra for garnish
1 tbsp flakey sea salt
For the broth
1l chicken or lamb stock
40g tomato paste
200g plum tomatoes, coarsely grated
Salt to taste
Preheat your oven to 175 fan.
Cut the courgettes in half and scoop out their seeded insides like you would a cucumber. You want to create a decent sized divet in the middle to host our filling. Lay in 2 large, deep roasting trays and set aside.
Combine the meat, soaked rice, oil, onion, garlic, spices, parsley and salt and mix well. Use a spoon to fill the divets in the courgettes with the meat mix. There should be plenty for the filling to be slightly humped and domed above the vegetable. Pop in the fridge until needed.
To make the tomato broth, put the tomato paste and grated tomato in a pan on a medium heat. Cook the tomato paste and tomatoes out for 2 minutes or so, until the oil starts to separate a bit from the paste, then pour in the hot stock. Stir, taste and season well like you would a soup. Strain the broth through a fine sieve to get rid of the tomato seeds and skins and then pour over the stuffed courgettes in their trays. Cover the trays tightly with foil and pop into the oven to cook for 1 hour. Remove from the oven and baste the courgettes with the broth after 30 minutes. After an hour the courgettes will be completely soft and tender and our filling will be cooked. Serve on deep platters drizzled in the broth (serve the rest on the side in bowls if you wish), some good quality olive oil and parsley leaves.
MAKE AHEAD -
You can stuff the courgettes and bake them up to 3 hours before. If you make the stuffing too far in advance the rice will soak up all the moisture so try to avoid this.
You can make the tomato broth up to 3 days ahead.
SUBSTITUTIONS -
Use peppers, squash or aubergine instead of courgettes.
Beef mince will work instead of lamb, always make sure it has a high fat content.
MANGO CREAMS
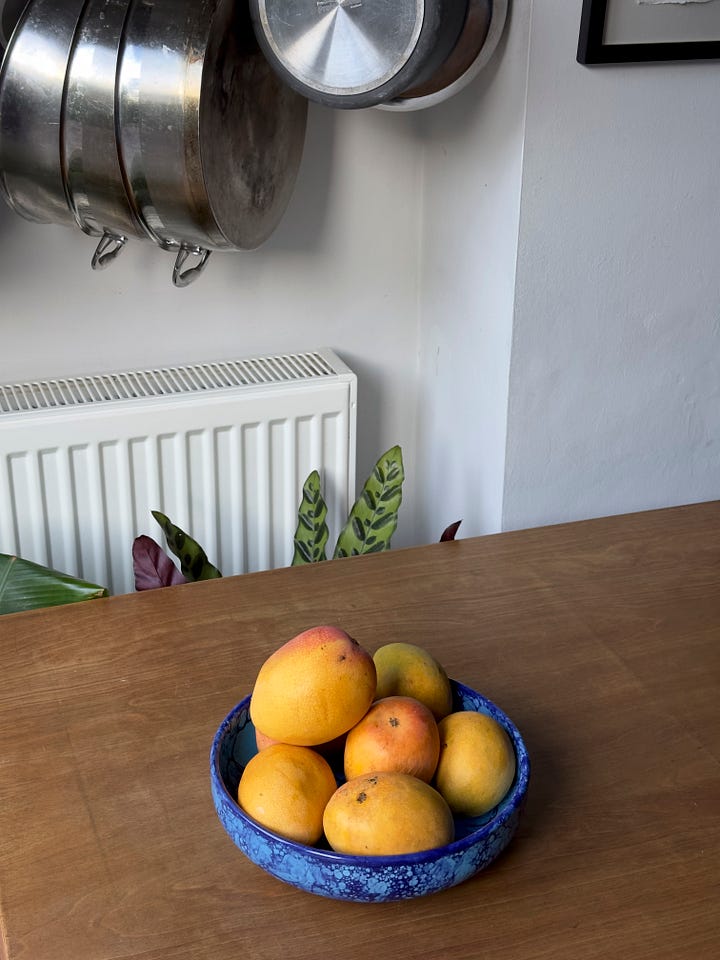
After a meal with many contrasts, colours and flavours, sometimes it’s nice to finish with something plain, simple and clean. These mango creams are such a lush way to end our feast - like a solero got whipped into a little moussey pudding. It’s kind of baby-food, in a good way? Of course the beauty of their simplicity means you can certainly zshush them if you wish. If they seem too plain, then serve them with some chopped fresh mango and passionfruit, or top them with crushed toasted coconut. You can make the mango purée yourself, or you can buy it, no judgement here. If you can get hold of alphonso mangoes, or indeed any Indian mango in season now, do. Ripe supermarket mangoes will of course work too, though. I use 1 leaf of gelatine to get the softest of sets here, just enough so that it has body but not too much that it becomes something chewy.
Makes enough for 6 large or 8 medium sized portions
For the mango purée
4 - 5 alphonso mangoes or 3 - 4 very ripe mangoes
For the creams
450g mango purée - fresh or canned.
Juice of 1 large lime
A decent pinch of flakey sea salt
4 egg yolks
80g sugar
1 sheet of gelatine
350ml double cream
If you are making the mango purée, then carefully cut into your mangoes, either side of the central stone to release two large fruit-filled cheeks. Scoop the flesh of the mangoes out, not forgetting to get as much as possible off the side of the stone itself too. Put the mango flesh into a strong blender - I like to use a nutribullet and blitz until smooth. Pass the purée through a fine sieve - mangoes are very fibrous and so this is important!
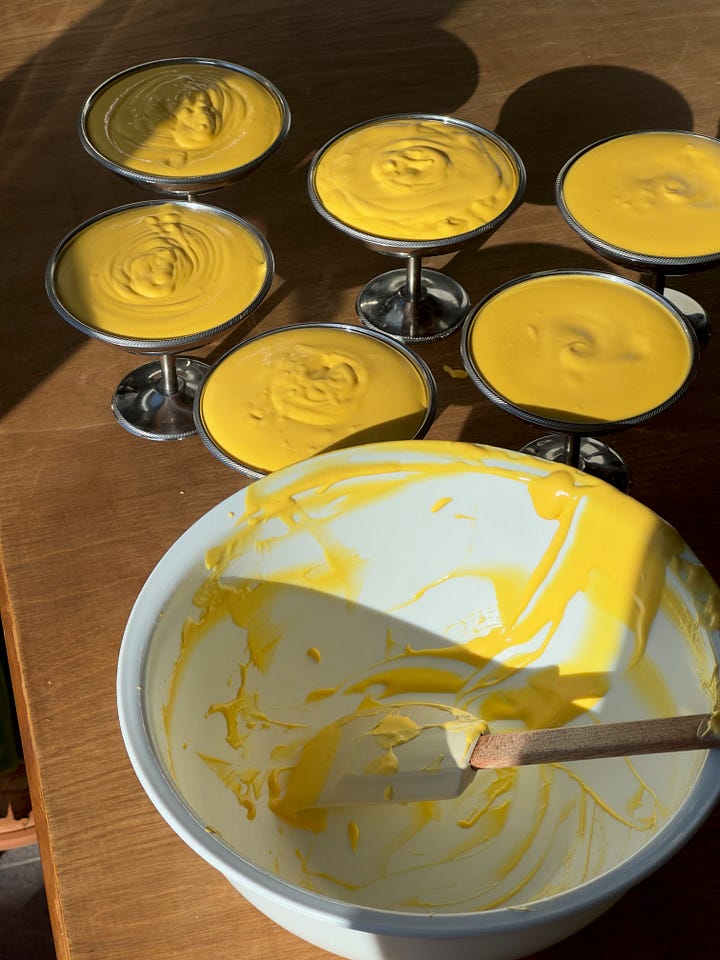
To make the mango creams season your purée with the lime juice and salt. Put the egg yolks and sugar in a large mixing bowl and use electric beaters to whisk them together until very very pale, thick and shiny - around 4 - 5 minutes. Put the leaf of gelatine in a bowl of cold water to bloom. We need to heat some of the cream to dissolve the gelatine properly, so in a pan, heat 50ml of the double cream until steaming, then remove from the heat. Whisk in the gelatine leaf - it should dissolve and thicken the cream slightly. Now we need to let this cool slightly (warm is fine) before we add it to our mix, so leave it for a couple of minutes. When the gelatine-cream mix is warm but not hot, take a spoonful of the whipped egg yolk mix and add it to the cream, mixing it in well with a spatula. This is to temper the eggs with the heat, and also help the gelatine combine properly with the cooler ingredients. Now pour the whole lot back into the bowl with the remaining egg yolk mix and use the beaters to whip it in briefly until well combined. Add the mango puree and mix again until you have a smooth, bright orange bowl of love.
In another bowl, whip the remaining cold cream to soft peaks. Fold them into the purée and egg yolk mix, taking care to combine them evenly but avoiding knocking out air. Pour the mango cream into your chosen bowls or glasses and pop in the fridge to set for 6 hours, ideally overnight. Cover your bowls or glasses if your fridge isn’t spotlessly clean and potentially smelly! Serve chilled.
MAKE AHEAD -
The mango creams can be made up to 24 hours ahead.
SUBSTITUTIONS -
Use tinned mango purée if you prefer.
TIMEPLAN
This first plan should help you see what you can get done in advance, so that for each course on the day you have at least 1, maybe 2 major parts of it taken care of. I appreciate that not everyone’s weeks are easily peppered with dinner party prep, but if you’re hosting after work or on a day where you can’t be in the kitchen, getting ahead is going to save your arse.
MISE-EN-PLACE
This is the fancy name we give to the food prep each section in the restaurant needs to do for their dishes. Hopefully breaking down each dish like this will help you feel organised.
Use the hour before your guests arrive to organise your space too- I find it helpful to group ingredients by dish so it is all in the same place. Little ramekins are really useful for this.
STYLING
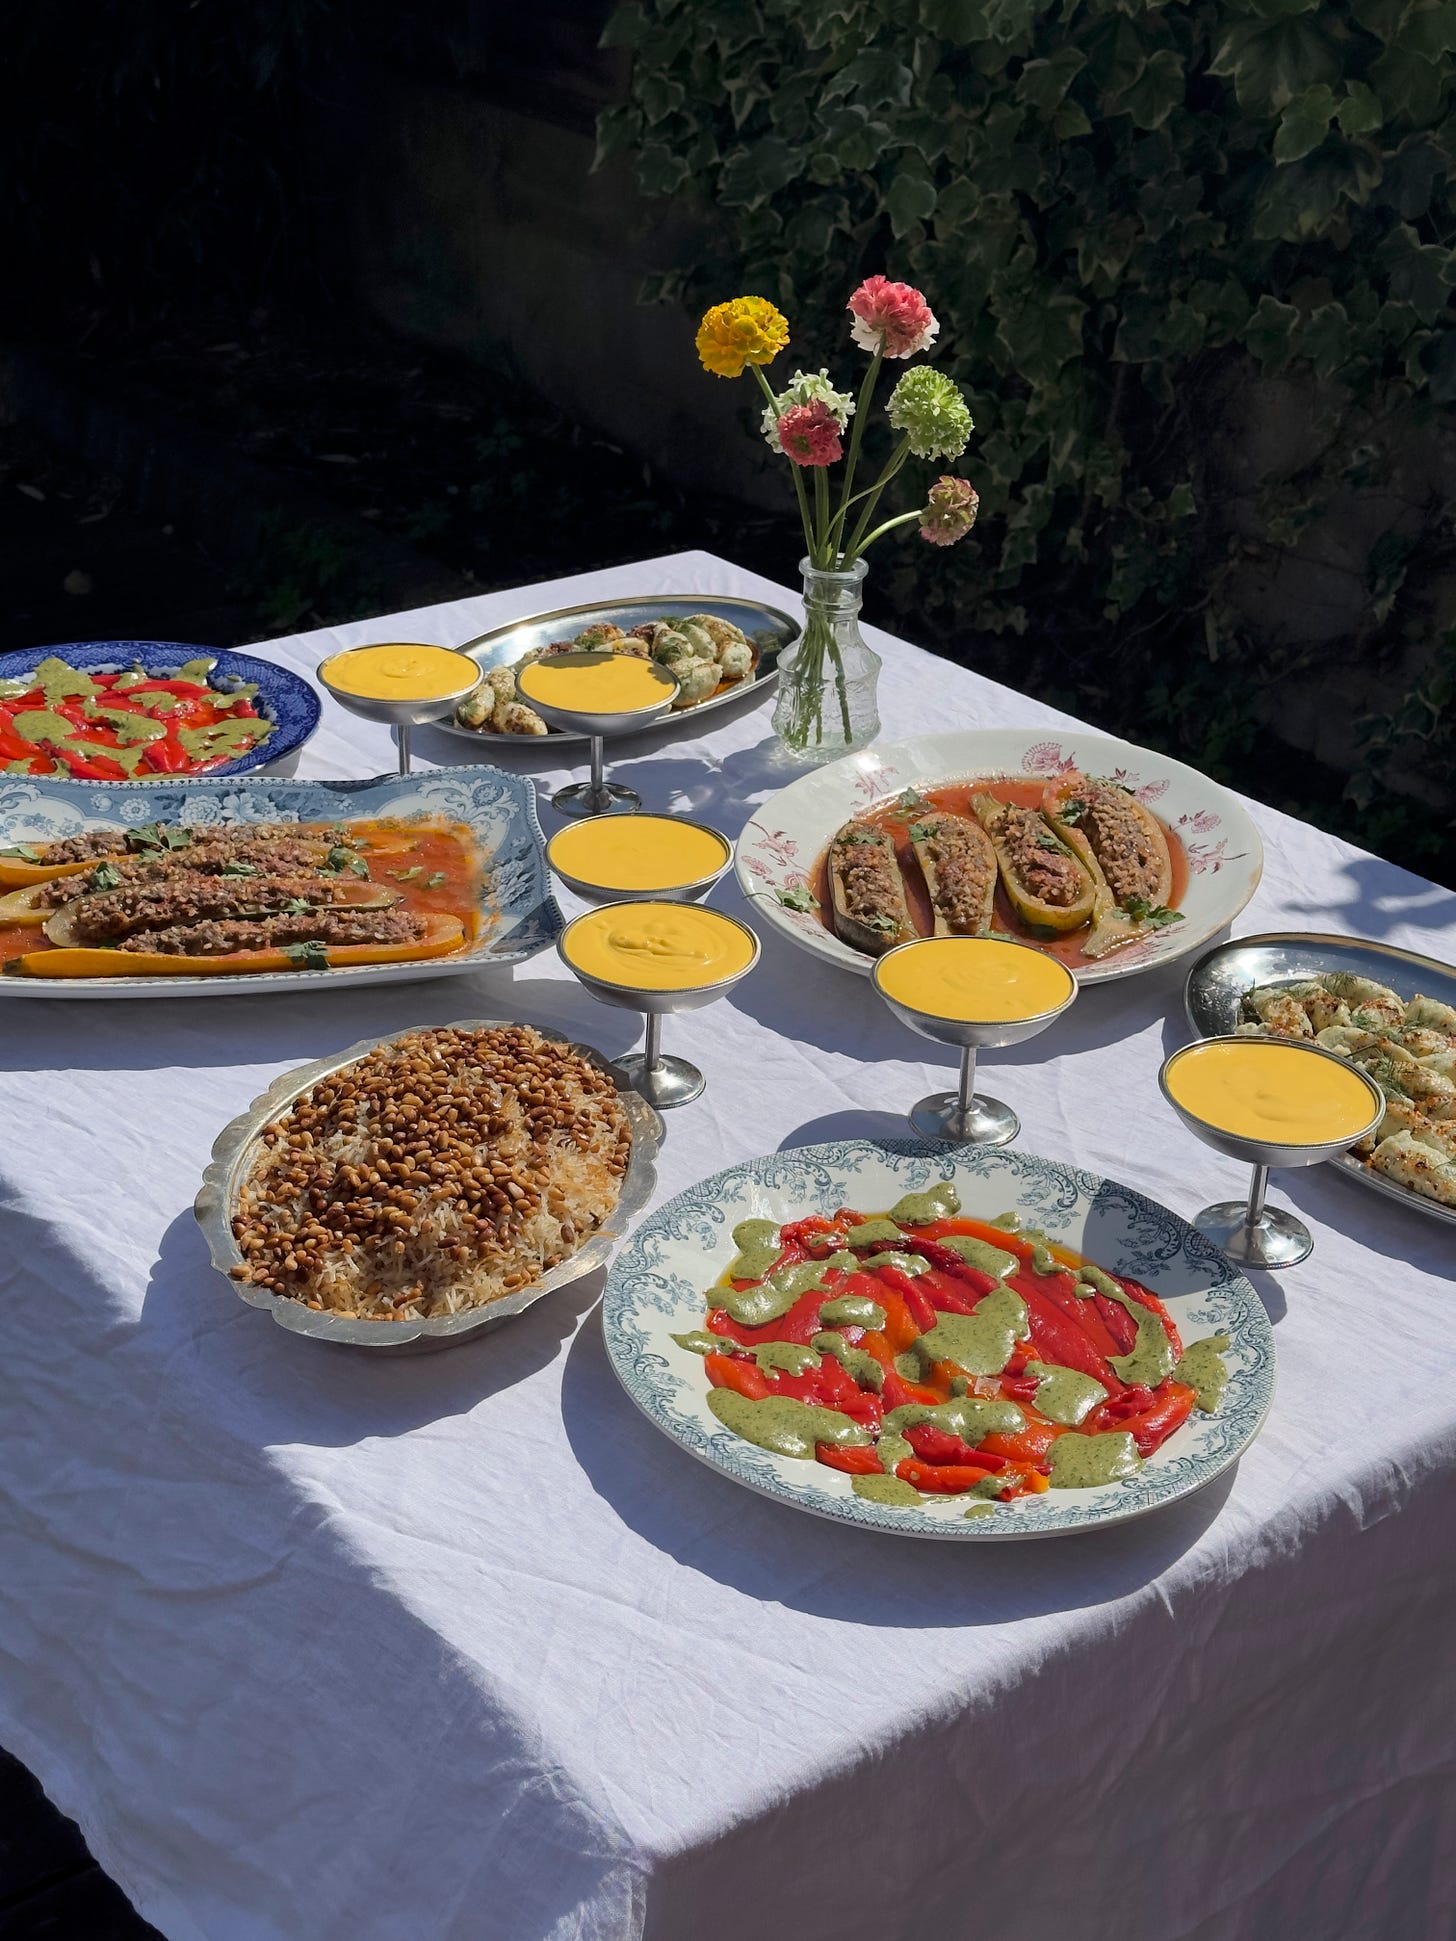
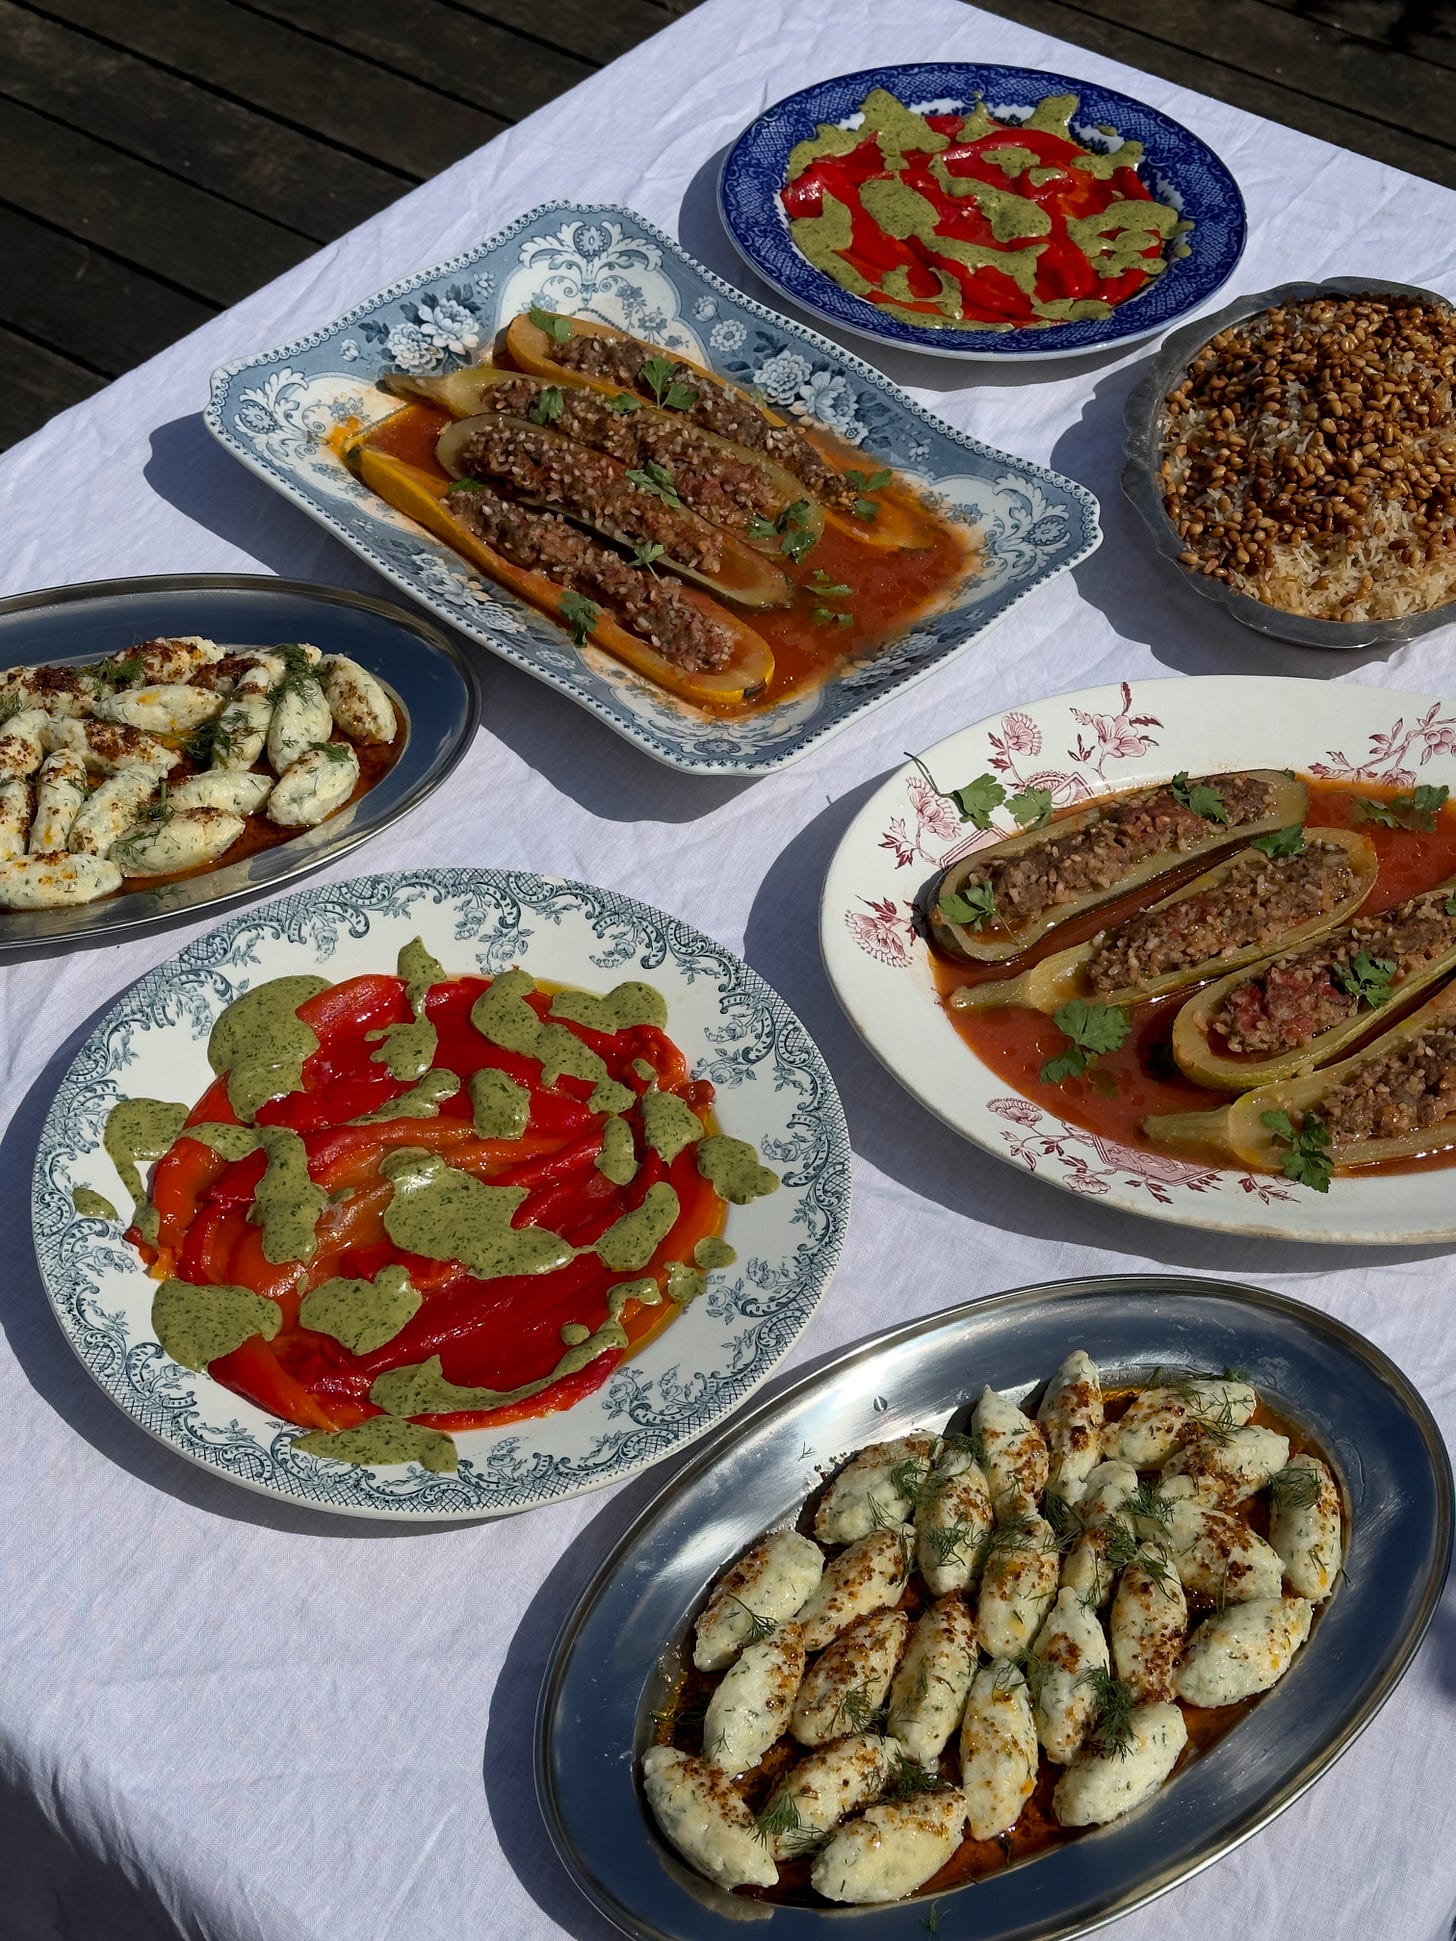
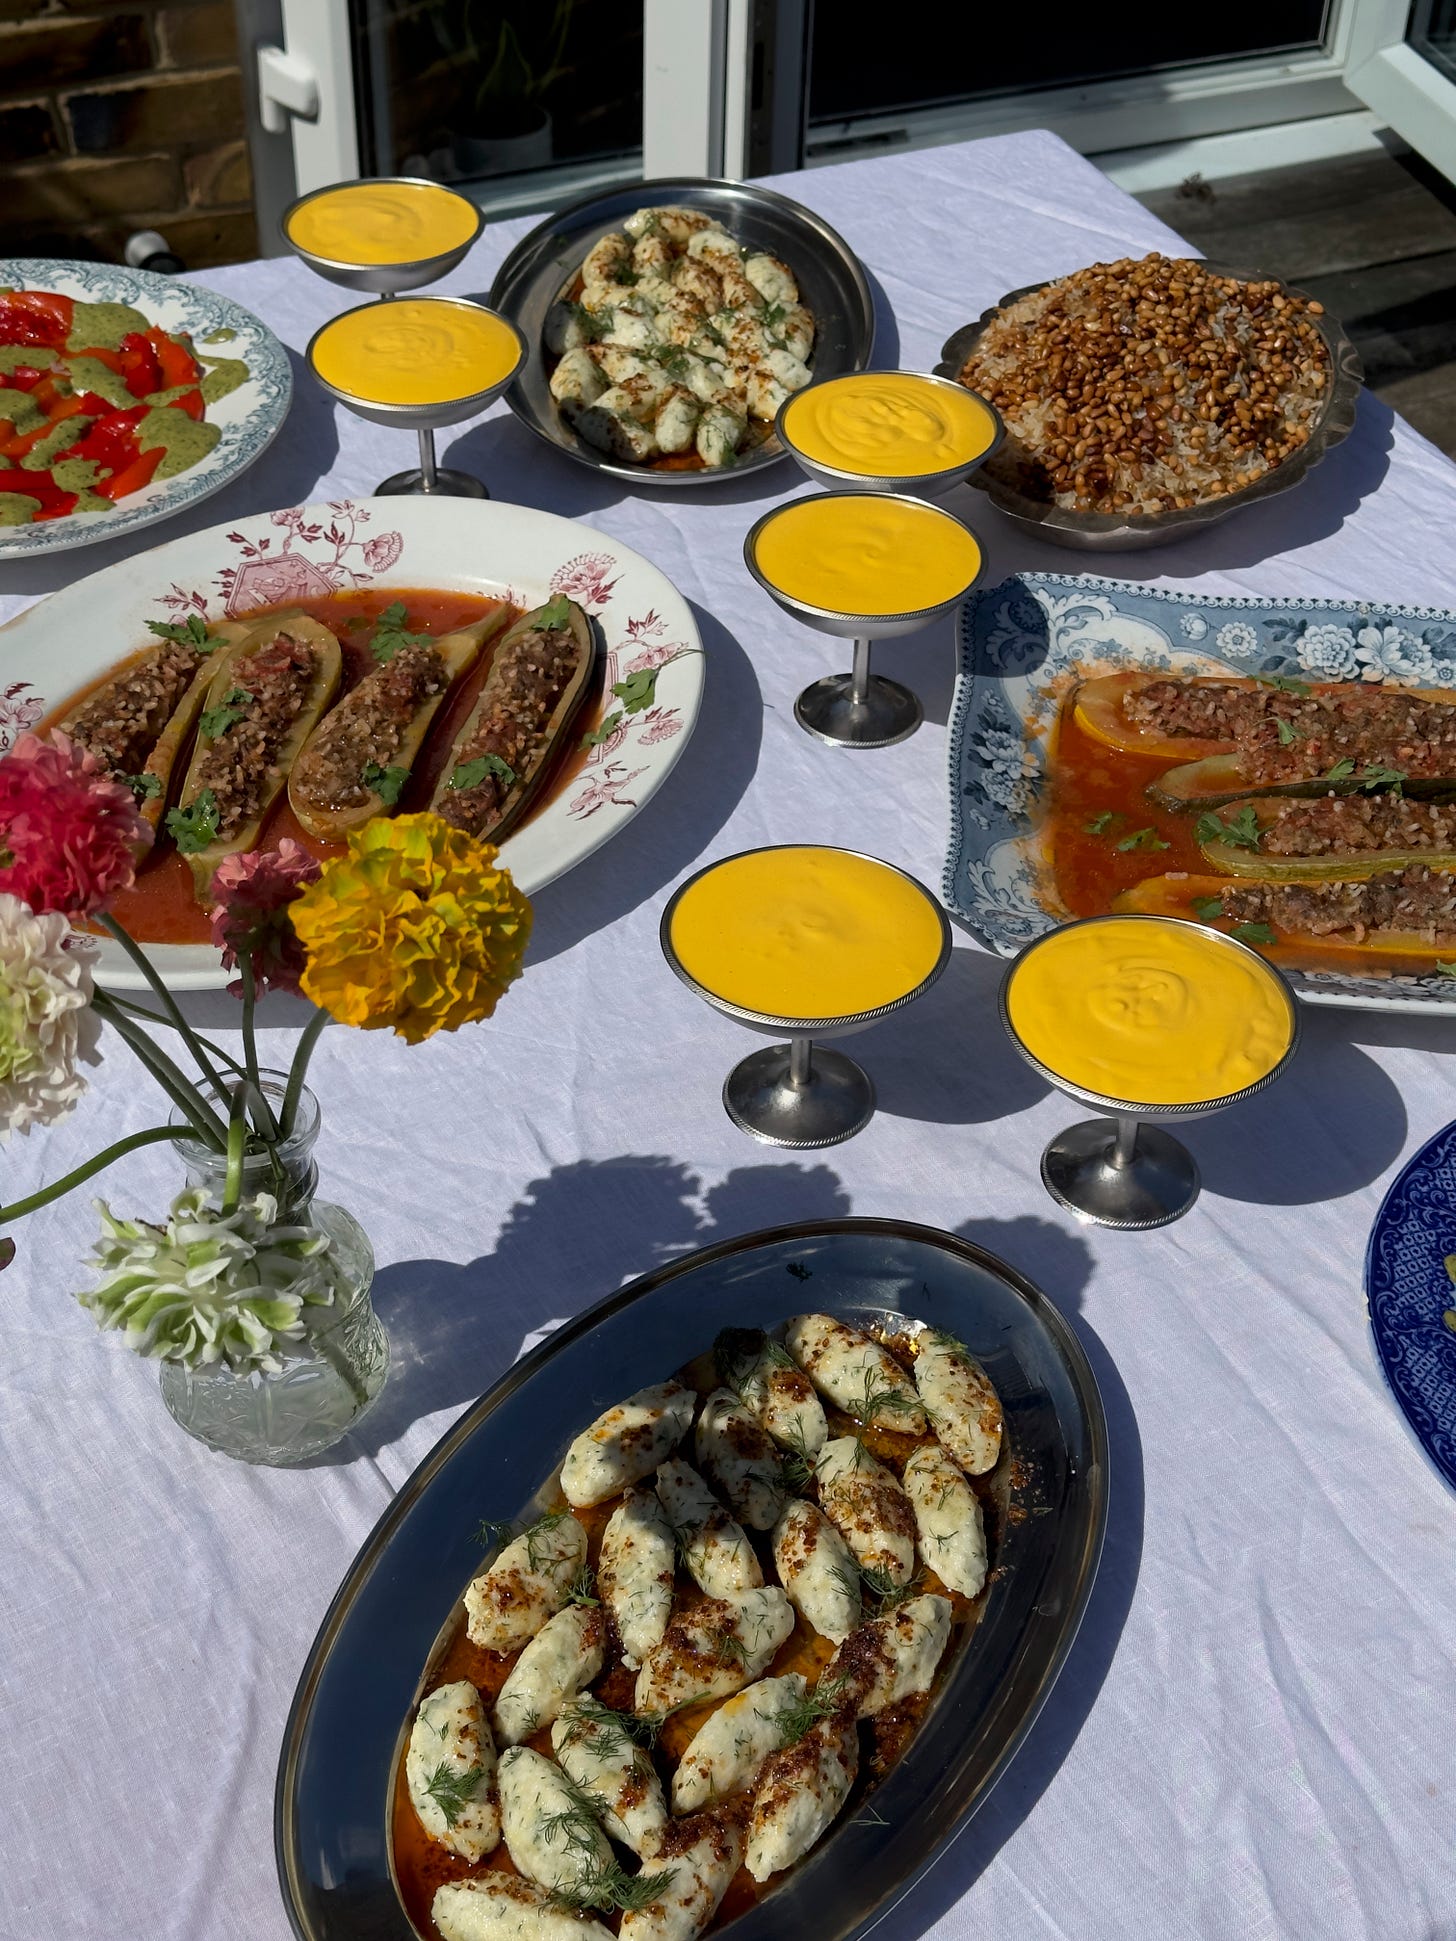
For a feasting table I love to duplicate plates, because even though it is just two of the same thing, it makes it look so much more full and generous. They don’t have to be the same plates for the same dishes of course, in fact the more random and gloriously eclectic the better!
I’ve long advocated for the use of platters and I know they aren’t something everyone has but truly they are such a godsend for entertaining and make everything look chic. If, however you simply do not have the space for them then just spread the dishes out over the largest plates you do have, or indeed serve in oven trays which works really well too.
Our menu is extremely bright, so it is really nice having some silver, metallic tones which make anything that’s a primary colour really sing. For the peppers, courgettes and gnudi I would avoid creating piles - you see the fabulous shapes and colours better if these are all on one layer on your plate. For the rice, feel free to heap it into one, two or three bowls to spread across the table. I’ve gone for metal ice cream bowls for my mango creams, but glasses, little ramekins or even jars would work too.









Lots of lovely ideas - thanks for sharing! Love the labneh gnudi in particular (have started experimenting with labneh in dumplings myself recently, using them to replace fresh curd cheese / quark in Austrian Topfenknödel so can imagine them working well here!)