


THE FRENCH KISS ONE
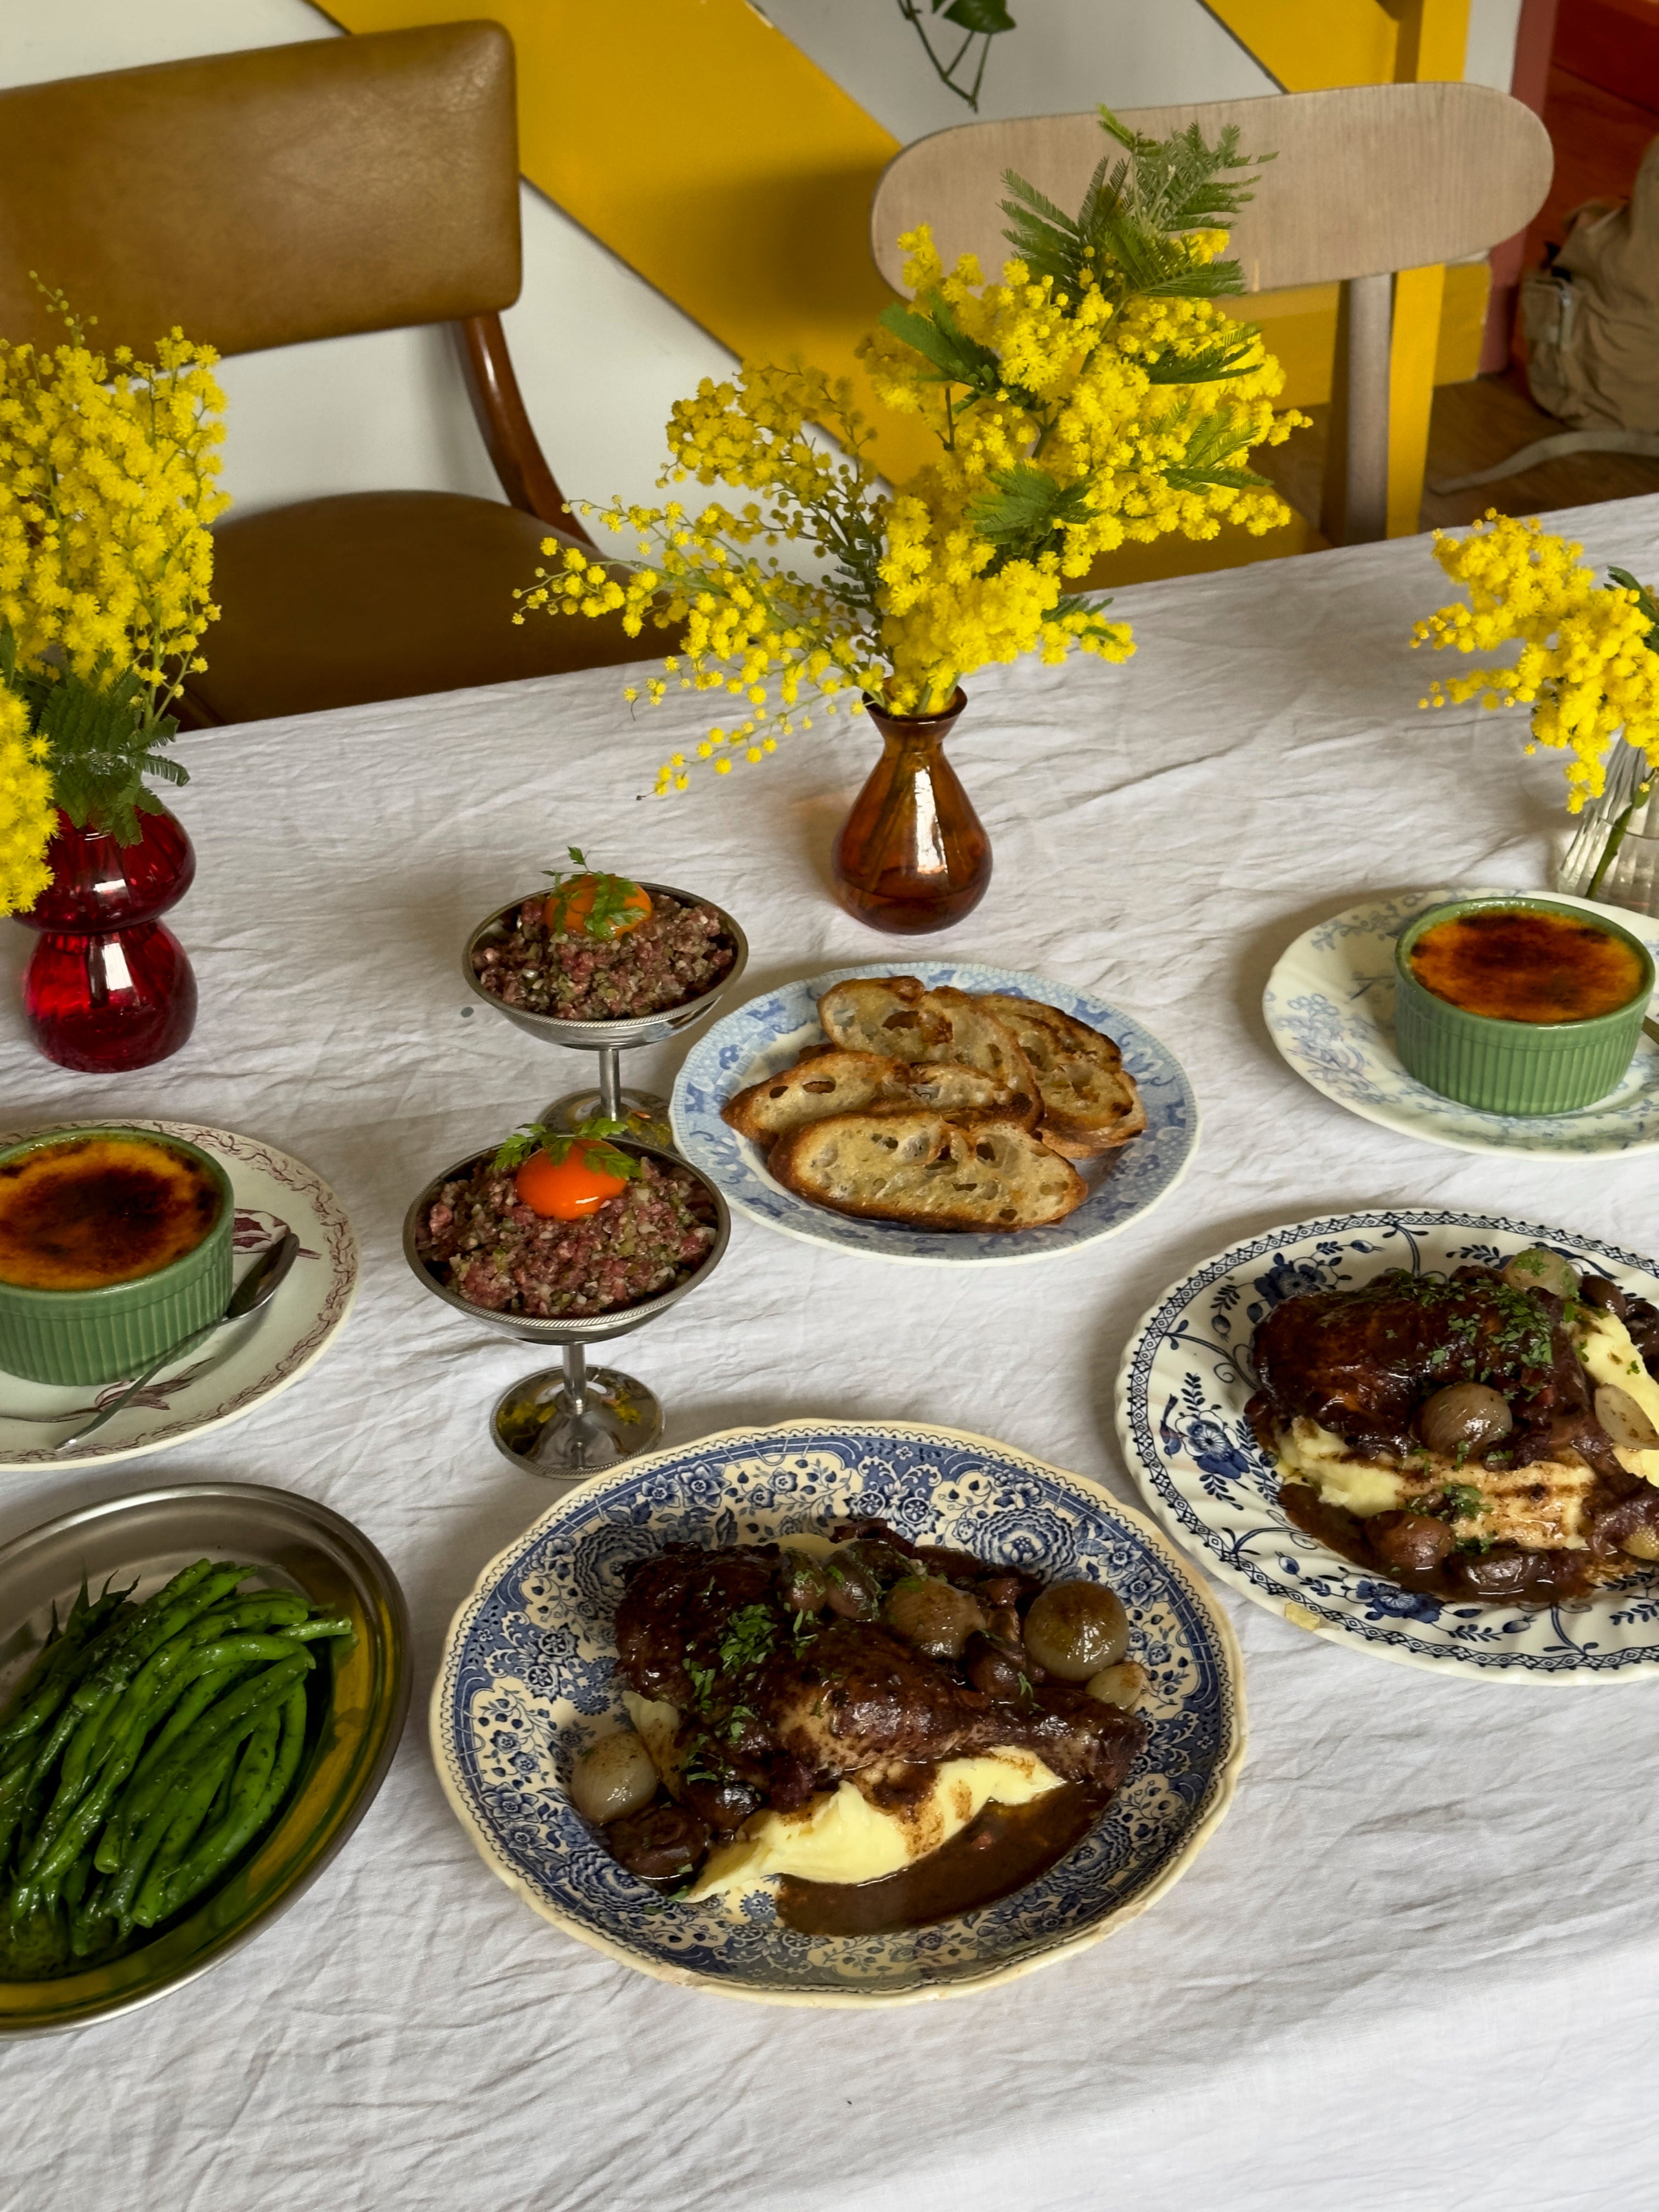
3 of the best to ever do it - Steak Tartare, Coq au Vin and Crème Brûlée


MENU TO SERVE 2
STEAK TARTARE
COQ AU VIN, POMMES PURÉE, HARICOT VERTS
CRÈME BRÛLÉE
This will be the Dinner Party’s second Valentine's Day episode and to be honest, I am thrilled! It’s long been one of my favourite dinners to plan, whether it be for a partner, a pal or a group of pals. I know the Illuminati have made Valentine's Day a corporate, capitalist hellscape but truthfully I am a huge fan of both the Illuminati and hellscapes so it’s all good with me. Jokes aside, I do like that we have a day for love, and that is how I interpret it. It’s a day to take a step back and relish all the love in our lives - platonic, familial, romantic, oedipal (ew no!) and to communicate that love to the people or pets who matter most.
I should say - please forgive me for indulging in today's soppy menu name but really I just wanted something catchy to convey that all the food in this menu is French and the other buzzwords that I associate with France (revolution, strikes, garlic) didn’t quite cut it. Ok but seriously I actually ADORED going back to my culinary roots and executing a classic and very delicious French dinner. I did my chef training at Le Cordon Bleu London when I made the pivot from languages graduate to chef and this menu really took me back to those days. We learned all the French classics, which were for a while very retro but are now firmly back in fashion here in London. It’s funny how things go in and out of style cyclically - I genuinely thought the low-rise flared jeans of my early teens were a thing of the past and yet I am firmly back in them aged nearly 34. The same has happened with classic French cooking it would seem and I for one am here for it.
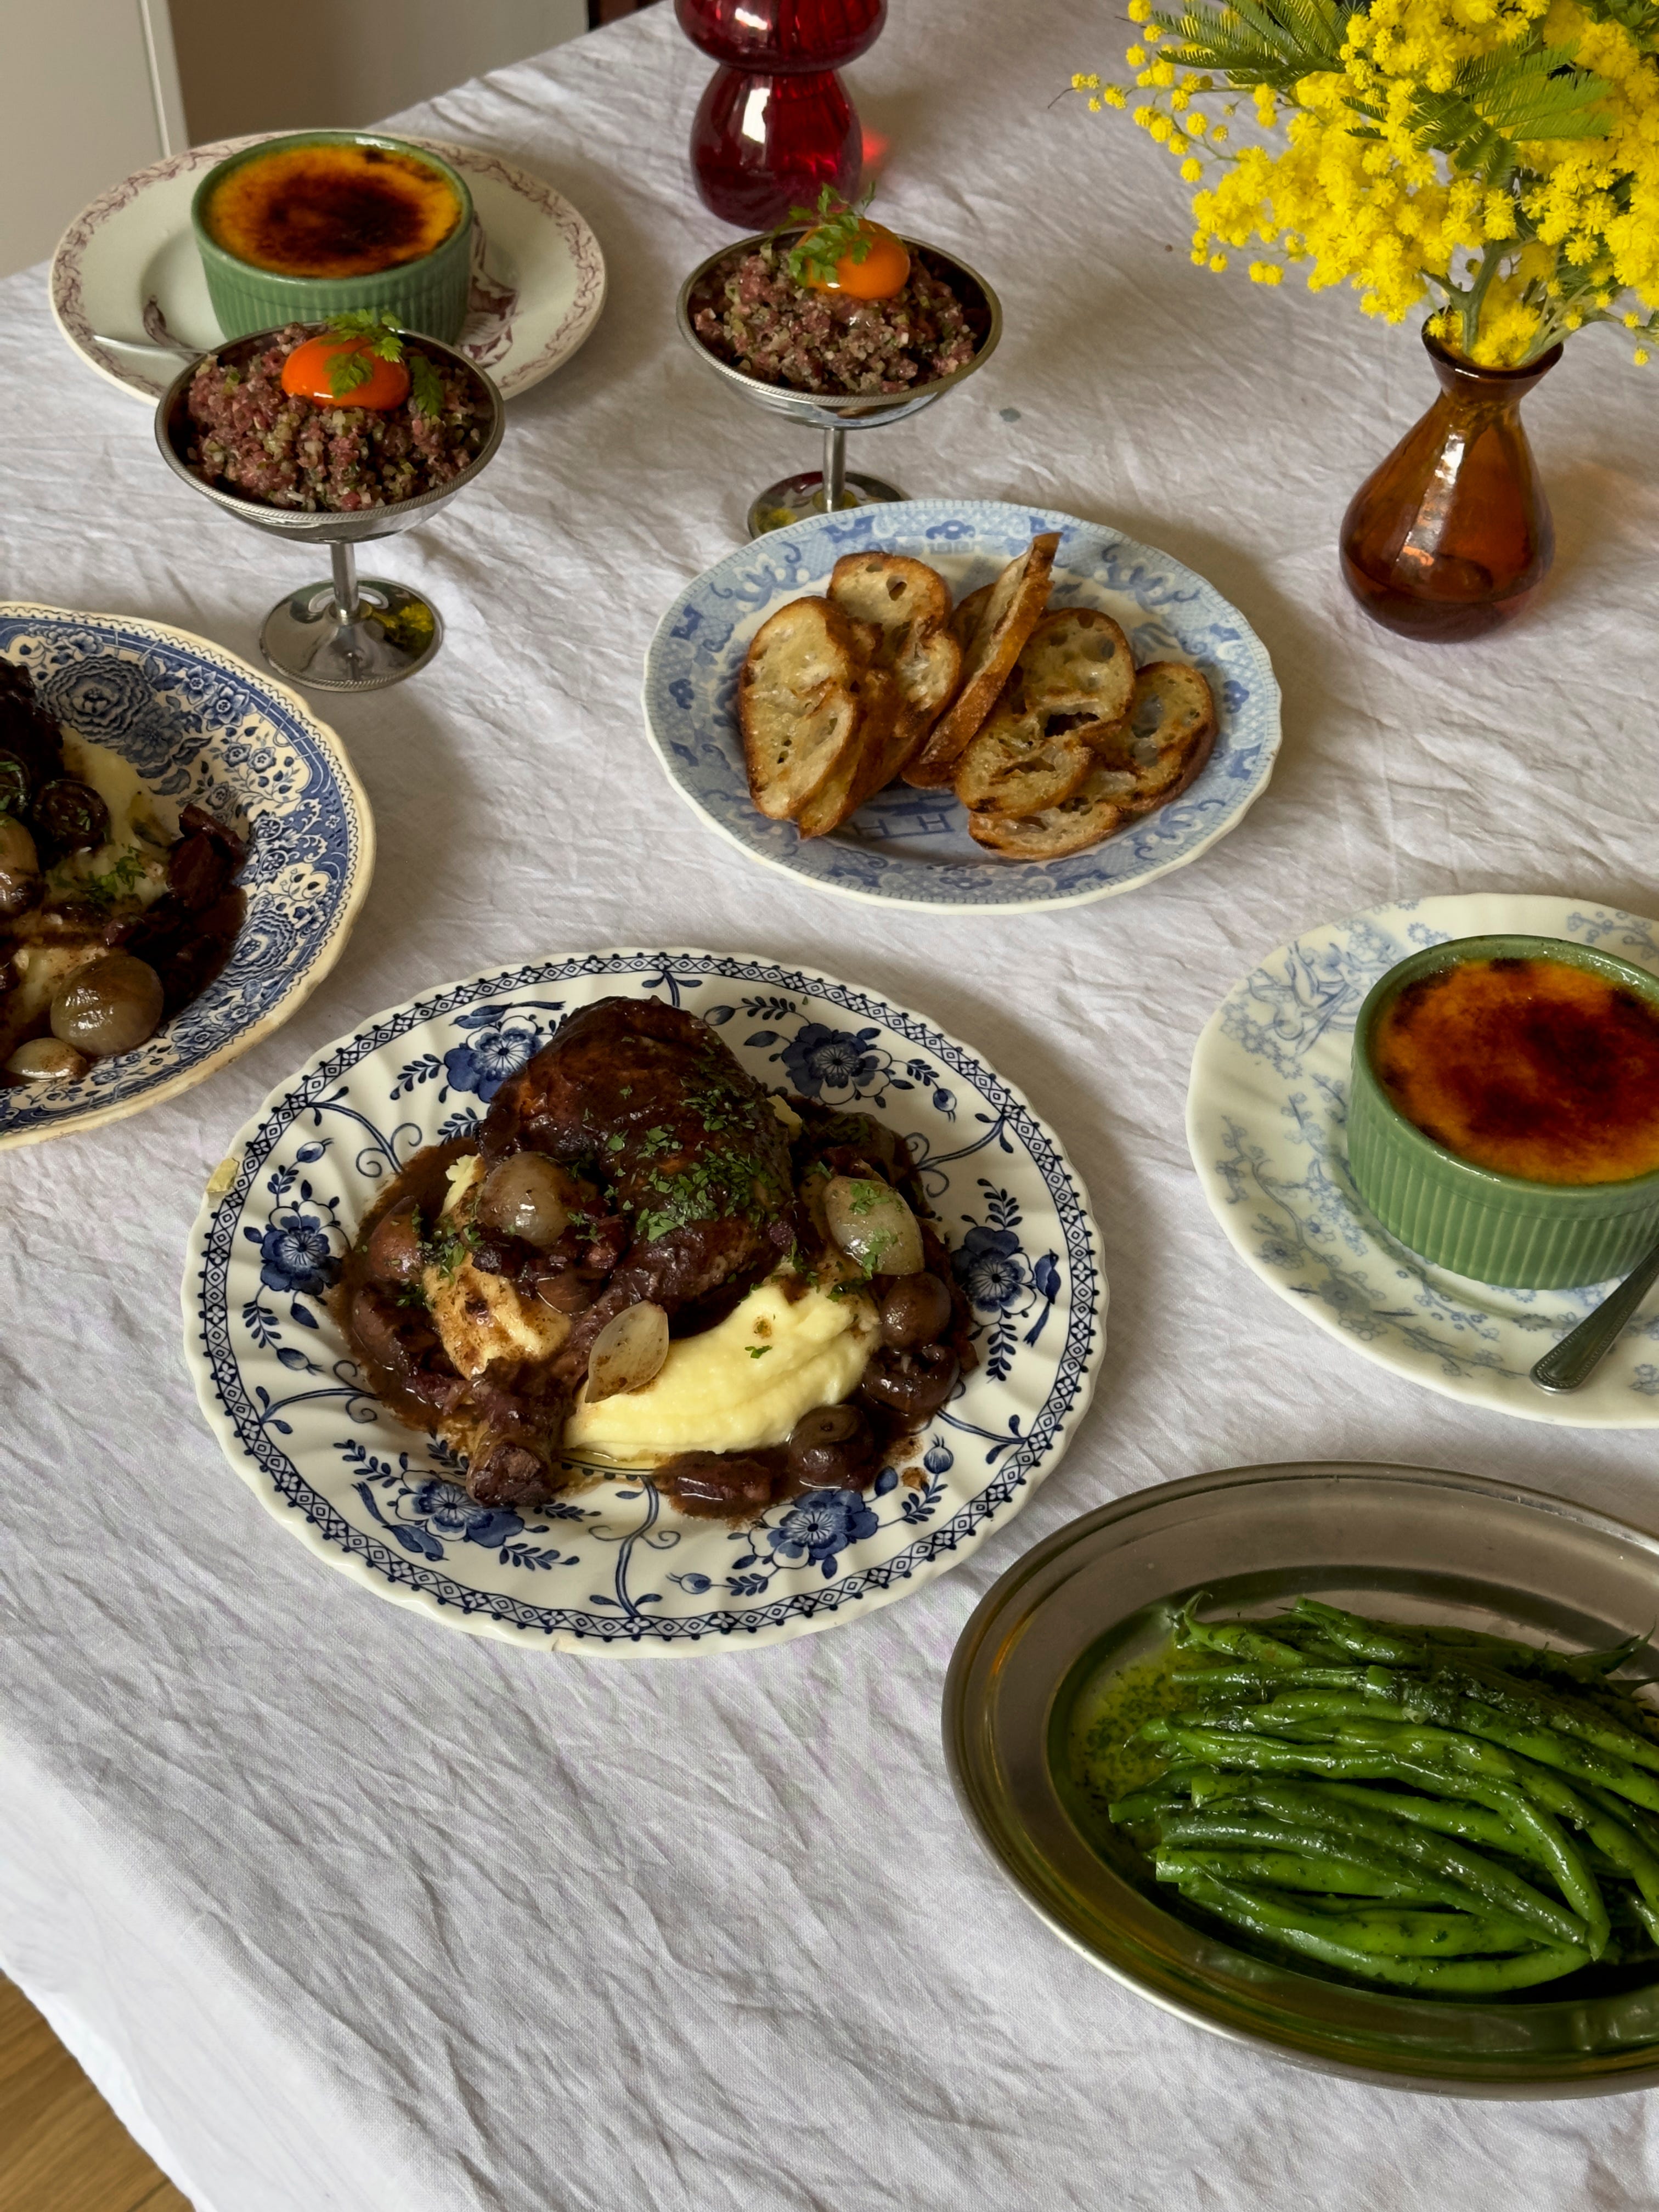
Because this menu is fairly heavy I have stuck to a 3 course structure instead of 4, but I do firmly encourage you to have a crusty baguette with good French butter at the table when you sit down. I chose to do a Steak Tartare as our starter today because it’s definitely one of the things I almost certainly order when eating French. It’s a wonderfully luxurious thing to serve at home and really easy to do, you just have to set aside some methodical chopping time. Next up is Coq Au Vin - a classic braised chicken dish with a divinely rich sauce made from a whole bottle of red wine. It’s glorious with perfect pommes purée (extra smooth mash) and green beans. And finally, if there wasn’t enough dairy for you, it’s a Cremè Brûlée for pudding. God I love this dessert - it’s somehow rich but light, and the lightness actually comes from the bitterness in the caramel which is alchemy in itself. I tested this multiple times and didn’t get bored of it once.
While I’ve got you, over on More Please we have 3 more iconic dishes that would be superlative for a Valentines dinner and some good technical cooking tips too.


Scallops in Garlic Butter for the seafood lovers, with instructions on how to perfectly cook scallops.
Steak Diane, where I teach you how to reverse sear a T-Bone steak ie. no stress on the big night.
Paglia e Fieno - a fun pasta dish with both classic egg and my easy spinach dough, plus porcini and parmesan butter.
STEAK TARTARE
There are two cornerstones to making Steak Tartare at home. Firstly you need a sharp knife. You will really struggle without one, so make sure your knife is spick and span before embarking on this. Secondly you need high quality beef - your supermarket butcher won’t cut it. Beef that has aged for a minimum of 20 days (30 days ideally) will provide a much better flavour and texture, it will also be easier to chop as it will be dryer and firmer. Once those two things are in the bag then you are on a roll. I have kept this recipe classic and simple and it is just delicious. I like to serve it on some toasted baguette but it’s great with crisps, sourdough or even chips as a main.
There are two cornerstones to making Steak Tartare at home. Firstly you need a sharp knife, you will really struggle without one, so make sure your knife is spick and span before embarking on this. Secondly you need high quality beef - your supermarket butcher won’t cut it. Beef that has aged for a minimum of 20 days (30 days ideally) will provide a much better flavour and texture, it will also be easier to chop as it will be dryer and firmer. Once those two things are in the bag then you are on a roll. I have kept this recipe classic and simple and it is just delicious. I like to serve it on some toasted baguette but it’s great with crisps, sourdough or even chips as a main.
Serves 2
250g chateaubriand or beef fillet
3 cornichons, finely diced
1/2 small shallot, finely diced
1 tbsp capers, chopped
1 anchovy, finely chopped
1 tbsp dijon mustard
A small handful of flat leaf parsley, finely chopped
A small handful of chervil or tarragon, finely chopped
1 tsp worcestershire sauce
A few shakes of tabasco
Salt and plenty of fresh black pepper
2 egg yolks
Sliced, toasted baguette to serve
If your beef is vac packed be sure to remove it from its packaging and let it dry out for a day in the fridge. Around 20 minutes before you want to chop the beef, pop it in the freezer to firm up. Prep the other ingredients while you wait.
Remove the beef from the freezer and trim off any large pieces of fat or sinew. Slice the beef in to 0.5mm pieces (video here). Then cut each piece into 0.5mm strips - as thin as you can get them. Now run your knife through the strips to finely mince the beef. It is worth taking time over this to get the beef nice and small. When all your beef is chopped combine it with the remaining ingredients except the egg yolks. Season it really well and check if it needs any salt. Toast your bread.
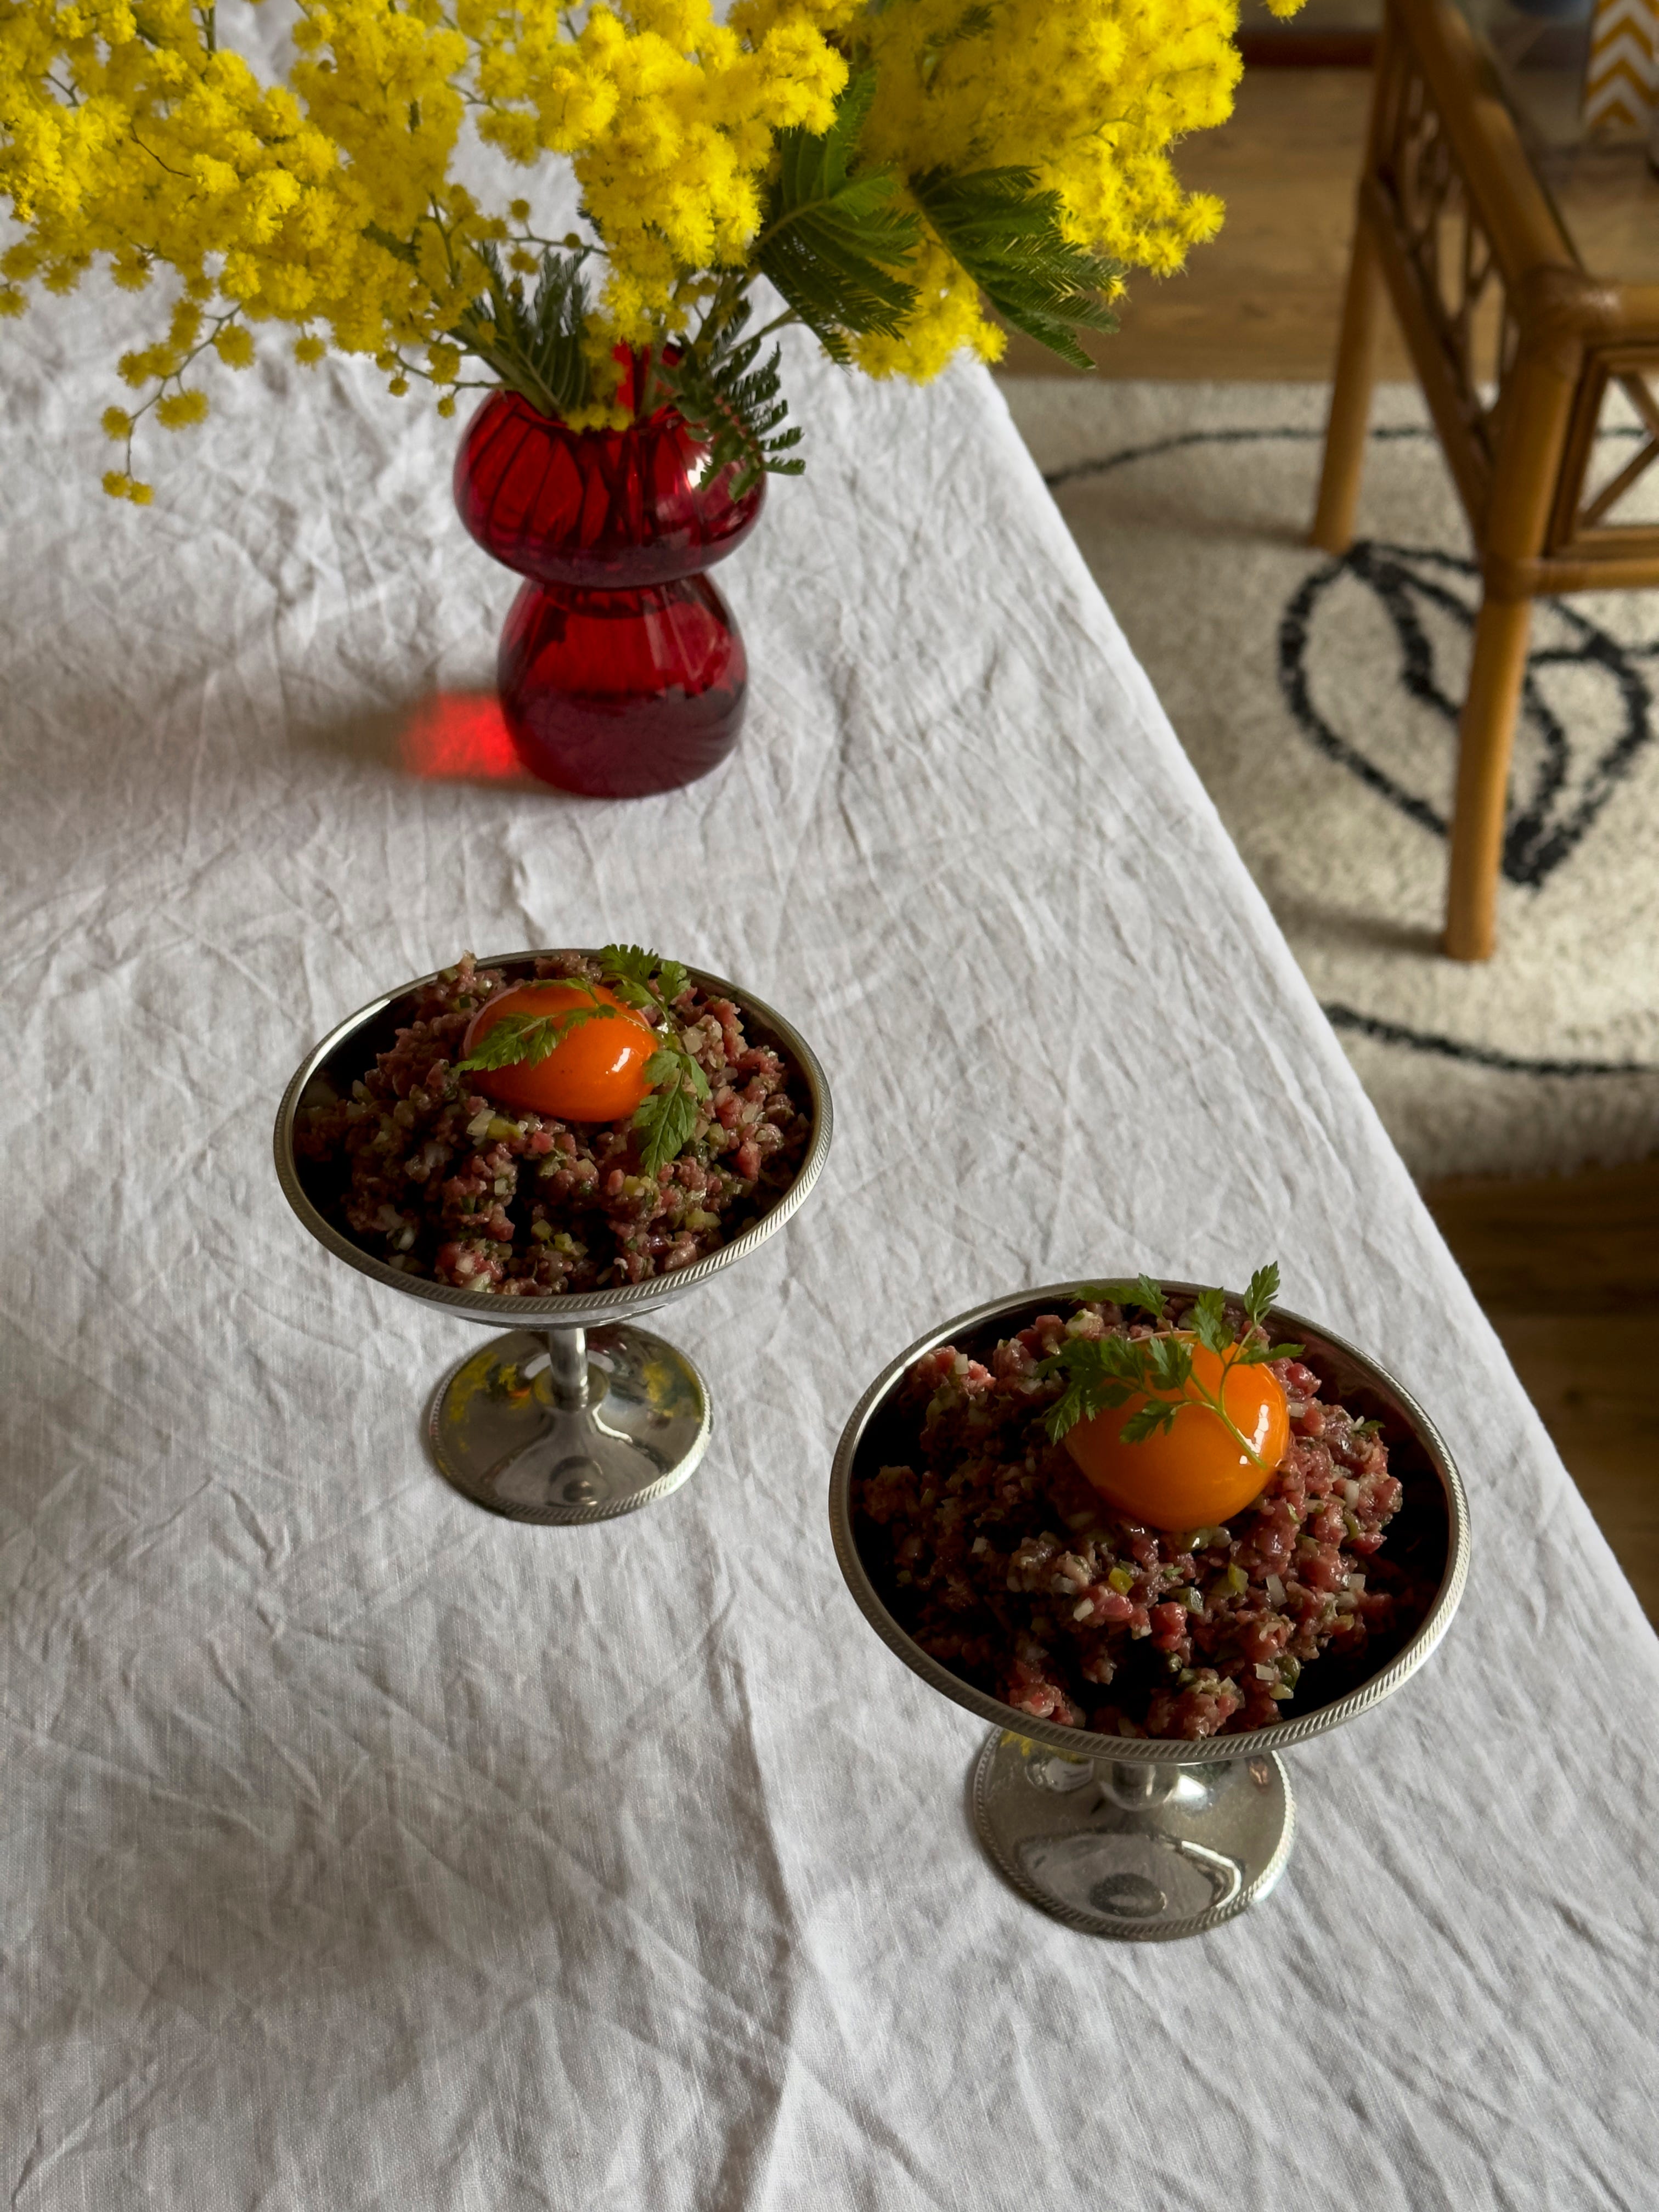
To serve, pile the tartare into bowls or plates. Top each serving with a raw egg yolk and a lovely sprig of chervil, tarragon or parsley. Pour a glass of something cold and fizzy and enjoy.
MAKE AHEAD -
You can chop the beef and keep it in the fridge for up to 3 hours before combining with the other ingredients and serving. Cover it directly with clingfilm and keep in a sealed container. Do not combine it with the remaining ingredients too soon as it will oxidise.
SUBSTITUTIONS -
It is worth using a lean yet tender cut of beef here which is why fillet or chateaubriand (the thicker head of the fillet) work best, however you can use high quality rib eye or sirloin too, you will just have to cut off any excess fat.
Chervil is not always easy to find but it's a delicious herb with a slightly aniseedy flavour. In its absence use tarragon.
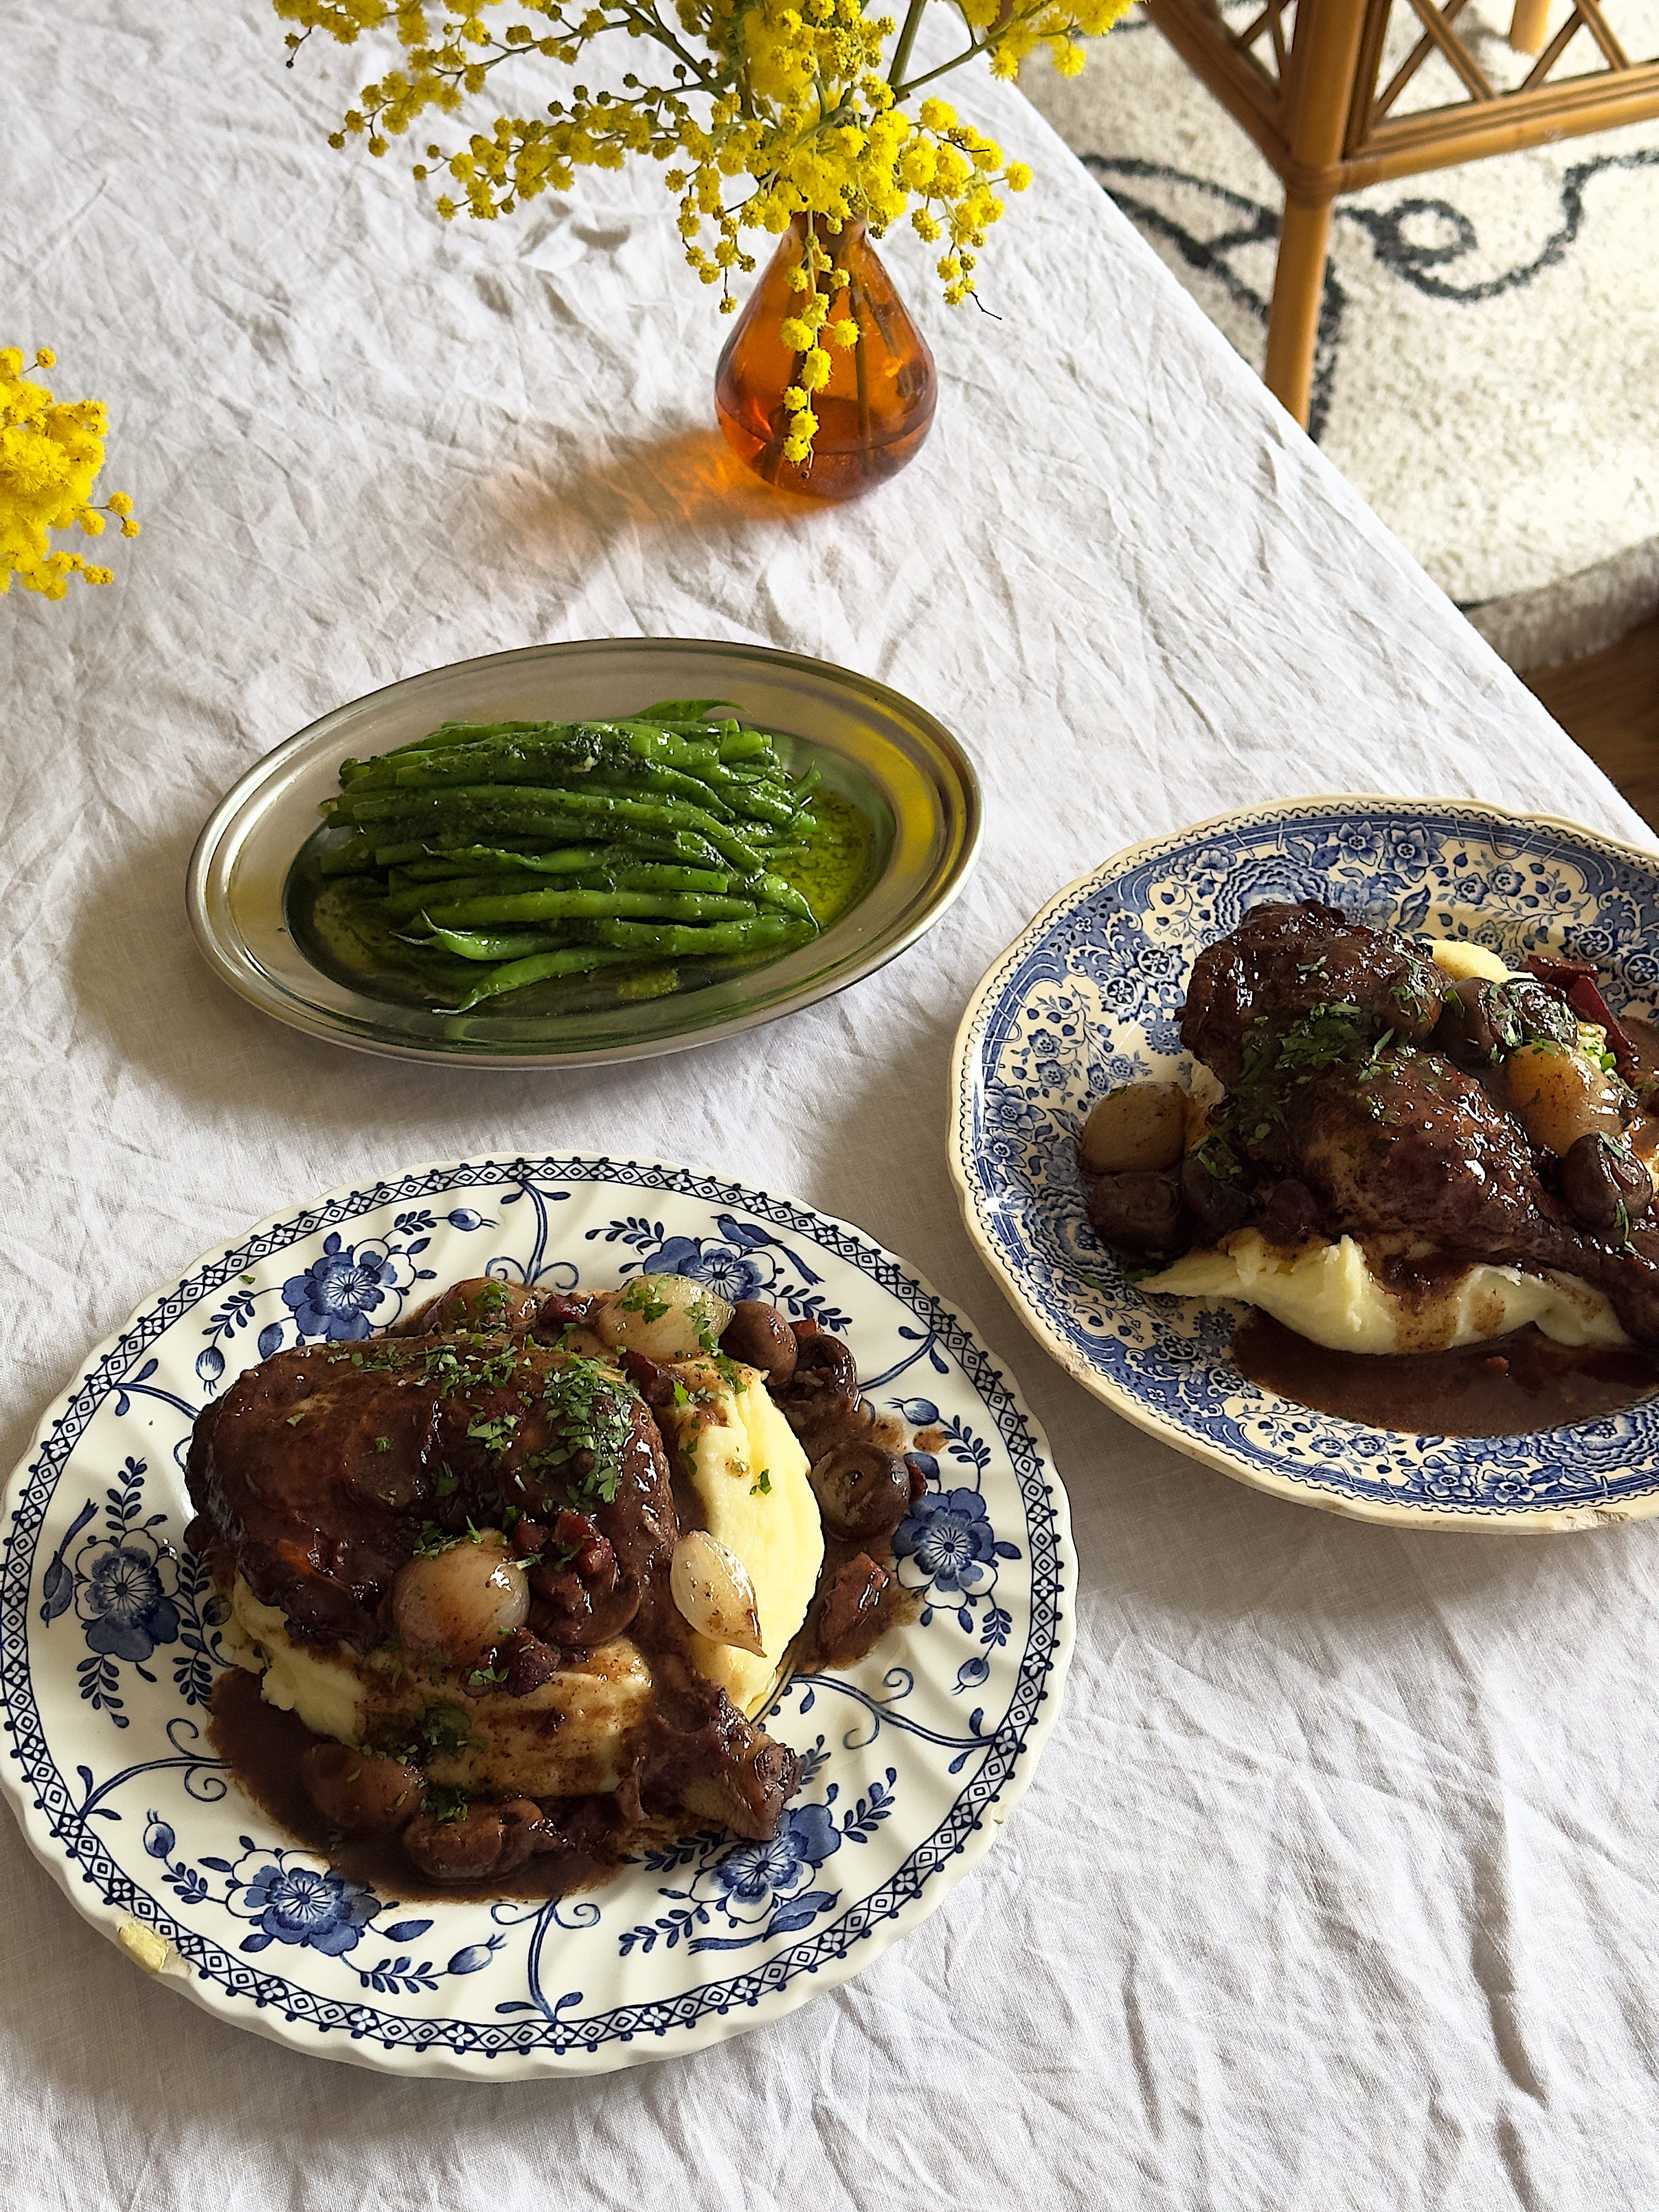
COQ AU VIN, POMMES PURÉE, HARICOT VERTS
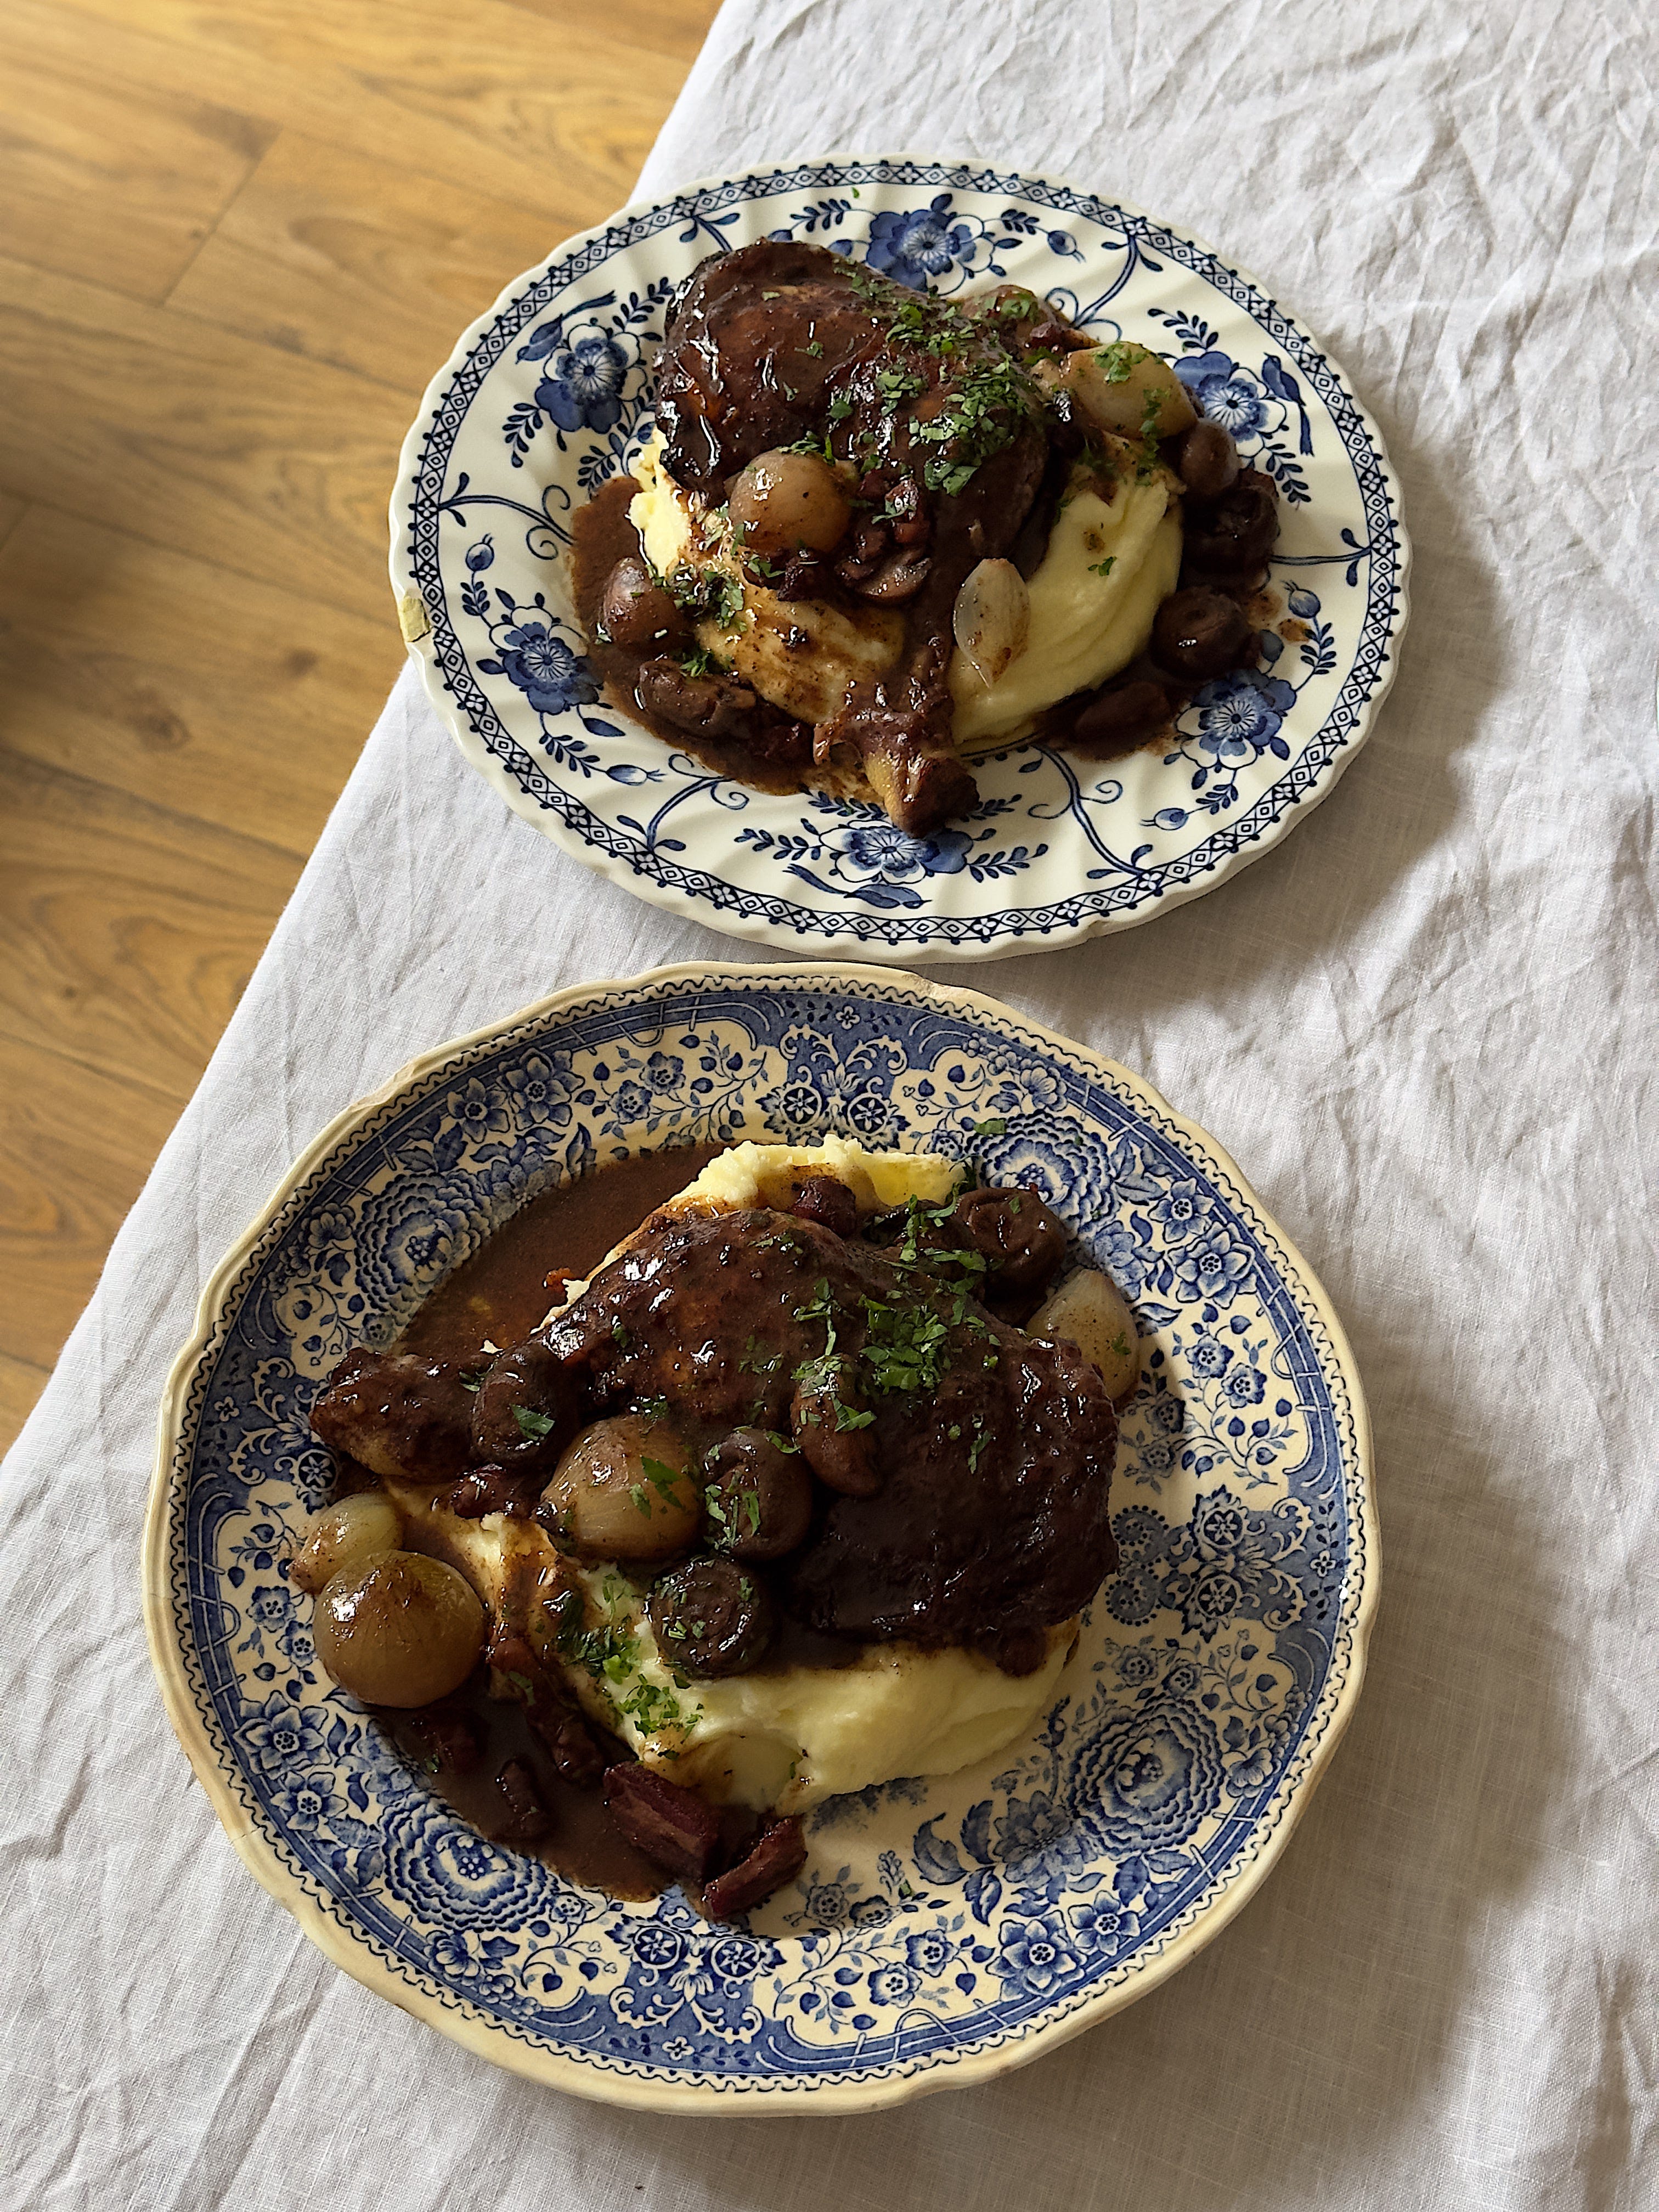
Coq au Vin is like almost all slow braised meat recipes and yet somehow it sits apart, simply because of the sheer quantity of wine in the sauce. You end up with something utterly luscious, a deep licorice in colour with an intensely rich flavour. It’s comforting whilst also refined and elegant. I know this menu is to serve 2 people, but this recipe actually serves 4. It didn’t feel right to reduce the quantities of the braise and only use half a bottle of red wine, plus it means you have 2 portions of Coq au Vin in the freezer for a rainy day. I like using a Pinot Noir in this recipe but really any good quality red that you like drinking works, although I would avoid a Beaujolais.
Serves 4 (or 2 with leftovers for another 2)
For the marinade
4 chicken legs
1 bottle of red wine
1 carrot, diced
1 onion, diced
2 celery stick, diced
3 garlic cloves, bashed and peeled
3 bay leaves
Small handful of thyme sprigs
1 tbsp black peppercorns
1 tbsp caster sugar
To cook
25g butter
30g plain flour
2 tsps flakey sea salt
1 tsp freshly ground pepper
200g smoked bacon lardons
185g baby chestnut mushrooms, some whole, larger mushrooms halved
185g baby onions or shallots, peeled - soak these in hot tap water for 15 minutes before you attempt to peel them for an easier time!
200ml chicken stock
A handful of fresh parsley, finely chopped, to finish
For the Pomme Purée
1kg maris piper potatoes, peeled and cut into large chunks
175g butter, diced and cold
100ml double cream
Salt and black pepper to taste
For the Haricot Verts
200g green beans, topped and tailed
80g garlic and herb butter - I used this one I made for the Scallops - or regular butter
Salt and pepper
The night before, make the marinade for the chicken. Pour the wine into a saucepan and add in the chopped veg, garlic, herbs, peppercorns and sugar. Bring the mix up to a simmer on a medium heat and cook for 20 minutes until it has reduced by about ⅓. Leave to cool completely, then pass through a sieve to get rid of the vegetables. Pour the cooled wine over your chicken - I actually prefer to marinade this in a bag for best results. Leave to marinade in the fridge for a minimum of 8 hours.
The next day, about half an hour before you want to cook your chicken, drain it in a colander over a bowl. You need to keep the drained marinade to cook with, but we want the chicken pieces to have dried a fair bit before we brown them. Preheat the oven to 150 fan.
Heat the butter in a large casserole or saucepan on a medium to high heat. Season the chicken generously with salt and pepper. Once the butter is sizzling, place the chicken in the pan skin side down. Brown both sides of the chicken well in the butter - this will take a bit longer than usual as the chicken skin will be moist from the wine. Once your chicken pieces are golden on both sides, remove them from the pan. Add the bacon to the butter and let it cook and render on a medium heat for around 10 minutes. Then add the shallots and let them brown for around 5 minutes before adding the mushrooms. Cook together for another 5. Add in the flour and stir well, frying for 2 minutes or so. Next, deglaze the pan with the reserved red wine. Scrape the bottom of the pan well to release any good sticky bits and stir well. Once the wine comes to a bubble, pour in the stock, mix well and bring up to a simmer again. Return the chicken legs to the pan skin side down. Cover with a lid and pop in the oven for 20 minutes. After 20 minutes remove the pan from the oven, flip the chicken legs over and remove the lid. Return to the oven uncovered for 20 more minutes. The sauce will have thickened slightly and the chicken will be a dark, deep brown. Leave to sit covered until needed.
For the pomme purée, cover the potatoes in cold water, season the water well with salt and bring to a boil. Warm the cream but do not boil it. Boil for around 15 minutes or so, until the potatoes are completely tender. Drain the potatoes and immediately start the mashing process - if they cool down at all they will become gluey and starchy and hard to work with. For an extra smooth result I rice my potatoes with my potato ricer straight into a sieve and then use the back of a spoon to push them through. You will end up with a perfectly smooth mash. Do this in stages; rice a handful, pass them through the sieve, then repeat. Do not be tempted to rice all the potatoes first as they will get too cold. Once all your potatoes are mashed, pop the pan back on a low heat. Add about ⅓ of the cold butter and stir it into the potatoes, it will take a while to melt completely but when it does add the next third, as well as half the cream. Combine gently again, then add the final third of butter. You will have a super rich, soft and silky mash. Season well and cover until needed.
For the beans, bring a pan of well salted water to the boil. Drop in the beans and cook for 2 minutes 30 seconds, until they are a lovely al dente. Drain the beans and immediately mix them with the garlic and herb butter. Season and keep warm.
To serve, reheat the chicken in the sauce gently if it has sat for a while, same goes for the mash. Pile the potatoes onto plates, then top with the braised chicken and sauce. Finish with parsley and green beans on the side. Obviously drink a bloody nice red with it too.
MAKE AHEAD -
You can braise the chicken the day before and reheat it covered tightly with foil and a lid in a low oven (140) for 30 minutes to serve. You may need to add a splash of water to the sauce to loosen it. Make sure the chicken is piping hot throughout before serving.
The mash can be made up to 3 days ahead and reheated to serve.
SUBSTITUTIONS -
Use bone in, skin on thighs instead of chicken legs if you prefer.
Serve with roast or boiled potatoes or even chips if you can’t be bothered to make mash.
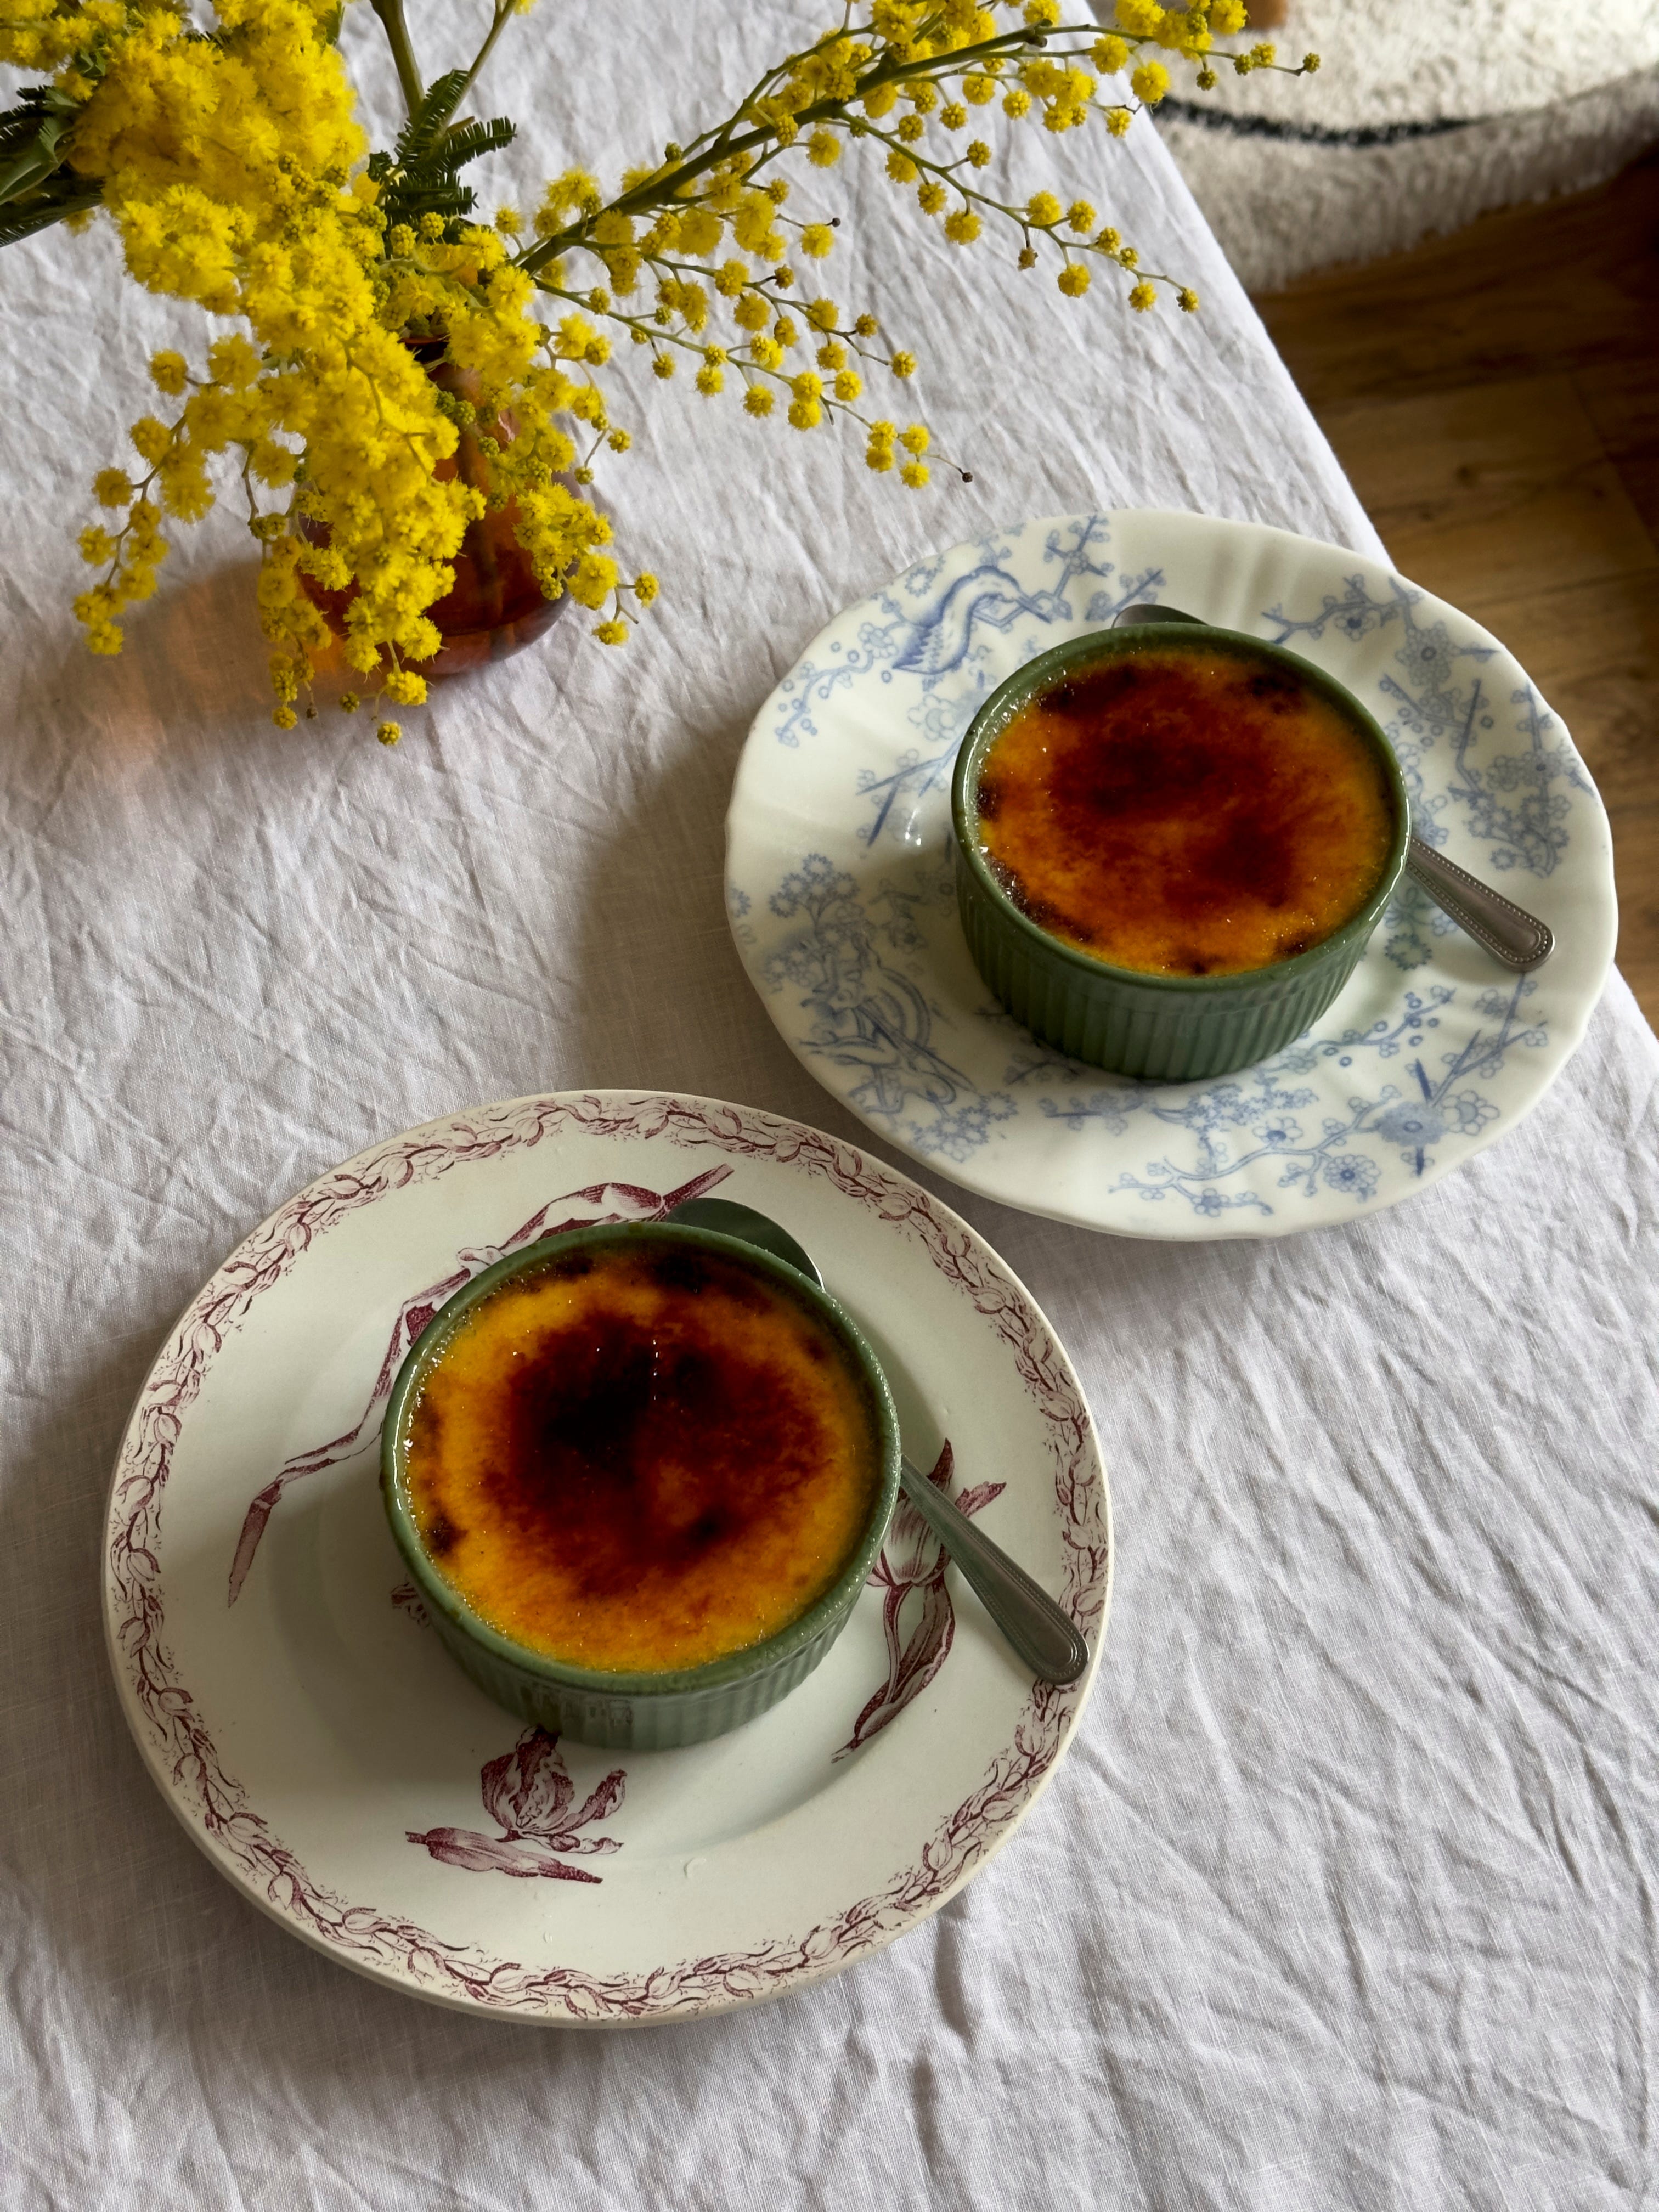
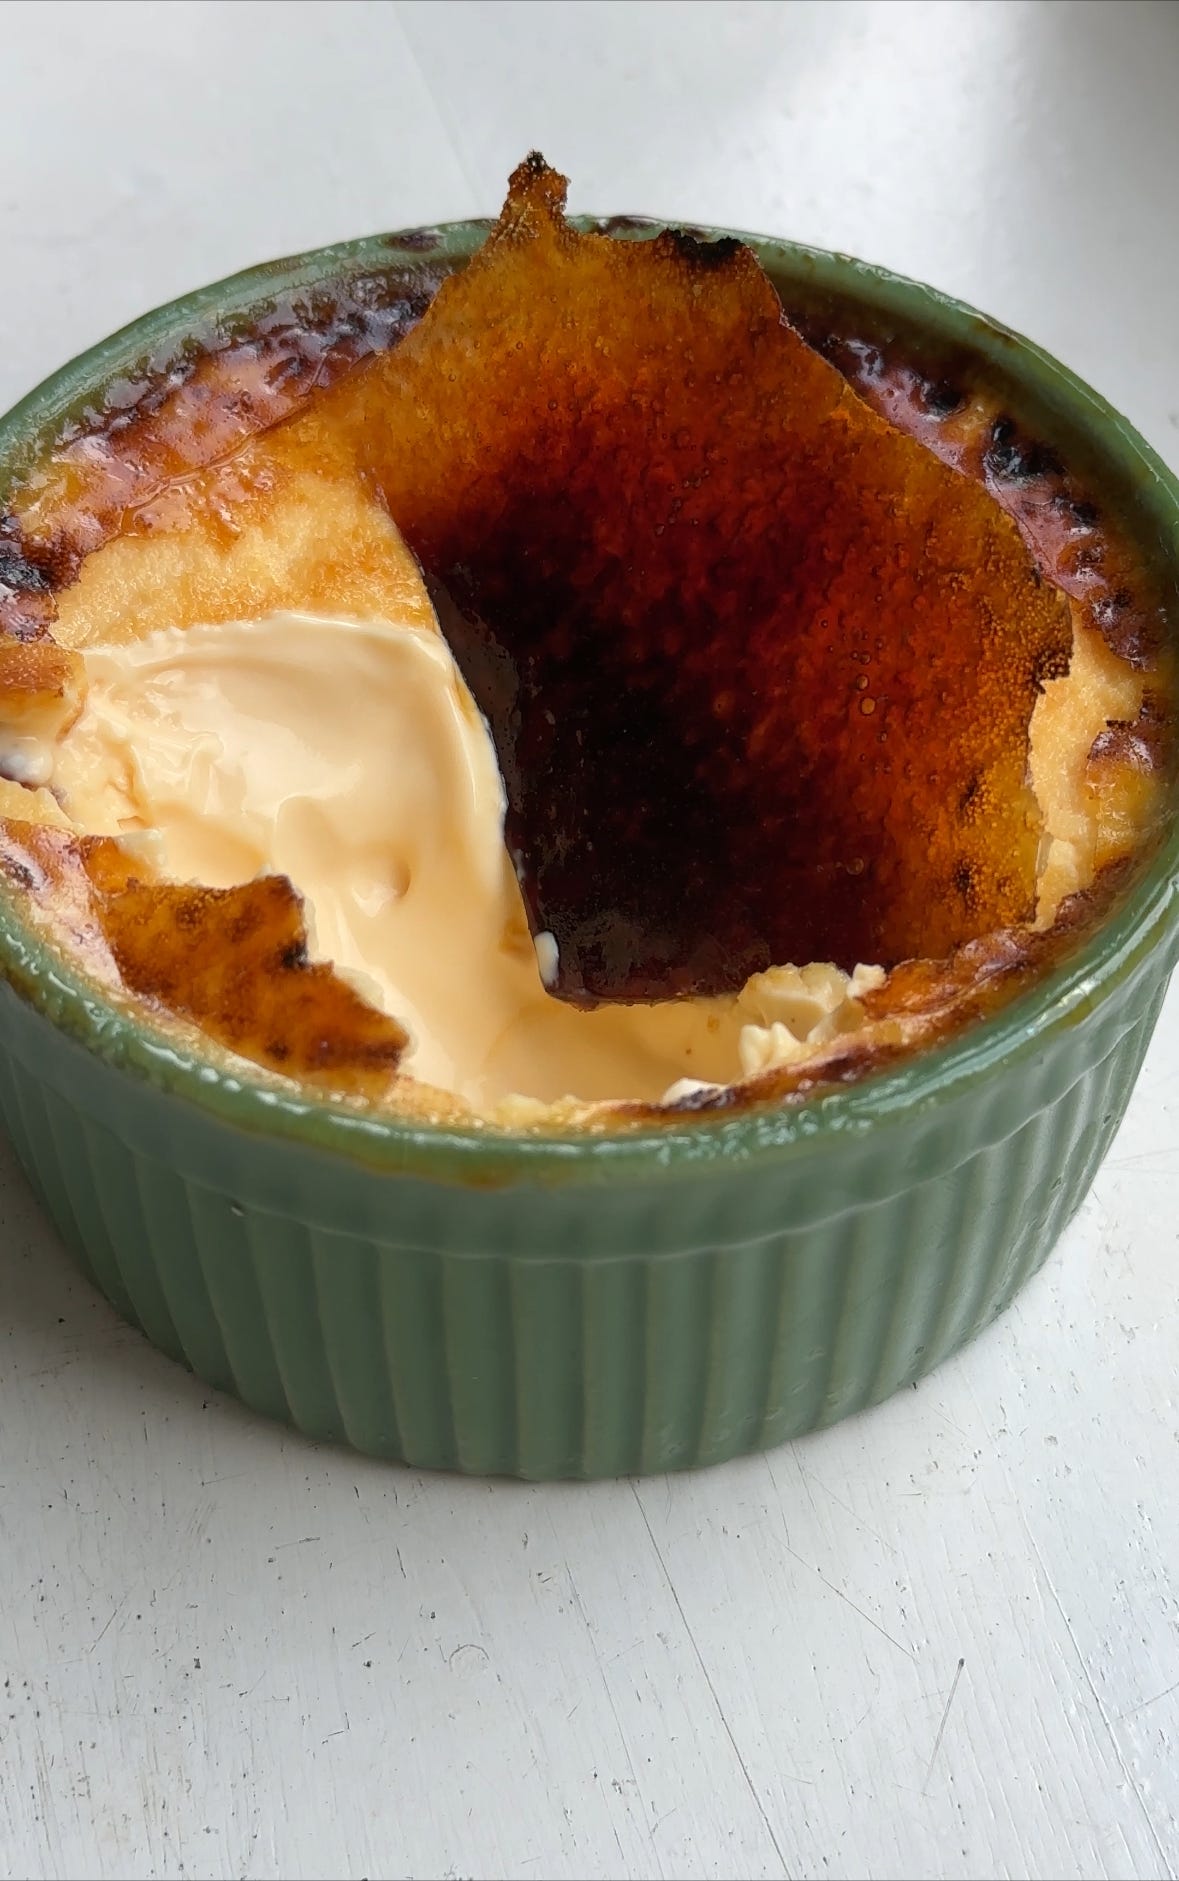
CRÈME BRÛLÉE
This is just a really spectacular pudding, isn’t it. Very few ingredients delicately handled with a bit of fire at the end - it’s just a wonder! I had to test this a few times because I was finding that the top of my crèmes, no matter how low my oven temp was, were over-cooking and getting slightly bubbly. I double checked my oven temperature with my oven thermometer and it was bang on, so it definitely wasn’t that. I came to realise that it might just be that the fan in my oven is quite fierce and was just a little too harsh on my custard. To mitigate this I covered the tray I was cooking the CBs in with another oven tray and it helped massively. I do recommend this if you find your oven to be on the rough side. Also, sorry to say it but you need to buy a blowtorch for these. They are brilliant for many things and get the best results for a crispy top - an oven grill will overcook your custard.
Serves 2 in 200ml ramekins
340ml double cream
60ml whole milk
3 egg yolks
30g caster sugar
1 vanilla pod, split
A pinch of salt
4 heaped teaspoons of caster sugar, for the top
These are best made the day before you want to eat them, as they need plenty of time to chill and set.
Preheat the oven to 140 fan. Prepare a small, deep roasting tin with a layer of kitchen paper on the bottom and put the ramekins on top - the paper will stop them from slipping. Find a flat oven tray big enough to cover the roasting tin. Fill and boil your kettle.
In a pan, warm together the cream, milk, split vanilla pod and salt on a low heat until steaming but not boiling. While the cream mix heats up, whisk the egg yolks and caster sugar together in a bowl until well combined. When the cream mix is steaming, pour about ¼ of it into the eggs and whisk together briefly, then continue adding the mix in stages until it is all in. You don’t need to whisk the buggery out of it, you are just looking to combine it, but it does help to add the hot cream slowly to the eggs to temper them and prevent them from scrambling. You can now strain the mix through a fine sieve into a jug and pour into your ramekins in your tray.
Now, carefully pour the freshly boiled water from the kettle (you may need two kettles worth depending on the size of your tin) into the roasting tin, taking care to avoid the filled ramekins. You need the water level to be almost at the top of the ramekins, leaving about a 1cm gap. Now make the sign of the cross, open your oven and very carefully place the roasting tin inside, ideally low down in the oven, taking GREAT care not to spill any water into your CBs or onto yourself. Cover the surface of the tin with your other tray and close the door. Bake the crème brûlèes for 40 - 45 minutes, they should still have a good wobble to them in the middle but also will clearly not be super liquid.
Remove the tin from the oven and take off the covering tray, but leave the CB’s in the hot water for another 10 minutes. Then let them cool for another 15 minutes before putting them in a CLEAN AND NOT SMELLY FRIDGE to chill for at least 6 hours, ideally overnight.
To brûlée, take 1 heaped tsp of caster sugar and sprinkle it all over the surface of the custard. Turn on your blowtorch and hold it about an inch and a half away from the ramekin as you gently grill the top. You want the sugar to gradually and evenly caramelise and go a deep brown, it’s fine if it smokes a bit! Repeat for the other CB and leave them both to sit for 5 minutes to harden. I like an extra crunchy snap on mine so once the top is completely solid (tap the centre lightly) sprinkle over another teaspoon of sugar and brûlée again. It can be fun to brulée with an audience, but if you prefer to do this without the added pressure of your date watching you the crème brûlèes can go back in the fridge for up to 2 hours at this point. You can serve them immediately but the texture will be a bit looser having just had the hot heat of the blowtorch on it.
MAKE AHEAD -
Make the CB’s the day before and brûlée up to 2 hours before serving.
SUBSTITUTIONS -
None, sorry!
TIMEPLAN
This first plan should help you see what you can get done in advance, so that for each course on the day you have at least 1, maybe 2 major parts of it taken care of. I appreciate that not everyone’s weeks are easily peppered with dinner party prep, but if you’re hosting after work or on a day where you can’t be in the kitchen, getting ahead is going to save your arse.

MISE-EN-PLACE
This is the fancy name we give to the food prep each section in the restaurant needs to do for their dishes. Hopefully breaking down each dish like this will help you feel organised.
Use the hour before your guests arrive to organise your space too- I find it helpful to group ingredients by dish so it is all in the same place. Little ramekins are really useful for this.

STYLING
A romantic dinner for two should be candle and flower city, in my opinion. I do however think it is worth skipping the traditional Valentine's blooms in favour of more seasonal flowers for February - think frothy yellow mimosas, fragrant freesias and hyacinths and bold anemones, daffodils and narcissi.
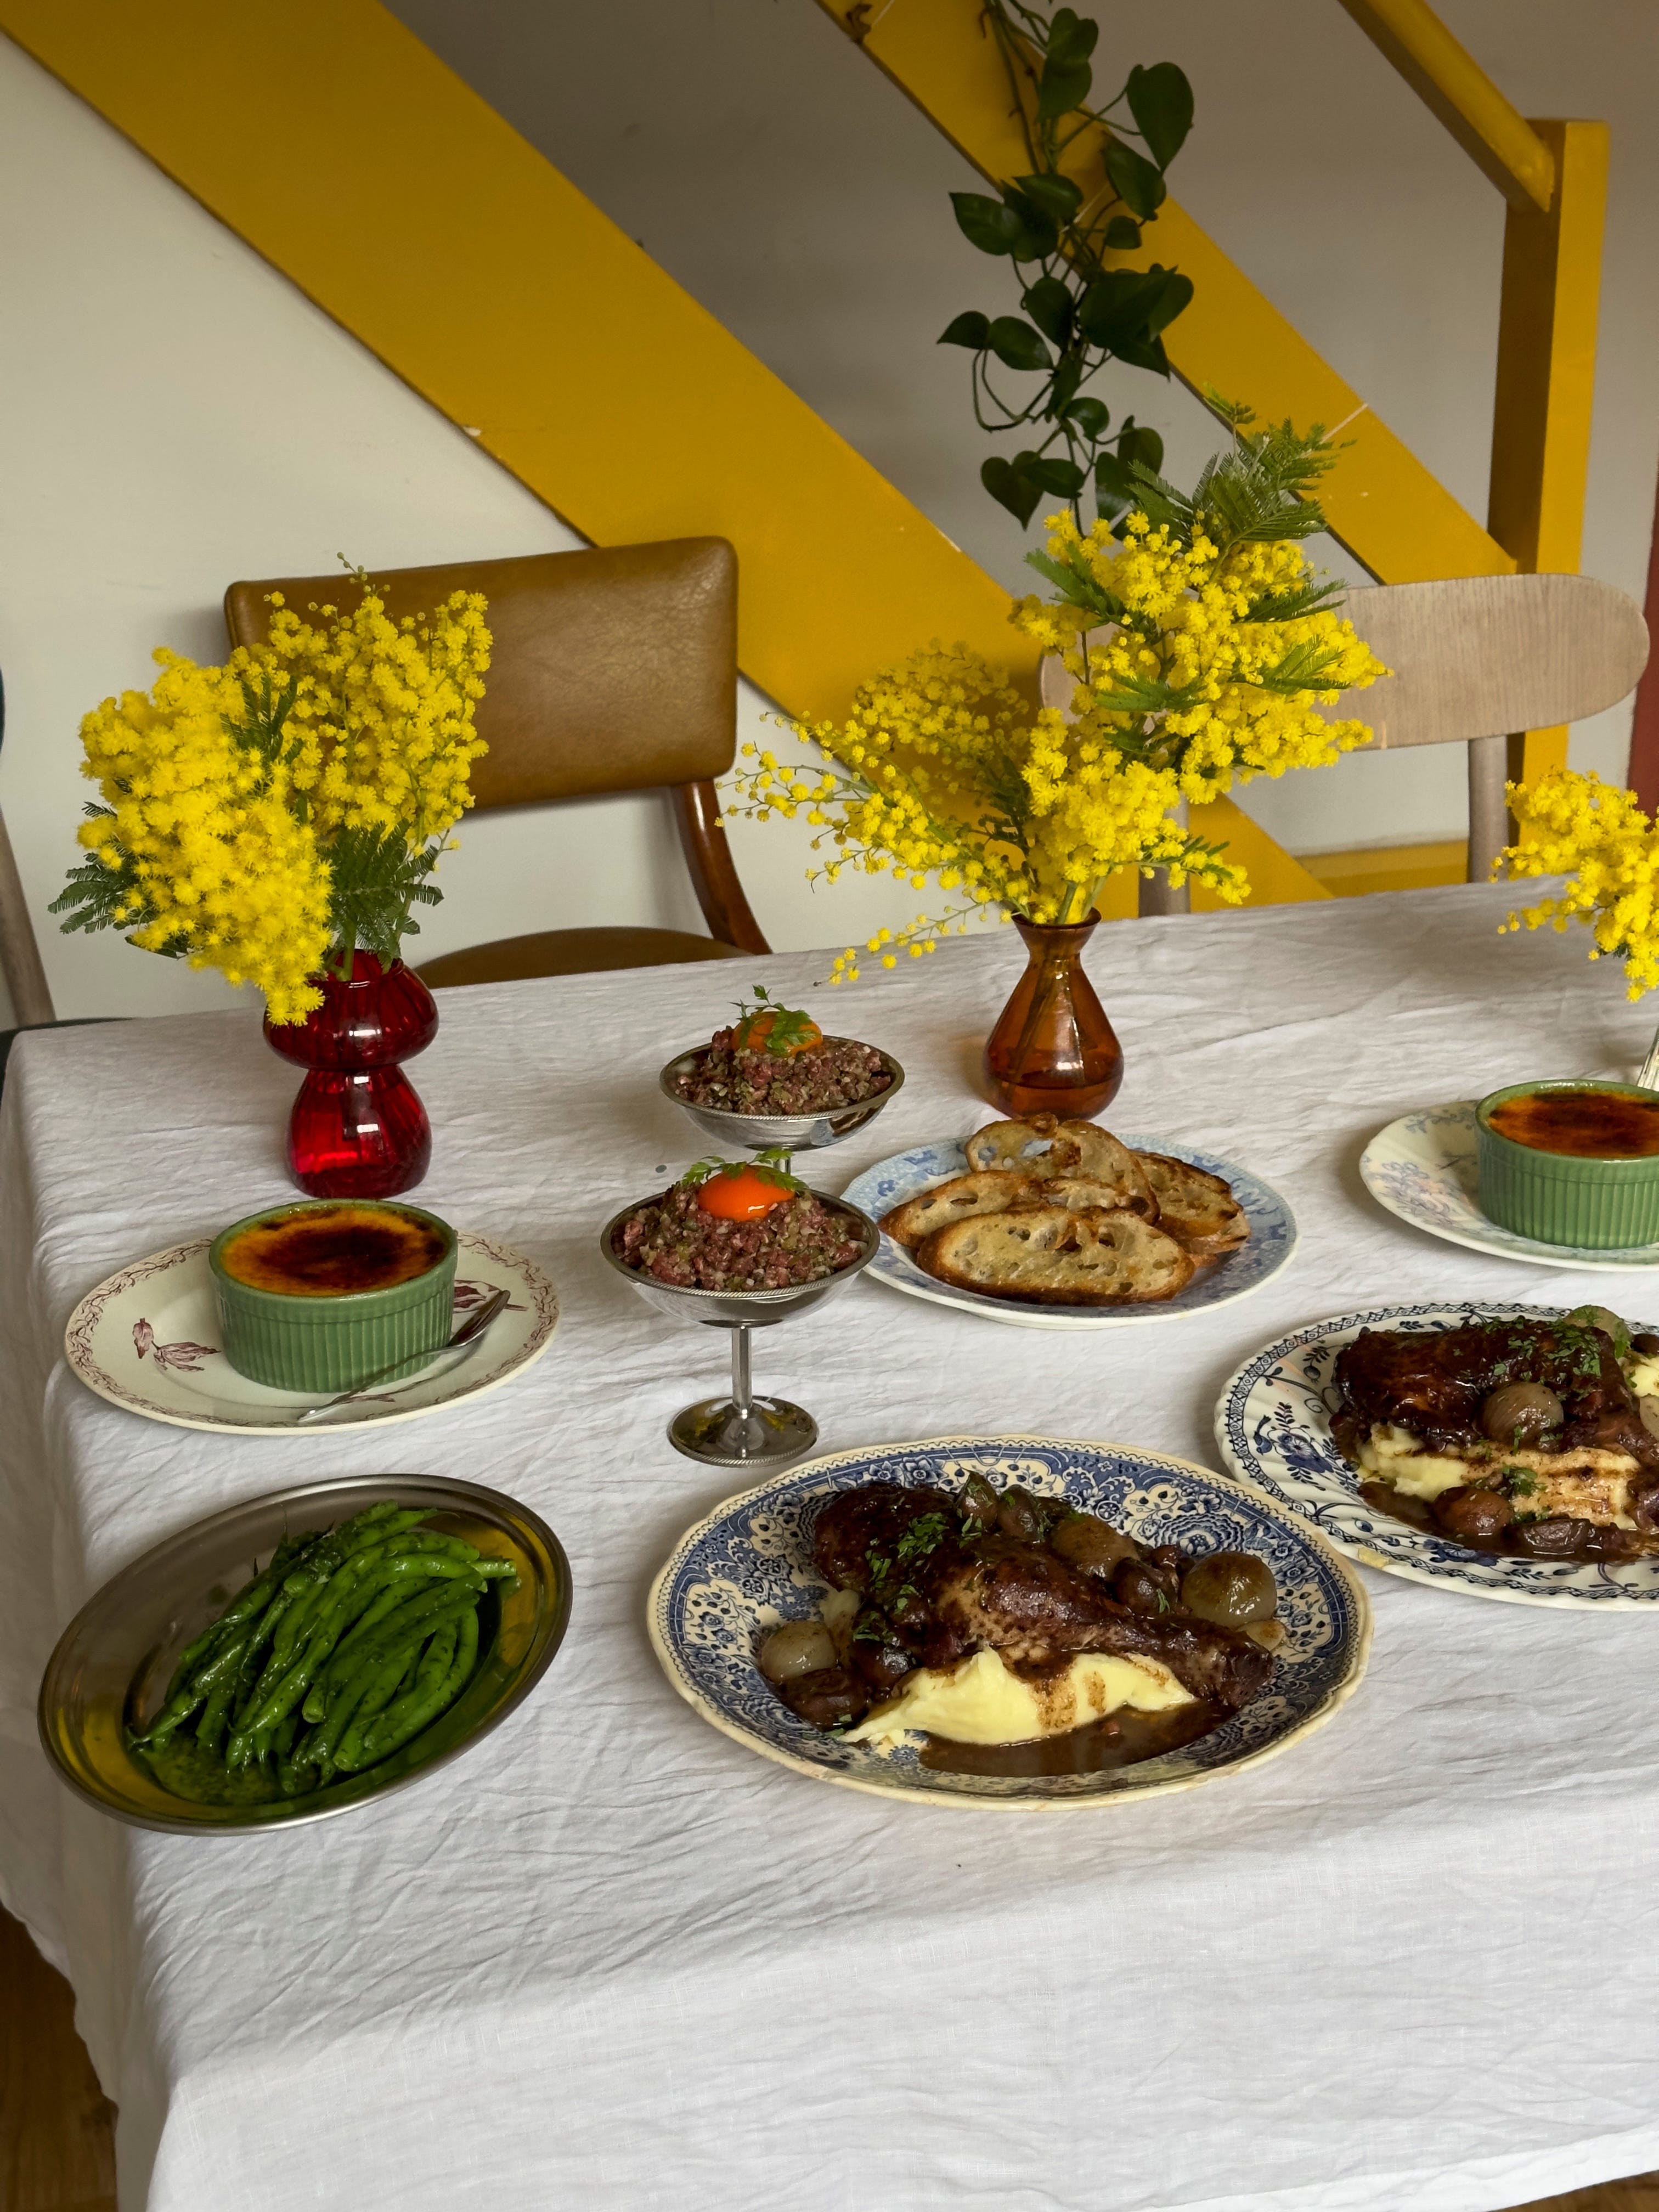
As far as plating goes these dishes are so beautiful in individual serves. I love to be playful with starters like tartare, so serve it in a big martini glass or footed bowls if you have them. The gleaming gold yolks look great against silvers or blues.
For our main I would find the most French looking plates you have - blues and whites are good for this especially with the dark sauce. This dish, being fairly rustic in appearance, is really lifted by the green parsley so don’t forget that. When plating go for height and make sure to leave space around the rim of the plate to prevent it looking messy or overcrowded.
Crème Brûlée kind of plates itself helpfully, but if you did happen to have a glass plate and a doily to pop them on then DEFINITELY go there.
This looks divine! Can’t wait to make the whole meal. A potentially silly question - what’s the best way to reheat the mash? Juggling between microwave being easier (esp for dinner party situation) but hob being possibly better - but not sure how and how long for? Any help much appreciated!
I've bookmarked all of this - this is the meal I would love to be cooked, and what I'm going to save for our delayed Valentine's (once my oven is fixed!) - though I need to come up with another starter, raw beef is my love language, not his!