

THE FIVE INGREDIENT ONE - 2024's Version
Nothing breeds creativity like restriction.


MENU TO SERVE 6 PEOPLE -
PIEMONTESE PEPPERS
OEUFS MIMOSA
PEA AND WILD GARLIC MALTAGLIATI
ORANGE JELLY, CARDAMOM CREAM
Hello and WELCOME to The Dinner Party! There are a lot of new faces around here, it’s so lovely to have you at my table. This March we are revisiting a theme I first touched upon in 2022 - Five Ingredient cooking. Nothing breeds creativity like restriction and I really love a challenge, so we’ve done it again and it really, really slaps. But, before I dive into this minimalist menu, I thought it might be helpful to outline the purpose and uses of The Dinner Party, so here is a little guide for newbies, and refresher for long standing subscribers (The Dinner Party turns 2 in April!). Feel free to skip this bit if it’s old news for you.
HOW TO USE THIS NEWSLETTER
THE DINNER PARTY - One free post a month, sometimes more!
Once a month I send an episode with a menu and recipes for a Dinner Party to serve 6 people (or 2 people, very occasionally). Almost always, I use a “family style” approach - everything is served to share.
Most often these are 4 courses, sometimes they are 3, sometimes they are big spreads with 5 or 6 dishes for buffet style dining, like The Garden Party One, The One that’s Picky Tea, The Bottomless Brunch One.
The menus treat a wide range of different occasions, moods, themes, celebrations and restrictions.
Sometimes it’s date night - The Summer Lovin’ One, The Valentines One, The French Kiss One.
Or perhaps it’s veg-centric - The Veggie One, The Autumnal Veggie One, The Cut the Richness One, The Nourishing One.
Or maybe it’s a seasonal vibe - The Celebrate Good Times One, The Spring has Sprung One, The Nights are Drawing In One, The Barely Cooking One.
There are 28 menus so far.
Each Dinner Party will also outline a TIME PLAN and “MISE-EN-PLACE” list (read - jobs) for you to use while preparing the menu, that starts 3 days before your event. Part of the reason why I started this newsletter was to help home-cooks prep like restaurant chefs ahead of their dinner parties, getting well ahead where possible and thinking laterally about their menus.
Finally there is a section on styling your dinner party with food styling tips as well as general table scaping ideas.
There are OVER 300 recipes on The Dinner Party which of course means there is a RECIPE ARCHIVE, broken down into categories including snacks, starters, mains, pastas, sides, sauces and desserts. I send Recipe Round Ups on different subjects once a month. You don’t ever have to cook a whole menu if you can’t be arsed, pick and choose what you wish!
MORE PLEASE - This is the paid level of The Dinner Party. Paying subscribers receive 3 additional posts a month, with at least 7 extra recipes.
The first More Please arrives on the same day as The Dinner Party, which is on the same subject of the menu, for example this month is Minimal Maximalism. It will have 3 additional recipes, usually to serve 2 or 4 people, with a focus on weeknight dinners or one course meals. This month we have Spicy Prawn Fregola, Crushed Olive and Ricotta Crostini and Onion Risotto Bianco.
A Seasonal Supper arrives the following week with a dish that highlights an ingredient at it’s absolute BEST. Coming next week is Purple Sprouting Broccoli with Walnut, Onion and Parmesan Fonduta.
Finally, a third More Please episode towards the end of the month will look at a specific genre of cooking, ingredient, technique or need, with 3 additional recipes. Previous episodes include Canapés, Pumpkin, Prawns, Cucina Povera, Chicken Dinners, Tarts, Traybakes . This month we will be talking about Pies!
More Please is also where you will find my Travel Guides, Restaurant and Kit Recommendations and Guest Recipes.
OK - I think that’s everything. I am always here to answer emails, comments, DM’s - please do get in touch if you have any queries or issues. The Dinner Party is a safe space for Good Time Cooking and I want you all to have a bloody good time using it.
Right, back to our menu.
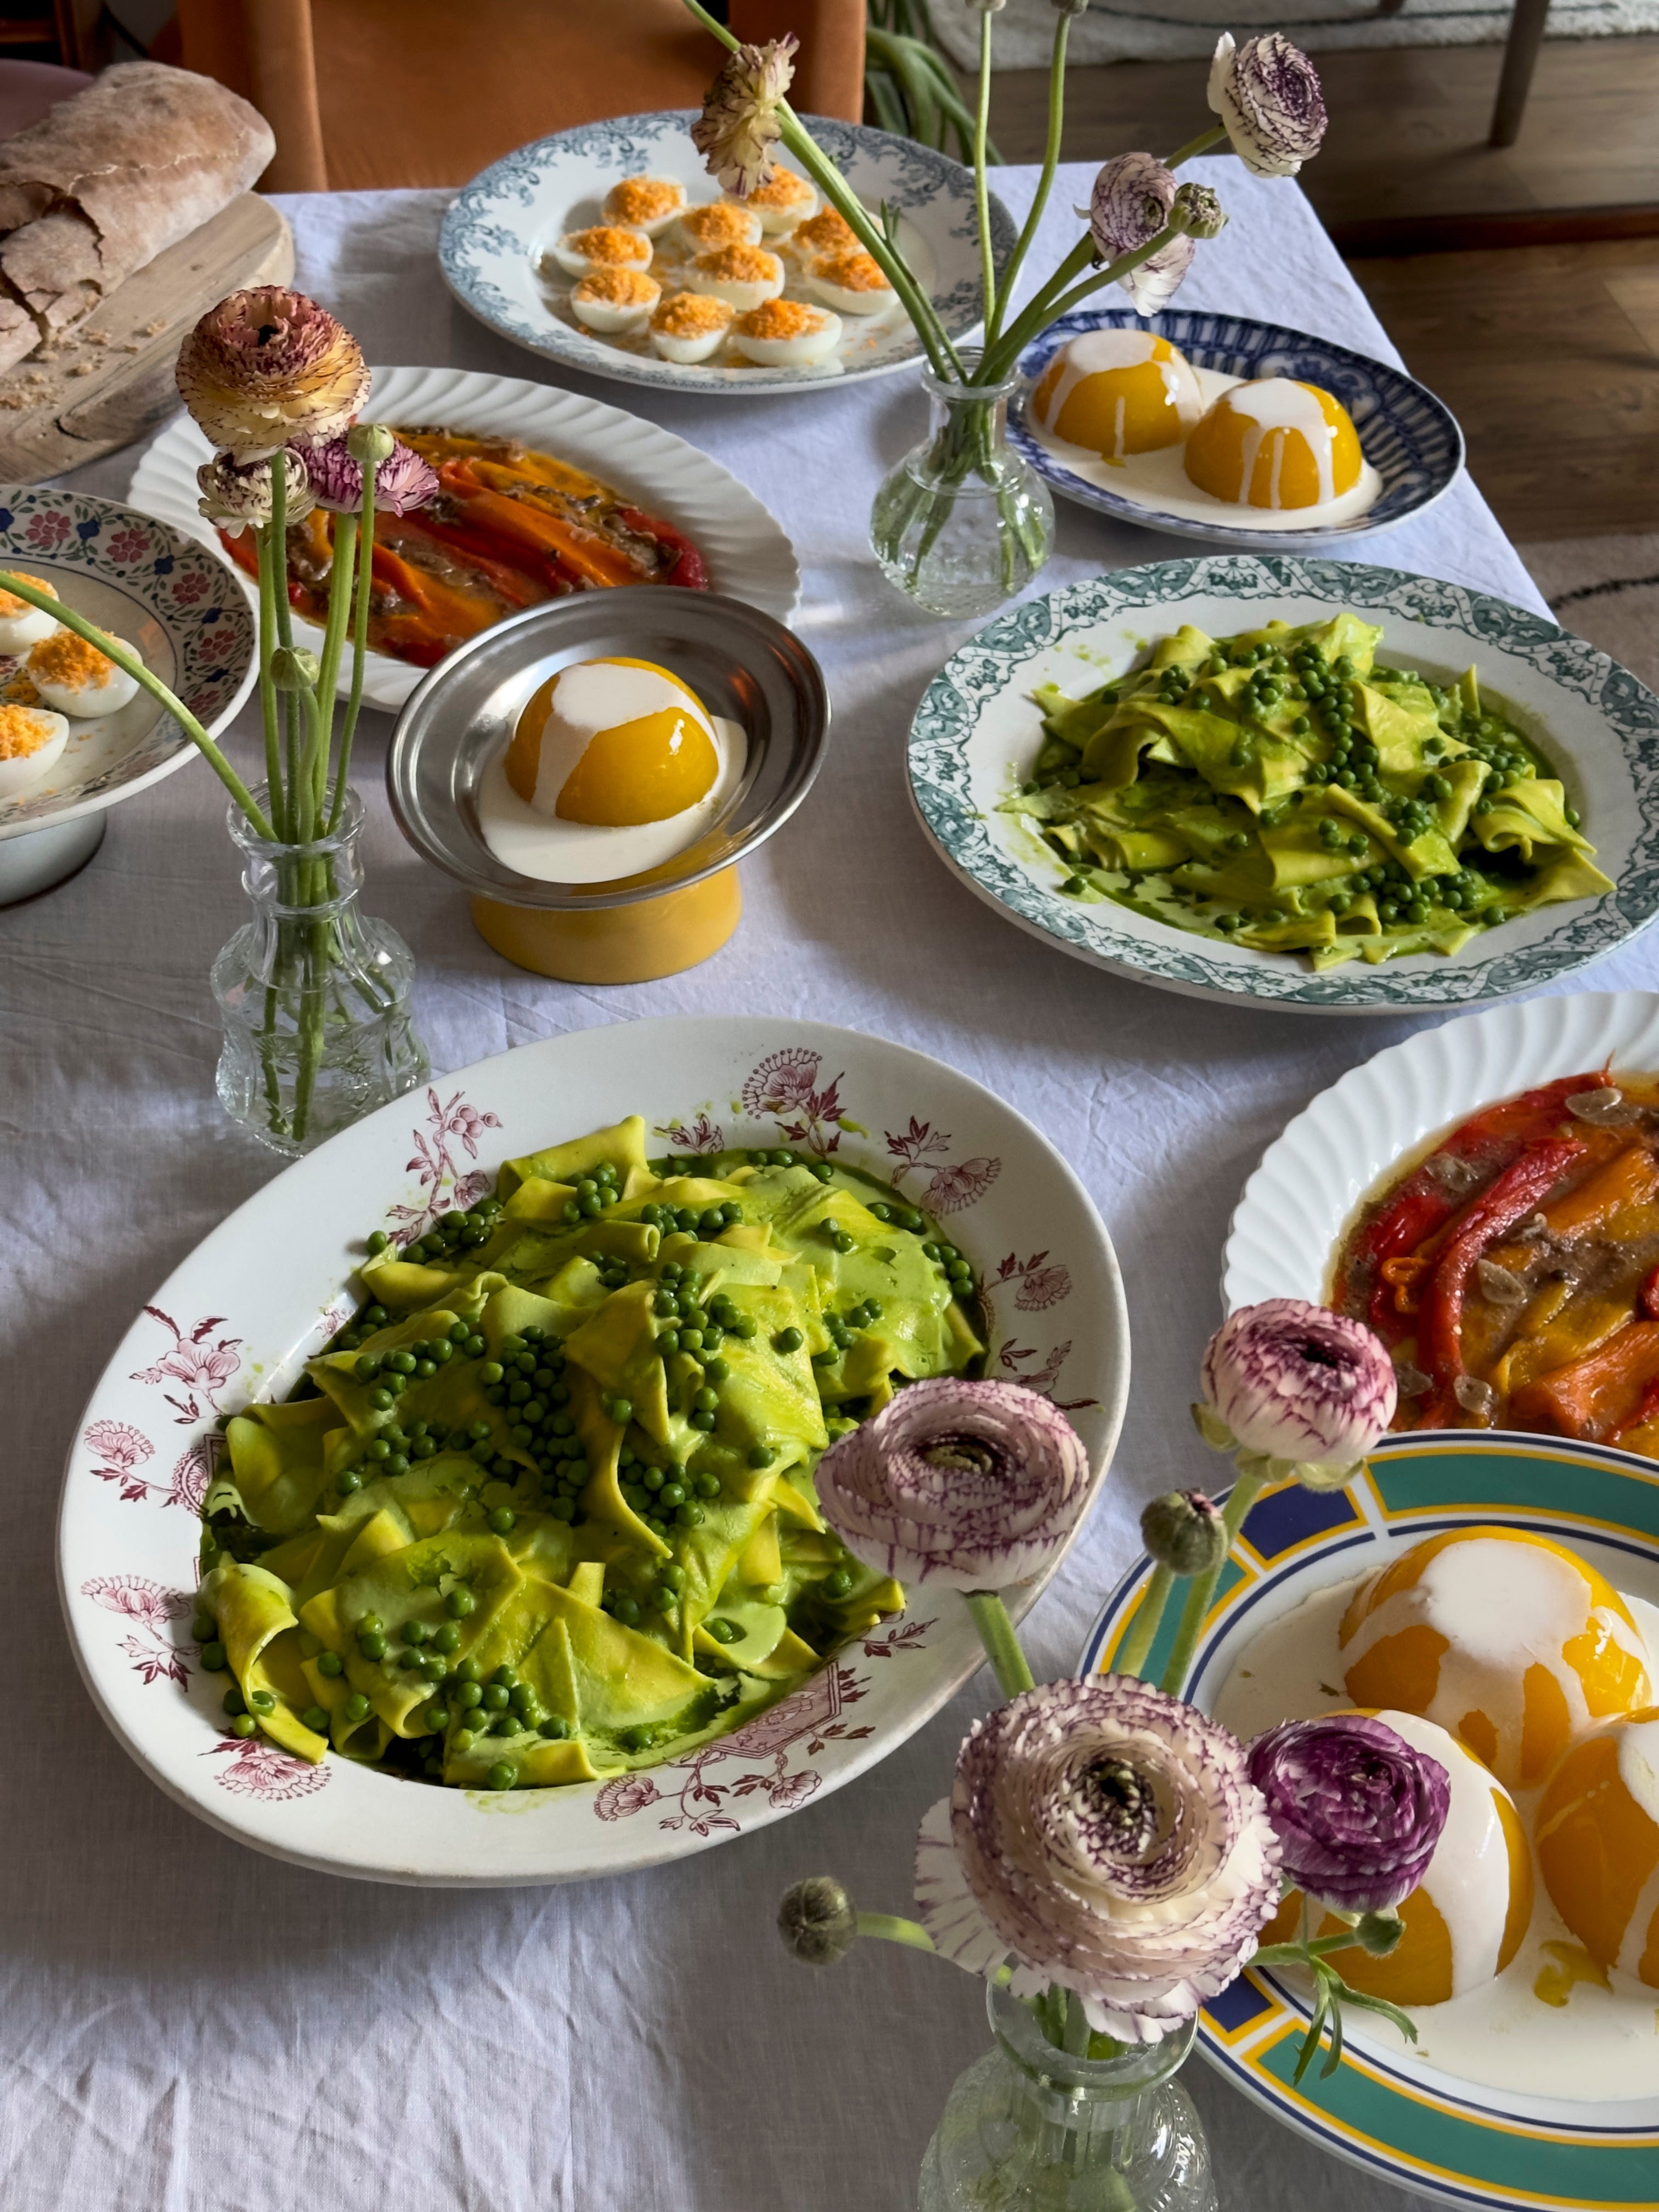
Each recipe today only uses up to 5 main ingredients, with salt, pepper, butter and oil being allowed as “givens”. I really, really love cooking like this - it makes me focus on what each ingredient is bringing to the dish, how to stretch it or coax more out of it, and what to pair it with for best results. Not to mention it makes everything cheaper and usually results in recipes that are less time consuming. It’s a wonderful way to flex and warm up our culinary muscles ahead of Spring and Summer. March in the UK means everything is starting to wake up, but winter's hangover still lingers. Blossom arrives but lots of trees stay bare, most veg are still in the ground and let’s be honest, it’s bloody cold. So, I’ve created a menu that is minimalist in structure but maximalist in spirit to uplift us, to shake off those wintry blues and welcome spring with open arms and full hearts. Colour was also big factor in my cooking this month - our dishes are all relatively monochromatic, celebrating the beauty and vibrance of their simplicity.
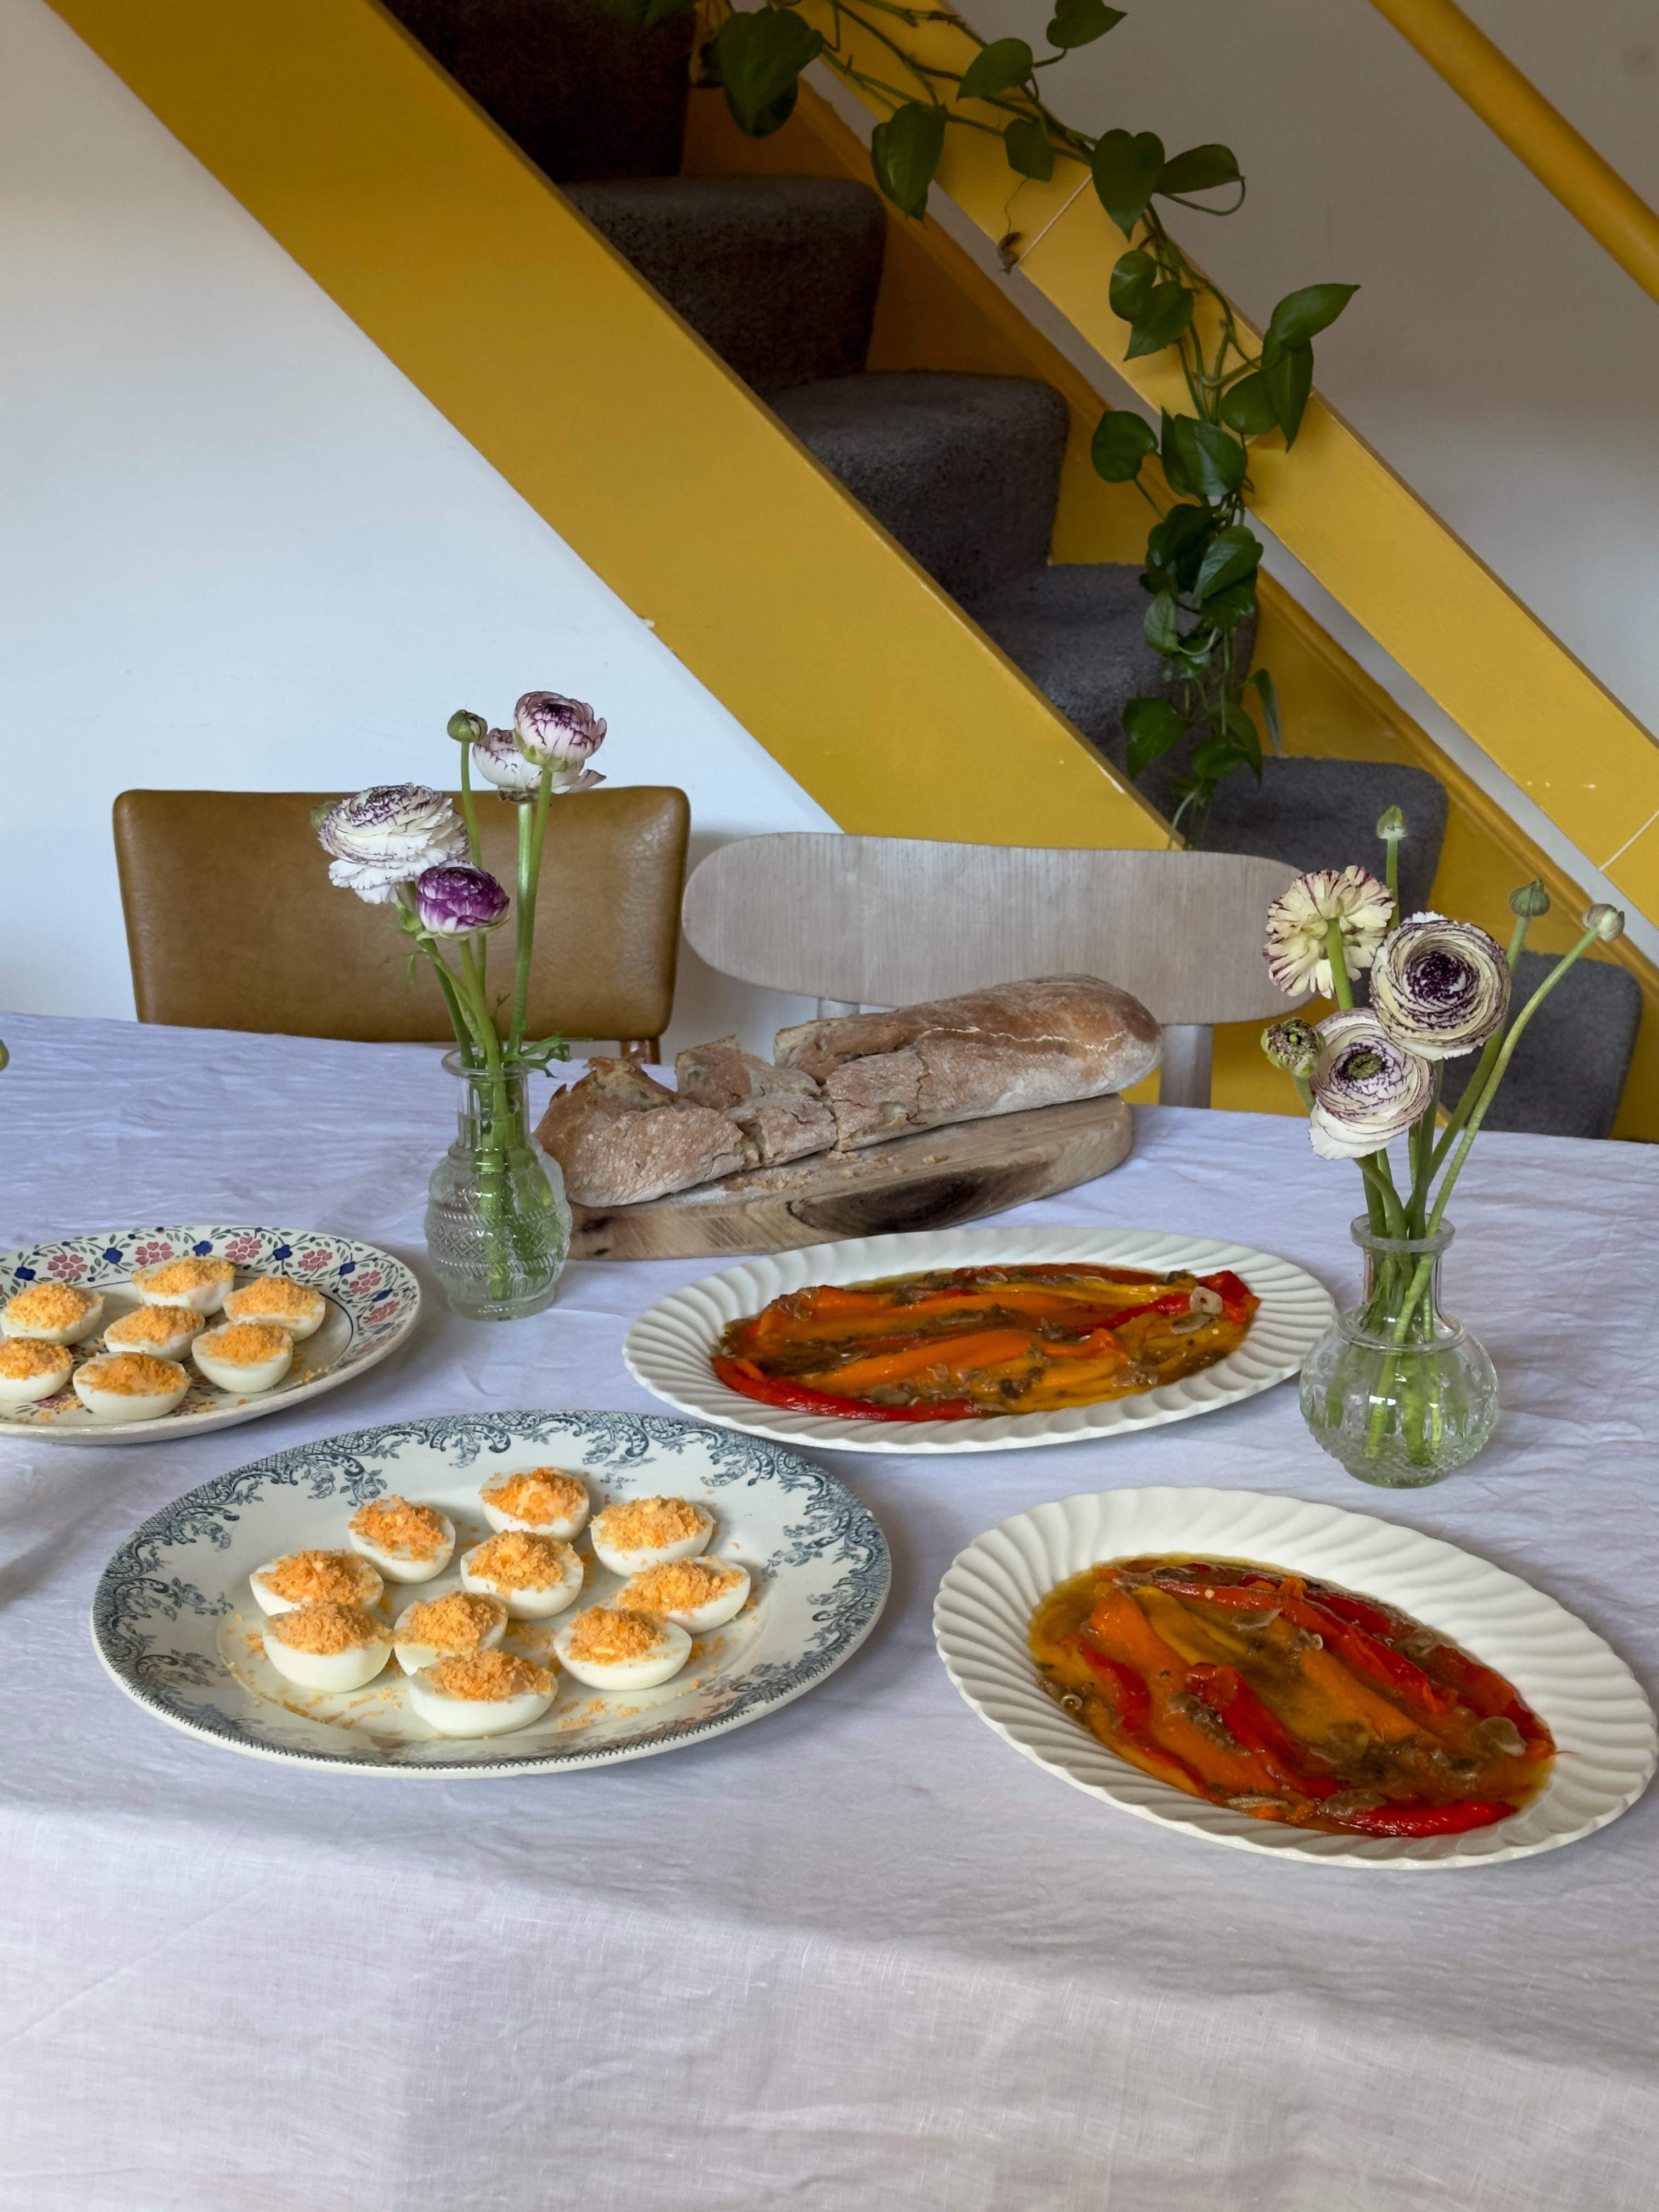
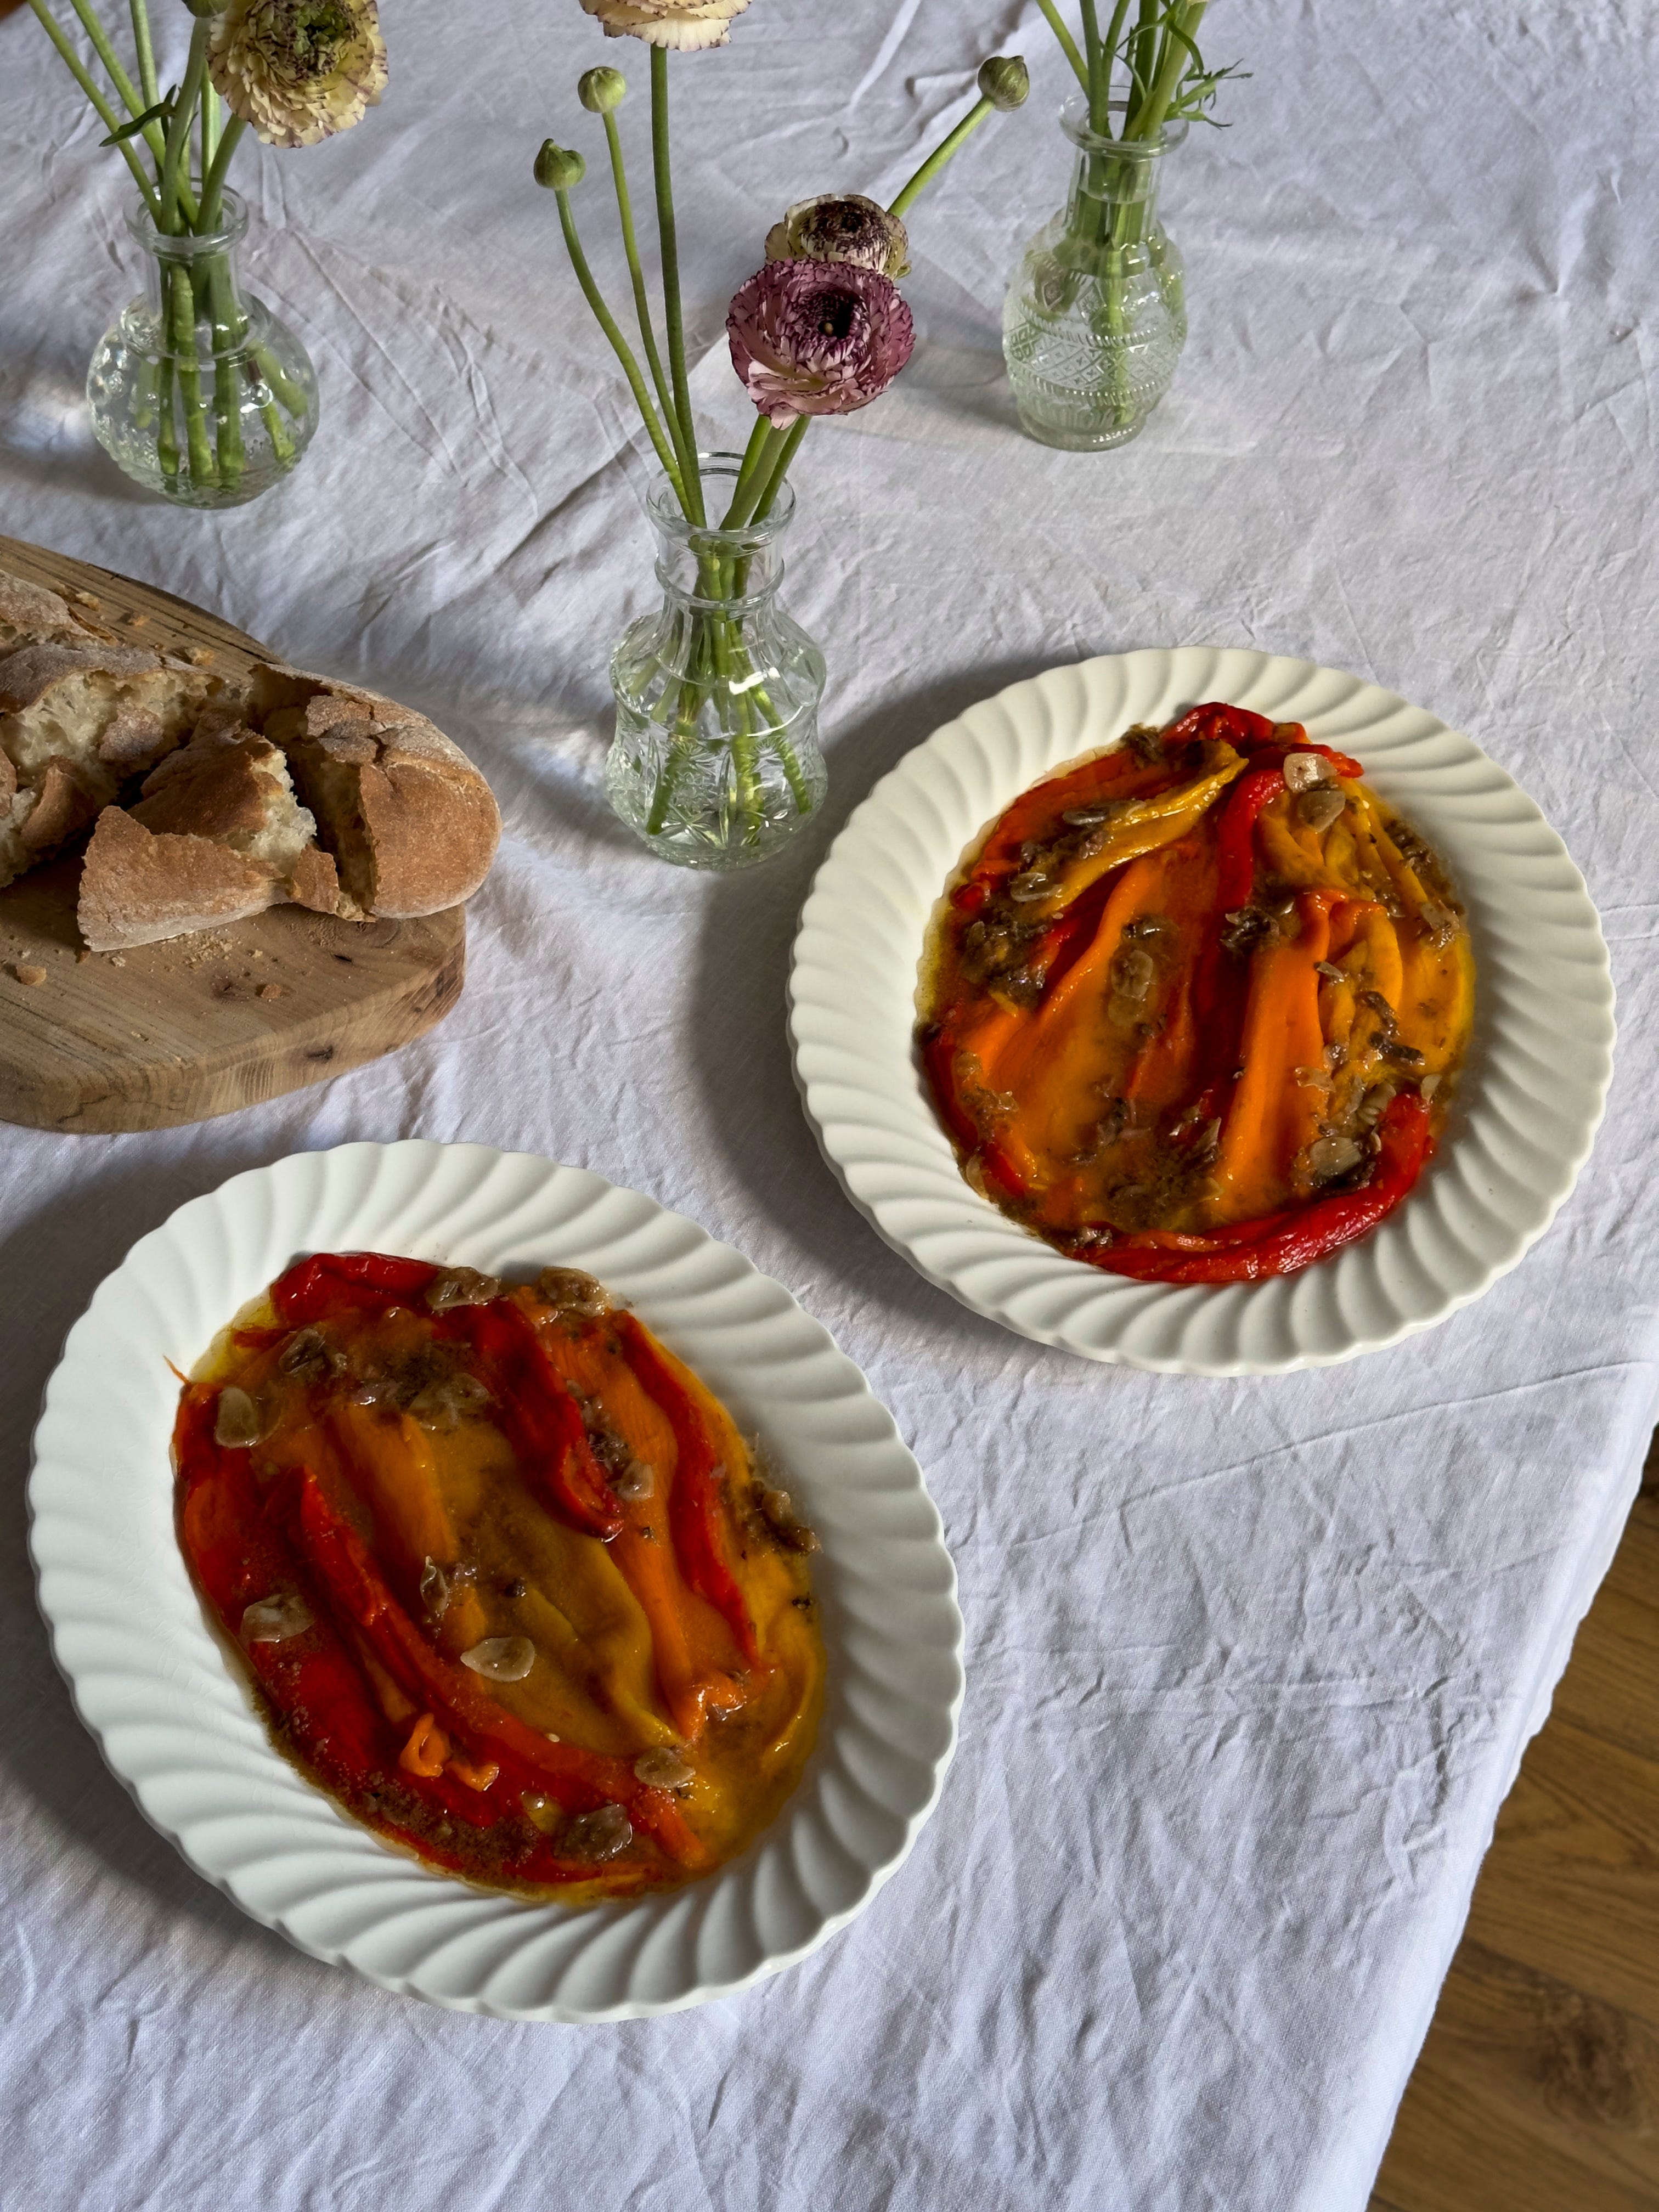
Our antipasti are Piemontese Peppers, where roasted romano peppers are drowned in a browned butter laced with anchovies and garlic, and Oeufs Mimosa - extra mustardy devilled eggs. They go beautifully served together, with crusty warm bread.
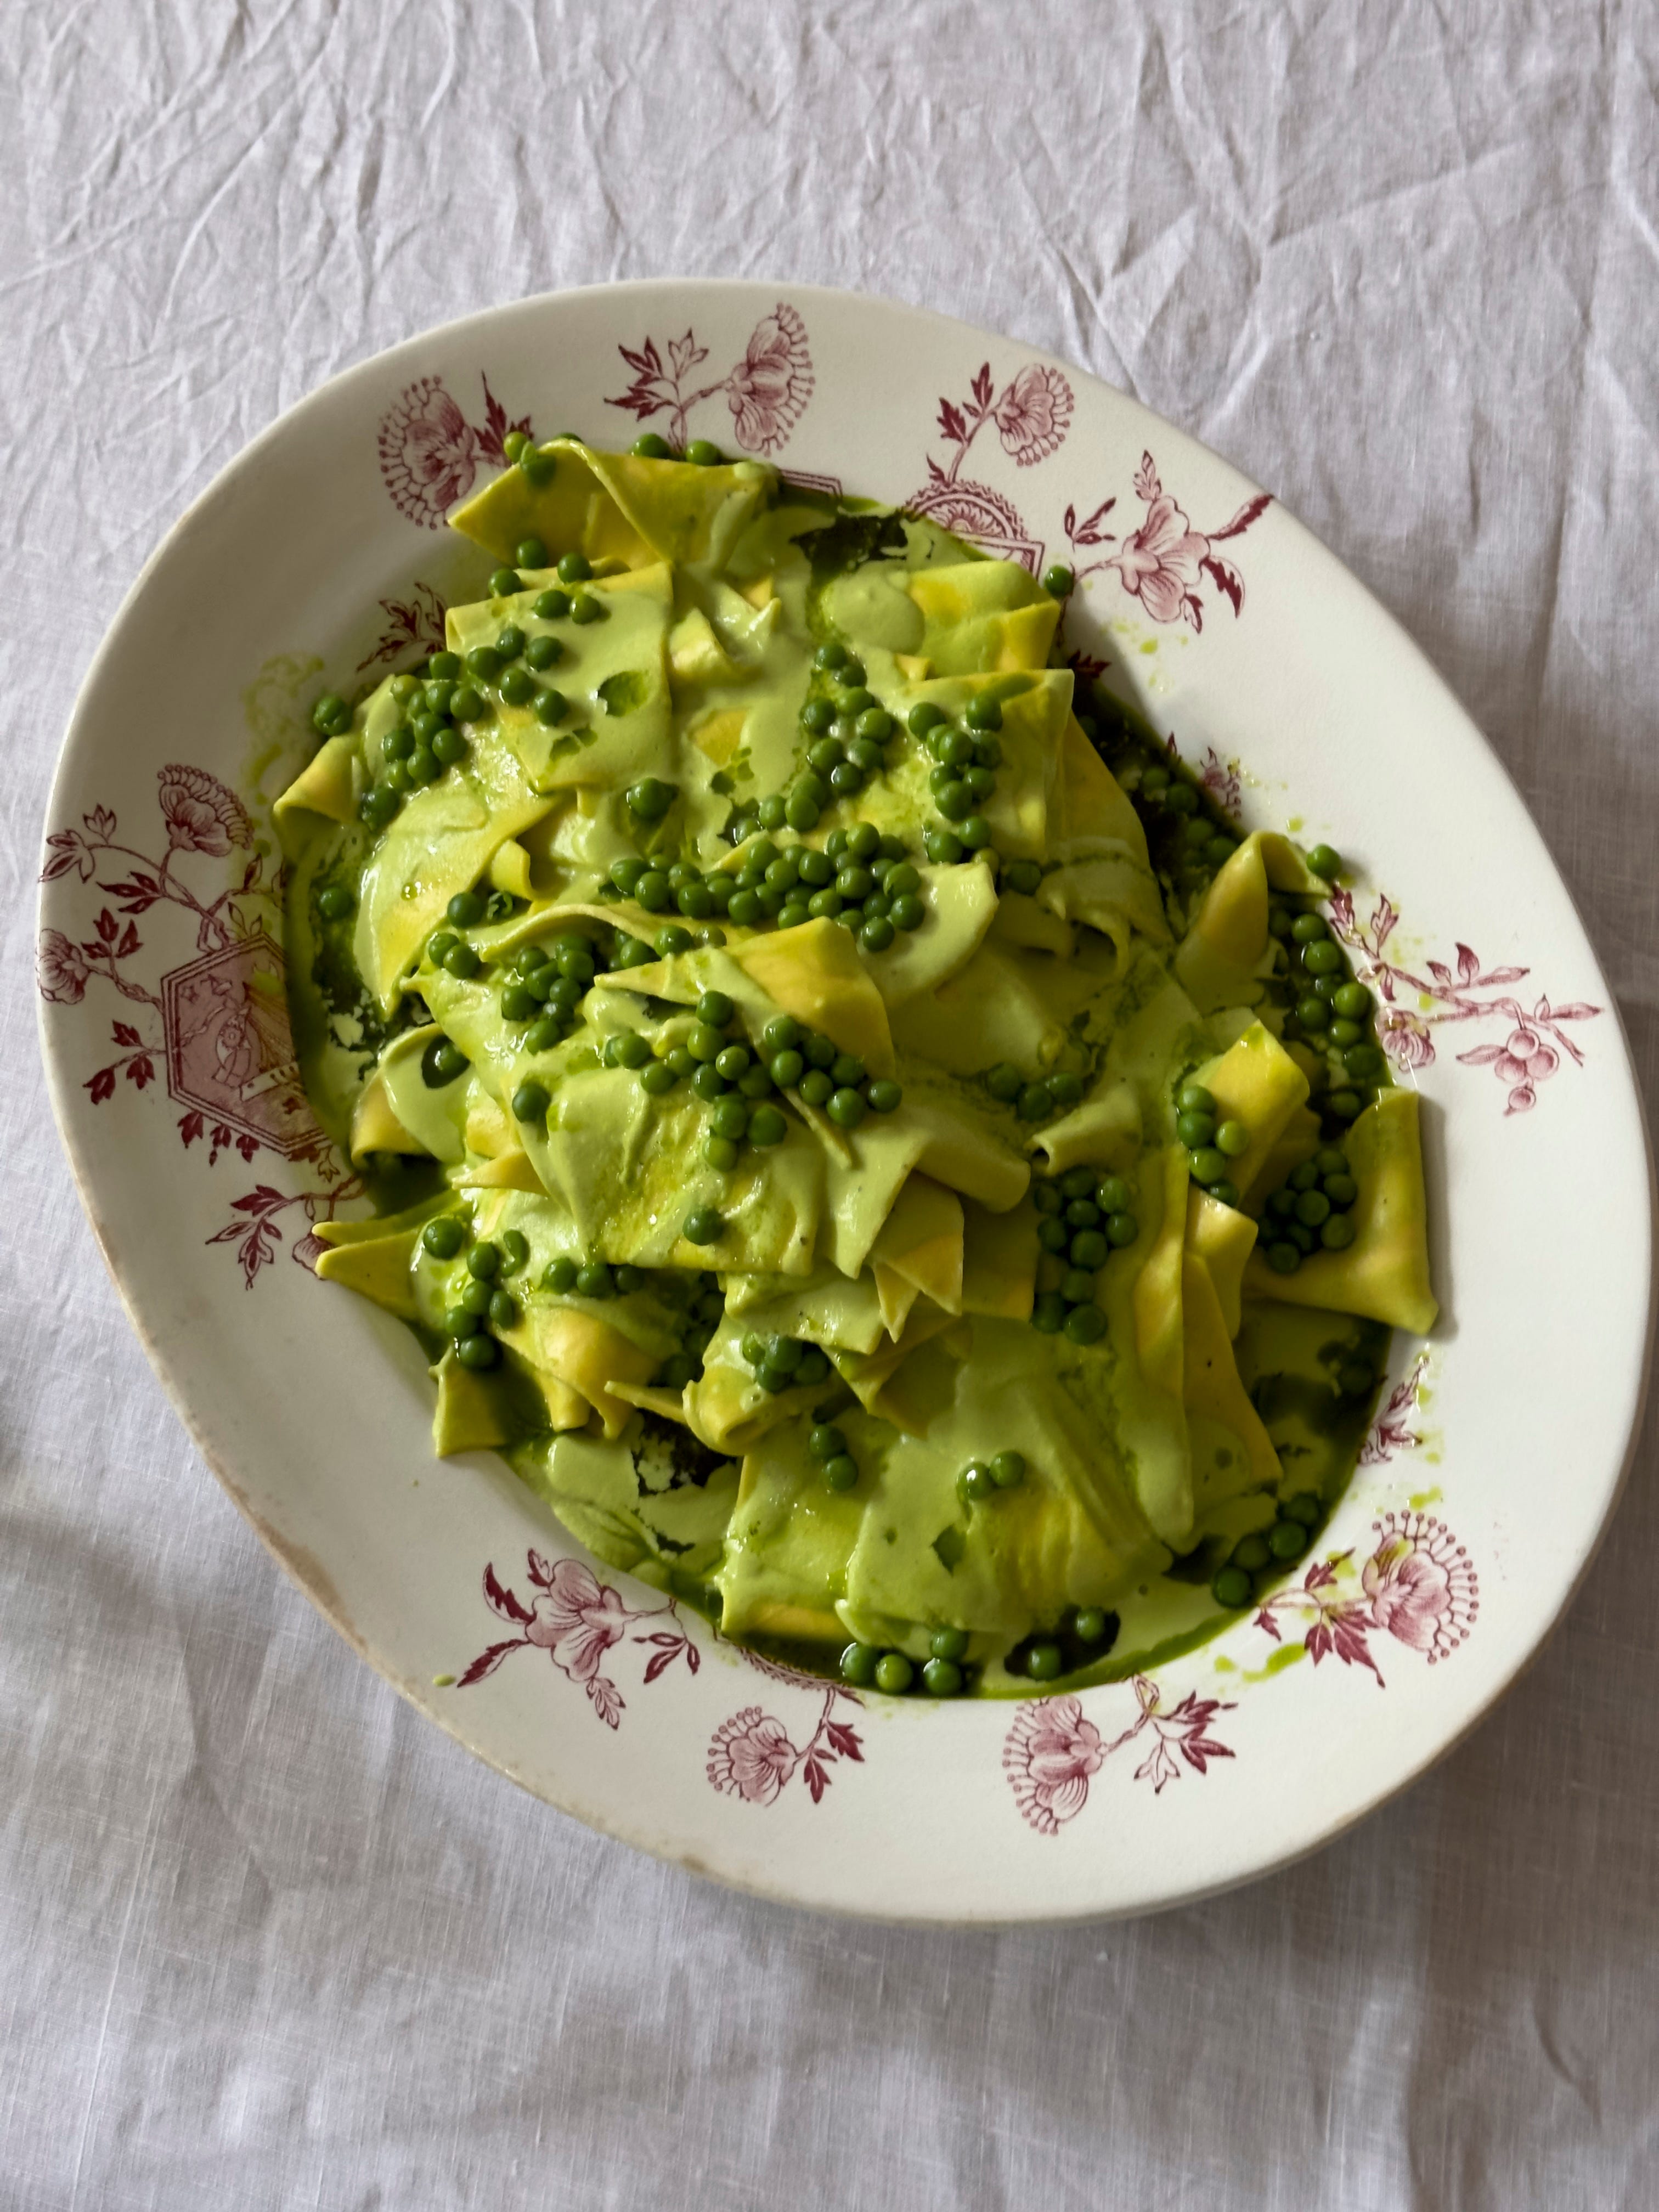
For our main we are serving Pea and Wild Garlic Maltagliati, where fresh lasagne sheets are cut into rough shapes (maltagliati means badly cut in Italian) and doused in a sauce made from peas, parmesan and double cream. They are then dressed with punchy Wild Garlic oil - that’s right, wild garlic is back in town! It’s a beautiful veggie centrepiece that is a lot less work than it looks.
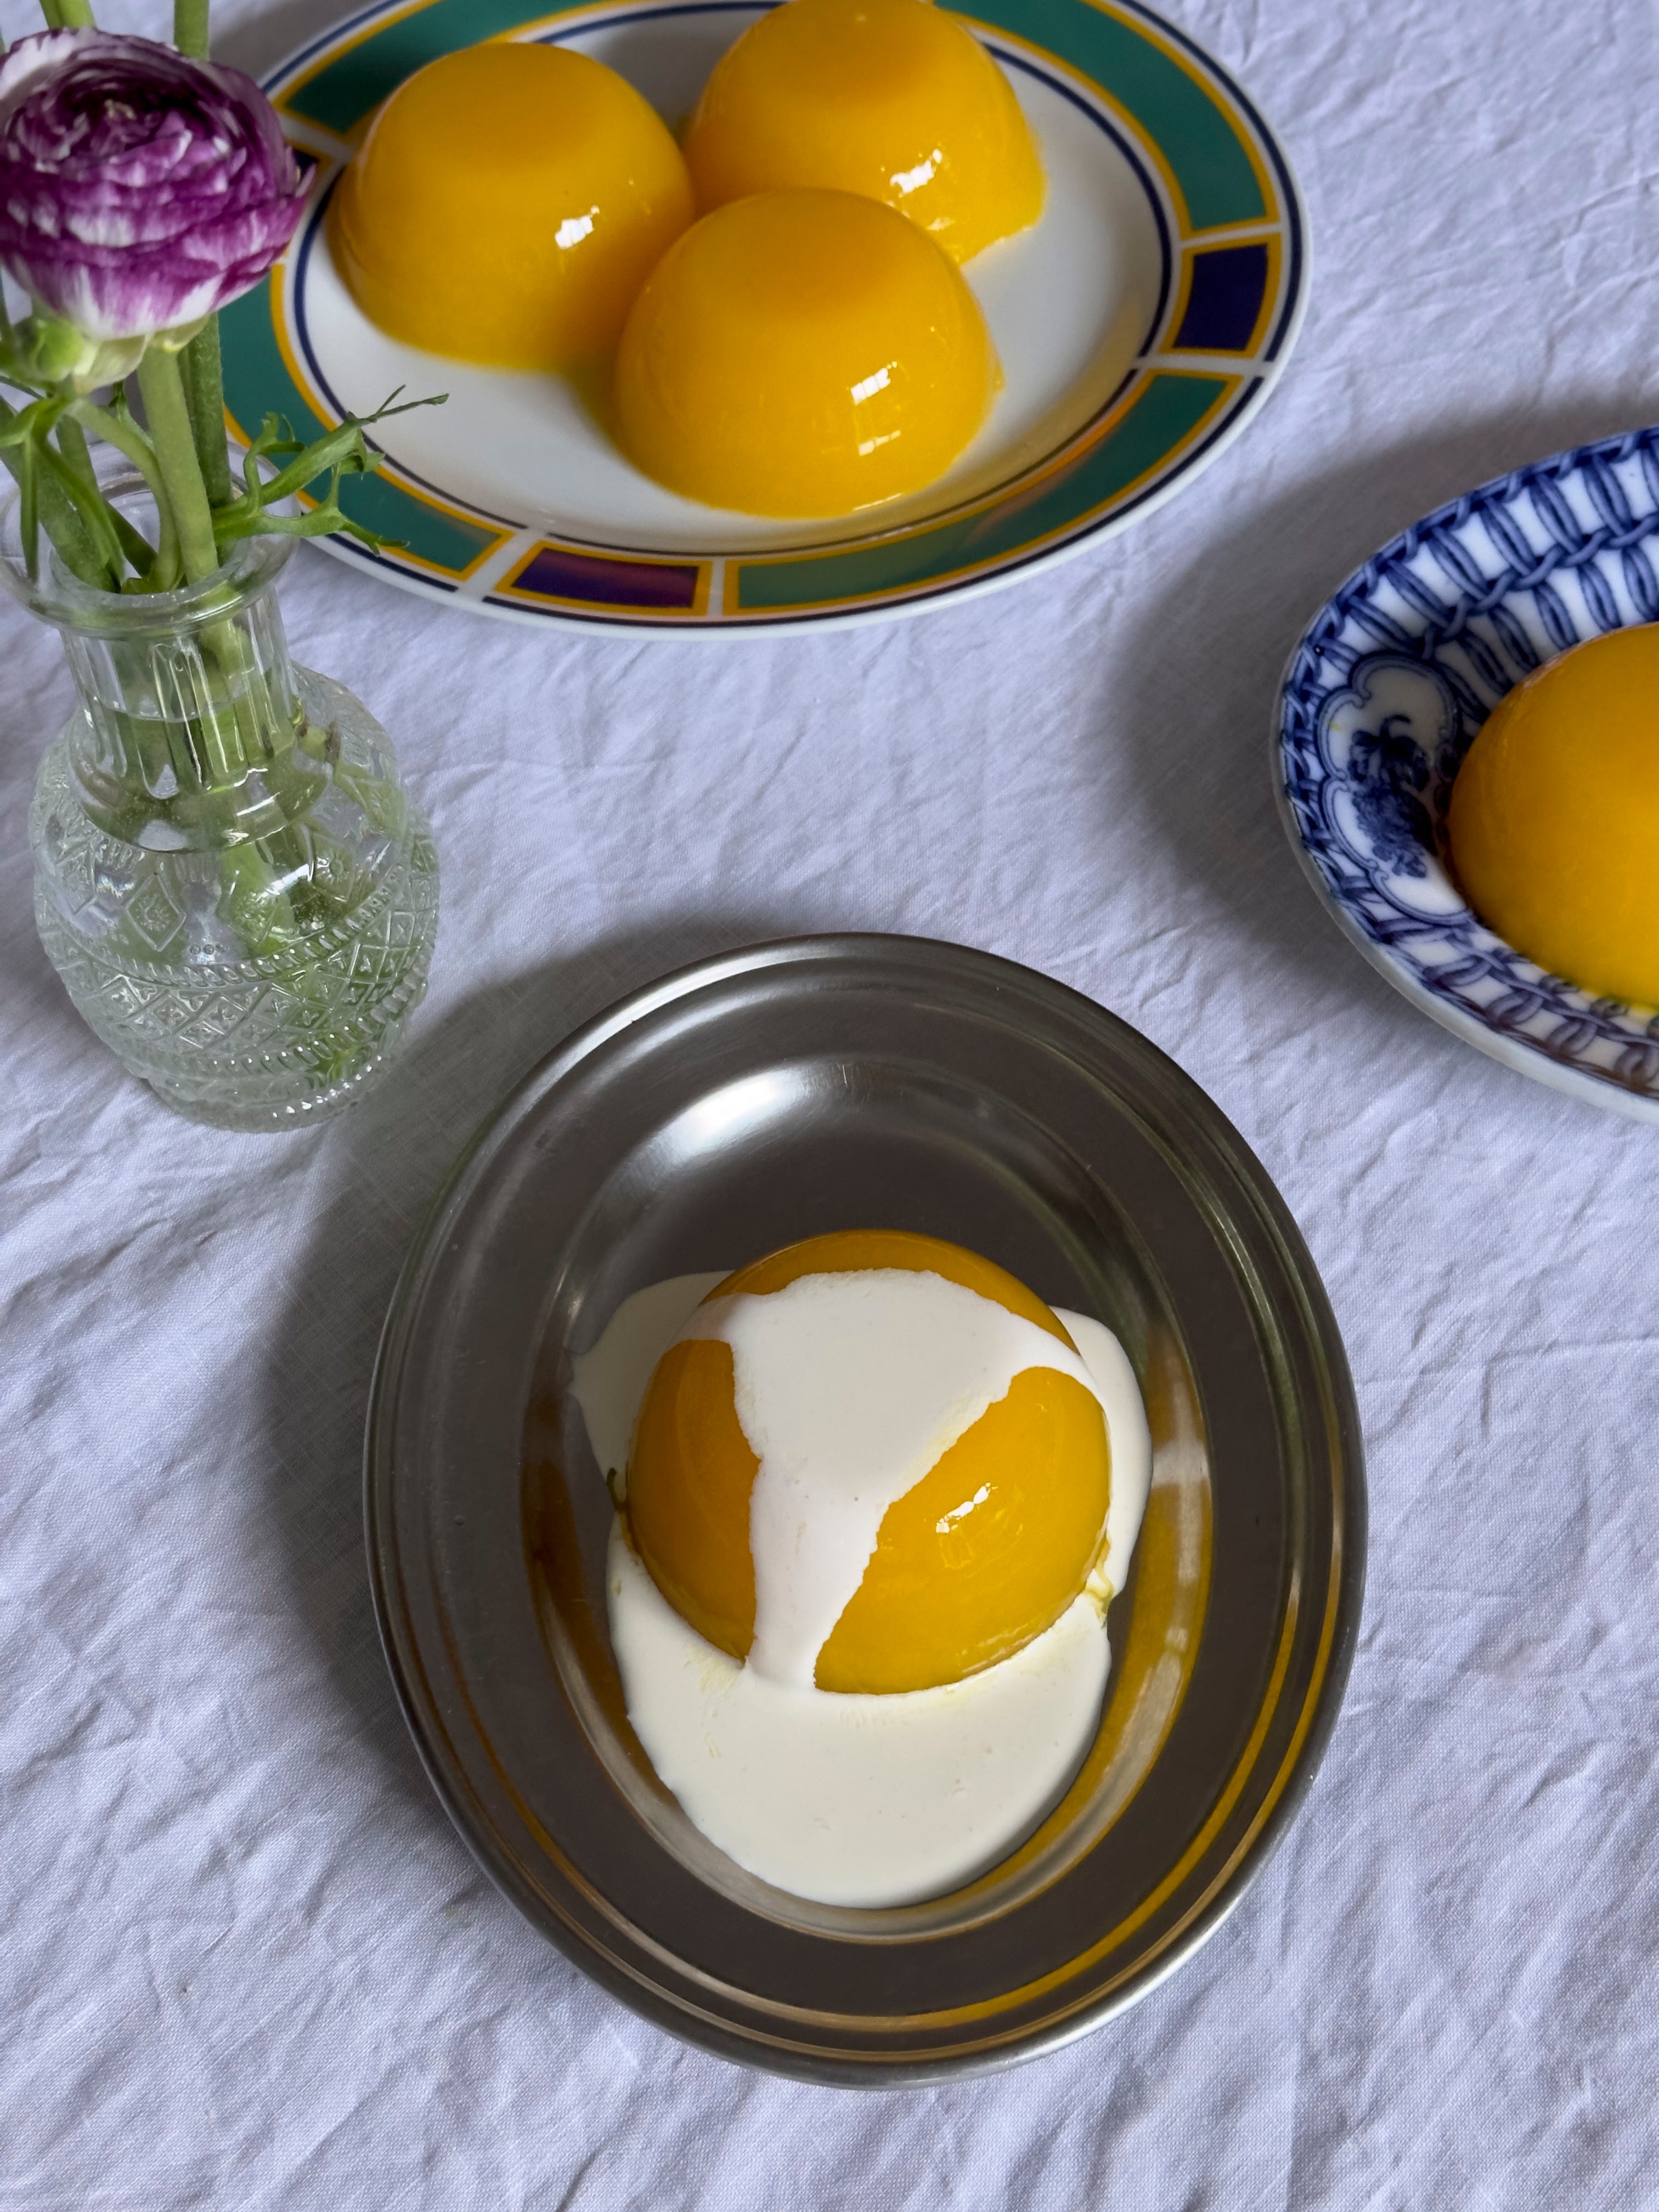
Finally, Orange Jelly and Cardamom Cream is our pudding. I simply adore jelly and this one is very low-key but so glorious to eat. Sharp and sweet, it tastes stunning with fragrant cardamom spiked double cream.
Time to get cracking I think!
PIEMONTESE PEPPERS
A roasted pepper is a joyous thing, absolutely packed with flavour without being overpowering. These are based on a traditional preparation from the Northern Italian region of Piemonte where anchovies and butter both play starring roles. Peppers and anchovies go together like a wink and a smile, as do garlic and butter, so basically you’re onto a winner with this.
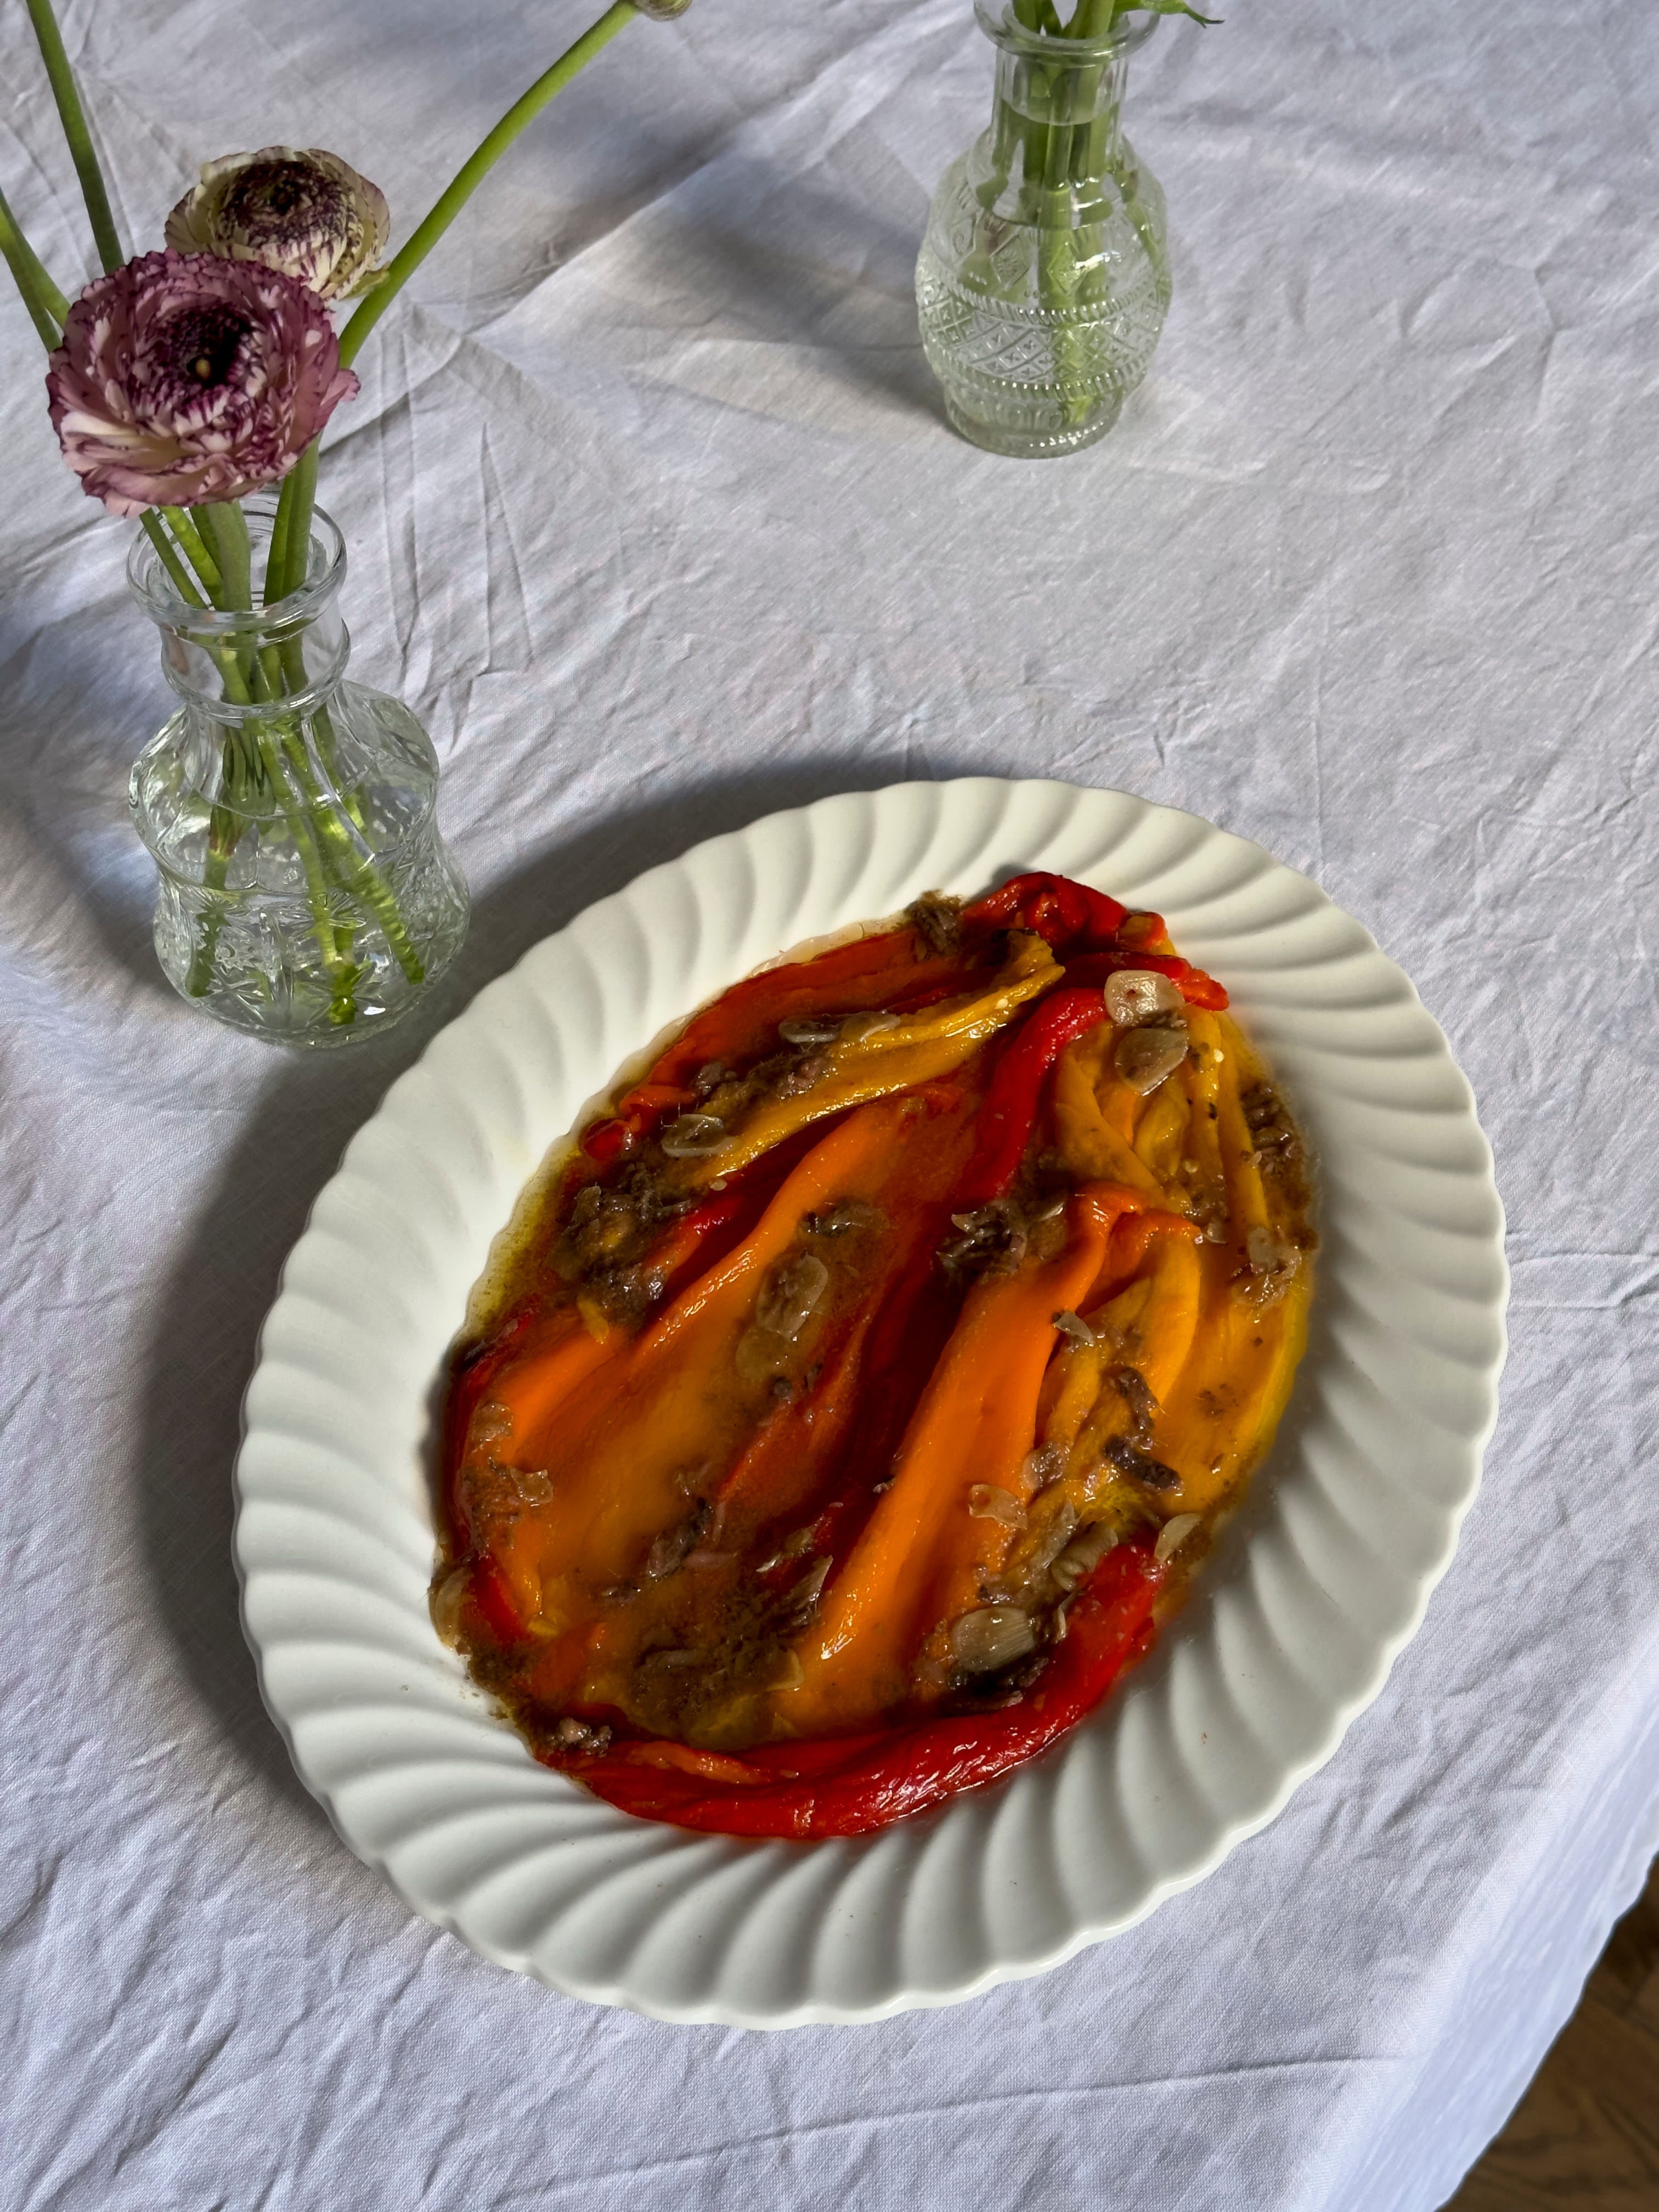
MAIN INGREDIENTS - PEPPERS, GARLIC, ANCHOVIES, BREAD
9 romano peppers - orange, yellow, red
2 tbsps olive oil
Salt and pepper
For the butter
100g unsalted butter
50g brown anchovies
3 cloves of garlic, sliced
Bread to serve
Preheat your oven to 200 fan. Toss the peppers in the olive on and spread over 2 oven trays. Roast them whole for 20 - 25 minutes, turning halfway through. Romano peppers are less hardy than bell peppers, so they take less time to cook. If using bell peppers you may need to roast for up to 40 minutes. When the peppers are slightly blistered, browned and soft, put them straight into a bowl and cover tightly with a tea towel or cling film. Let them sit and steam like this for 15 minutes - it will help release their skins. While still fairly warm, peel the filmy skin off the peppers and remove their tops and seeds. I like to tear them into 2 or 3 long strips when I do this. DISCLAIMER - if you don’t want to peel your peppers, don’t. It’s not a must. I like to do it as I think the butter seeps better into the peeled flesh. Put your cooked peppers onto two plates and season lightly with salt and pepper.
Heat the butter in a pan on a medium heat until it starts to froth and smell nutty. Immediately add the anchovies and garlic to the pan and stir well. Cook for a minute before removing from the heat. Use a wooden spoon to break down any anchovy pieces that haven’t melted into the butter. Pour the hot butter over the peppers and leave to sit for 10 minutes. Serve warm with plenty of crusty bread.
MAKE AHEAD -
You can make and dress the peppers up to 2 days ahead. Simply reheat on a flat plate in a 100 degree oven until warmn enough to serve - the butter should be completely liquid again before you eat.
These are absolutely amazing tossed through pasta, in a sandwich with mozzarella or cold roast pork, or with a piece of grilled fish.
SUBSTITUTIONS -
Use bell peppers if you can’t get hold of romano peppers, but be aware they may need longer to cook.
Feel free to leave out the anchovies to make this veggie, you can just do a simple garlic butter or add torn basil or chopped rosemary to it. You can also top with shaved parmesan.
OEUFS MIMOSA
This is the French name for devilled eggs, but I also like to think it refers to the finely grated yolk they are dressed with, which resembles the frothy yellow blossom of Mimosa trees which are in flower right now. We have a very simple, refined devilled egg here with the main flavour profile being dijon mustard, which provides a welcome piquancy against the rich egg. I really love the combination of the peppers with the eggs - they are both super savoury, umami dishes with undertones of creaminess and work brilliantly together.
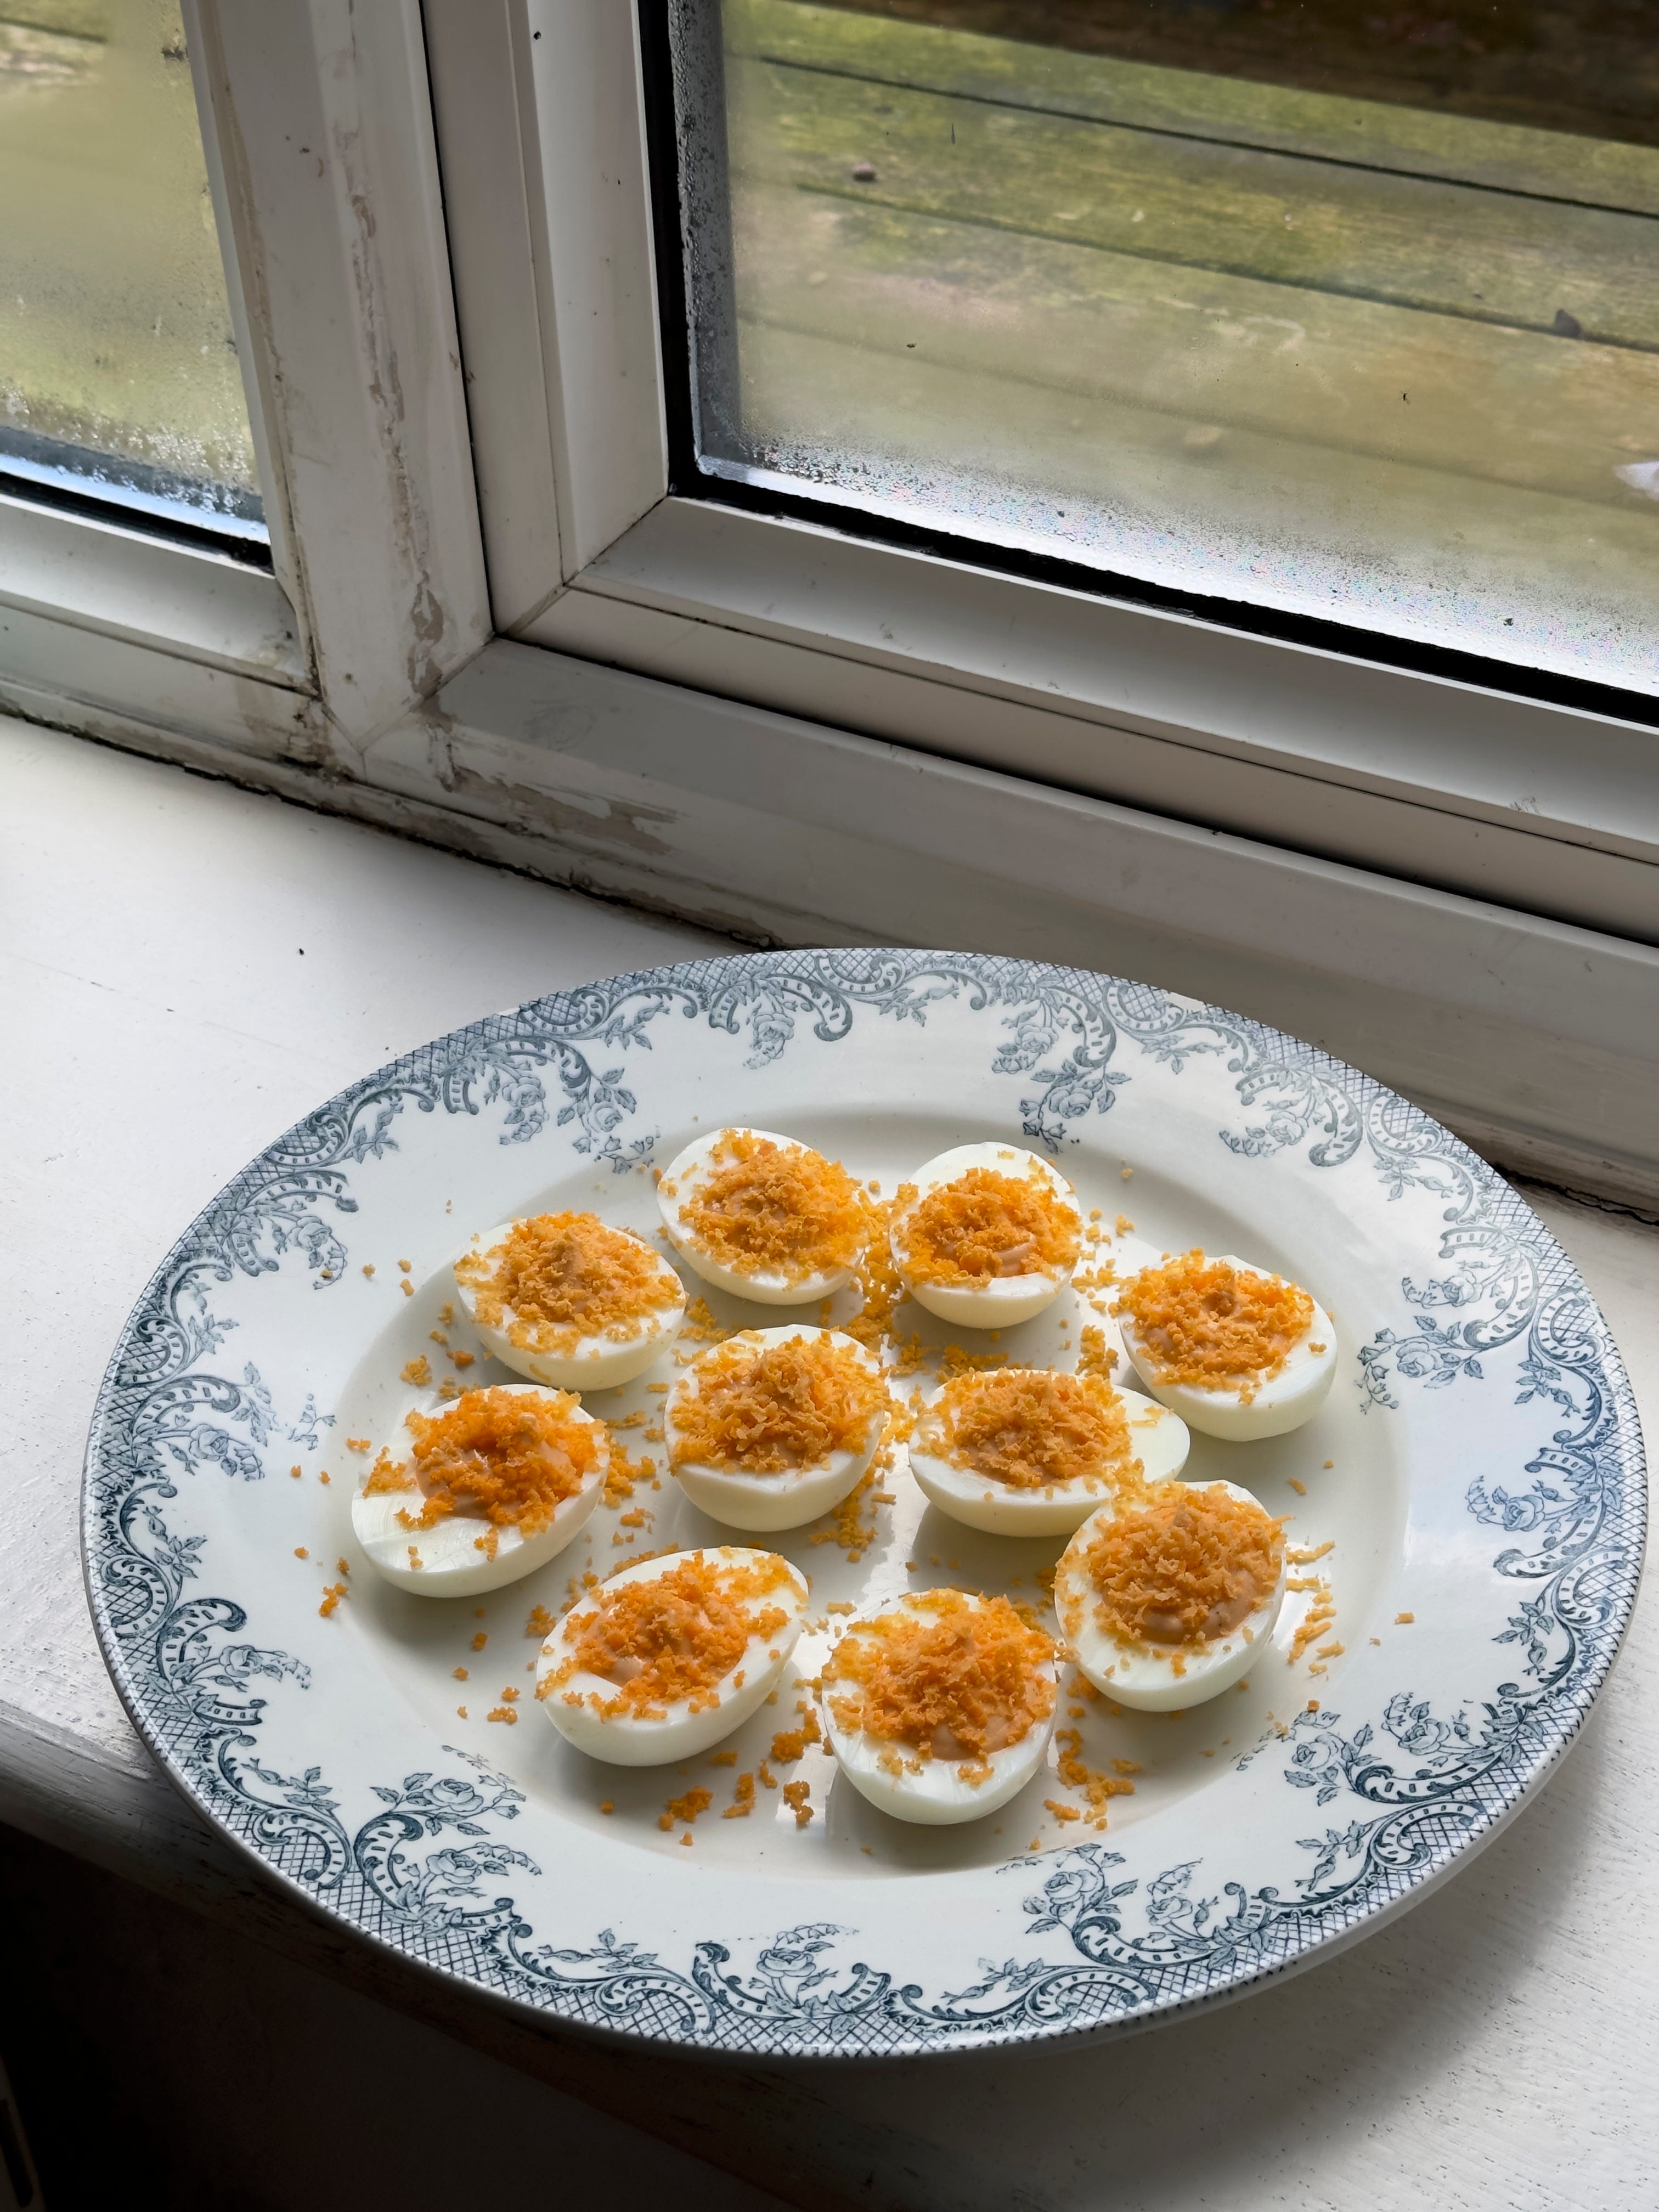
MAIN INGREDIENTS - EGGS, MAYO, DIJON, LEMON JUICE (salt and pepper included)
12 medium free range eggs
160g mayonnaise
2 tbsps dijon mustard
Juice of ½ lemon
Salt and pepper
Bring a deep saucepan of water to the boil. When the water is at a rolling boil, carefully lower the eggs into it using a spoon and set a timer for 10 minutes. I like to do this in batches of 6. While your eggs are boiling, prepare a large bowl of generously iced water. When the timer is up, use a slotted spoon to move the eggs straight from the pan into the iced water, giving them a little tap to break the shells once they are submerged. Leave to cool for 10/15 minutes. Repeat with 6 more eggs.
To peel the eggs, gently tap them on your work surface all over to break the shell, then peel. I find it helpful to keep the eggs submerged in the water while I do this.
Slice the eggs in half lengthways carefully, wiping the knife off between each egg. Scoop the yolks out carefully, and lay the whites onto a tray. Cover them with cling film and refrigerate until needed. Set aside the yolk halves from 3 eggs and also pop them in the fridge.
Use a fork to smoosh and break down the remaining yolks before transferring to a food processor with the mayonnaise, mustard, lemon juice and a good pinch of salt and pepper. Blitz until smooth, adding a drop of water if the mix is very thick. Don’t forget to check and adjust the seasoning. Pop the mix into a piping bag and into the fridge for 30 minutes to firm up.
When you are nearly ready to serve, lay out the egg whites onto your plates. If they are really domed on their bottoms and sliding around a bit, I find it helpful to pipe a tiny bit of filling onto the plate for the white to stick to. Pipe the filling into the yolk cavity of each egg, you will have more than enough to be generous. Take the chilled yolks from the fridge and use a fine sharp grater to grate them over your filled eggs - you will have more than you need and they may crumble as you do this but don’t worry - that’s ok!
Serve immediately.
MAKE AHEAD -
You can boil and peel your eggs 24 hours in advance. Cut open the eggs and make the filling up to 6 hours before, just make sure both are covered and stored in the fridge until 30 mins before you serve
SUBSTITUTIONS -
Use English mustard or horseradish for a more intense kick, or swedish mustard for a sweeter version.
Dill, chives or chervil would be lovely on top too.
PEA AND WILD GARLIC MALTAGLIATI
Maltagliati typically refers to pasta scraps created in the process of making another shape. These are never wasted and are usually kept to put in soups, but here we are breaking all the rules by intentionally making maltagliati instead of something more official, and by using fresh lasagne sheets to do it. The peas are the base of our sauce, blended with cream and parmesan to make a slightly sweet and luscious green liquid to toss our pasta in. Wild Garlic is now in season here in the UK and here it’s been blanched and then blended into a rich, bright green oil. I love the way the oil sits on top of the velvety pea sauce and how each bite of this dish is both bright and fresh, yet comforting and rich.
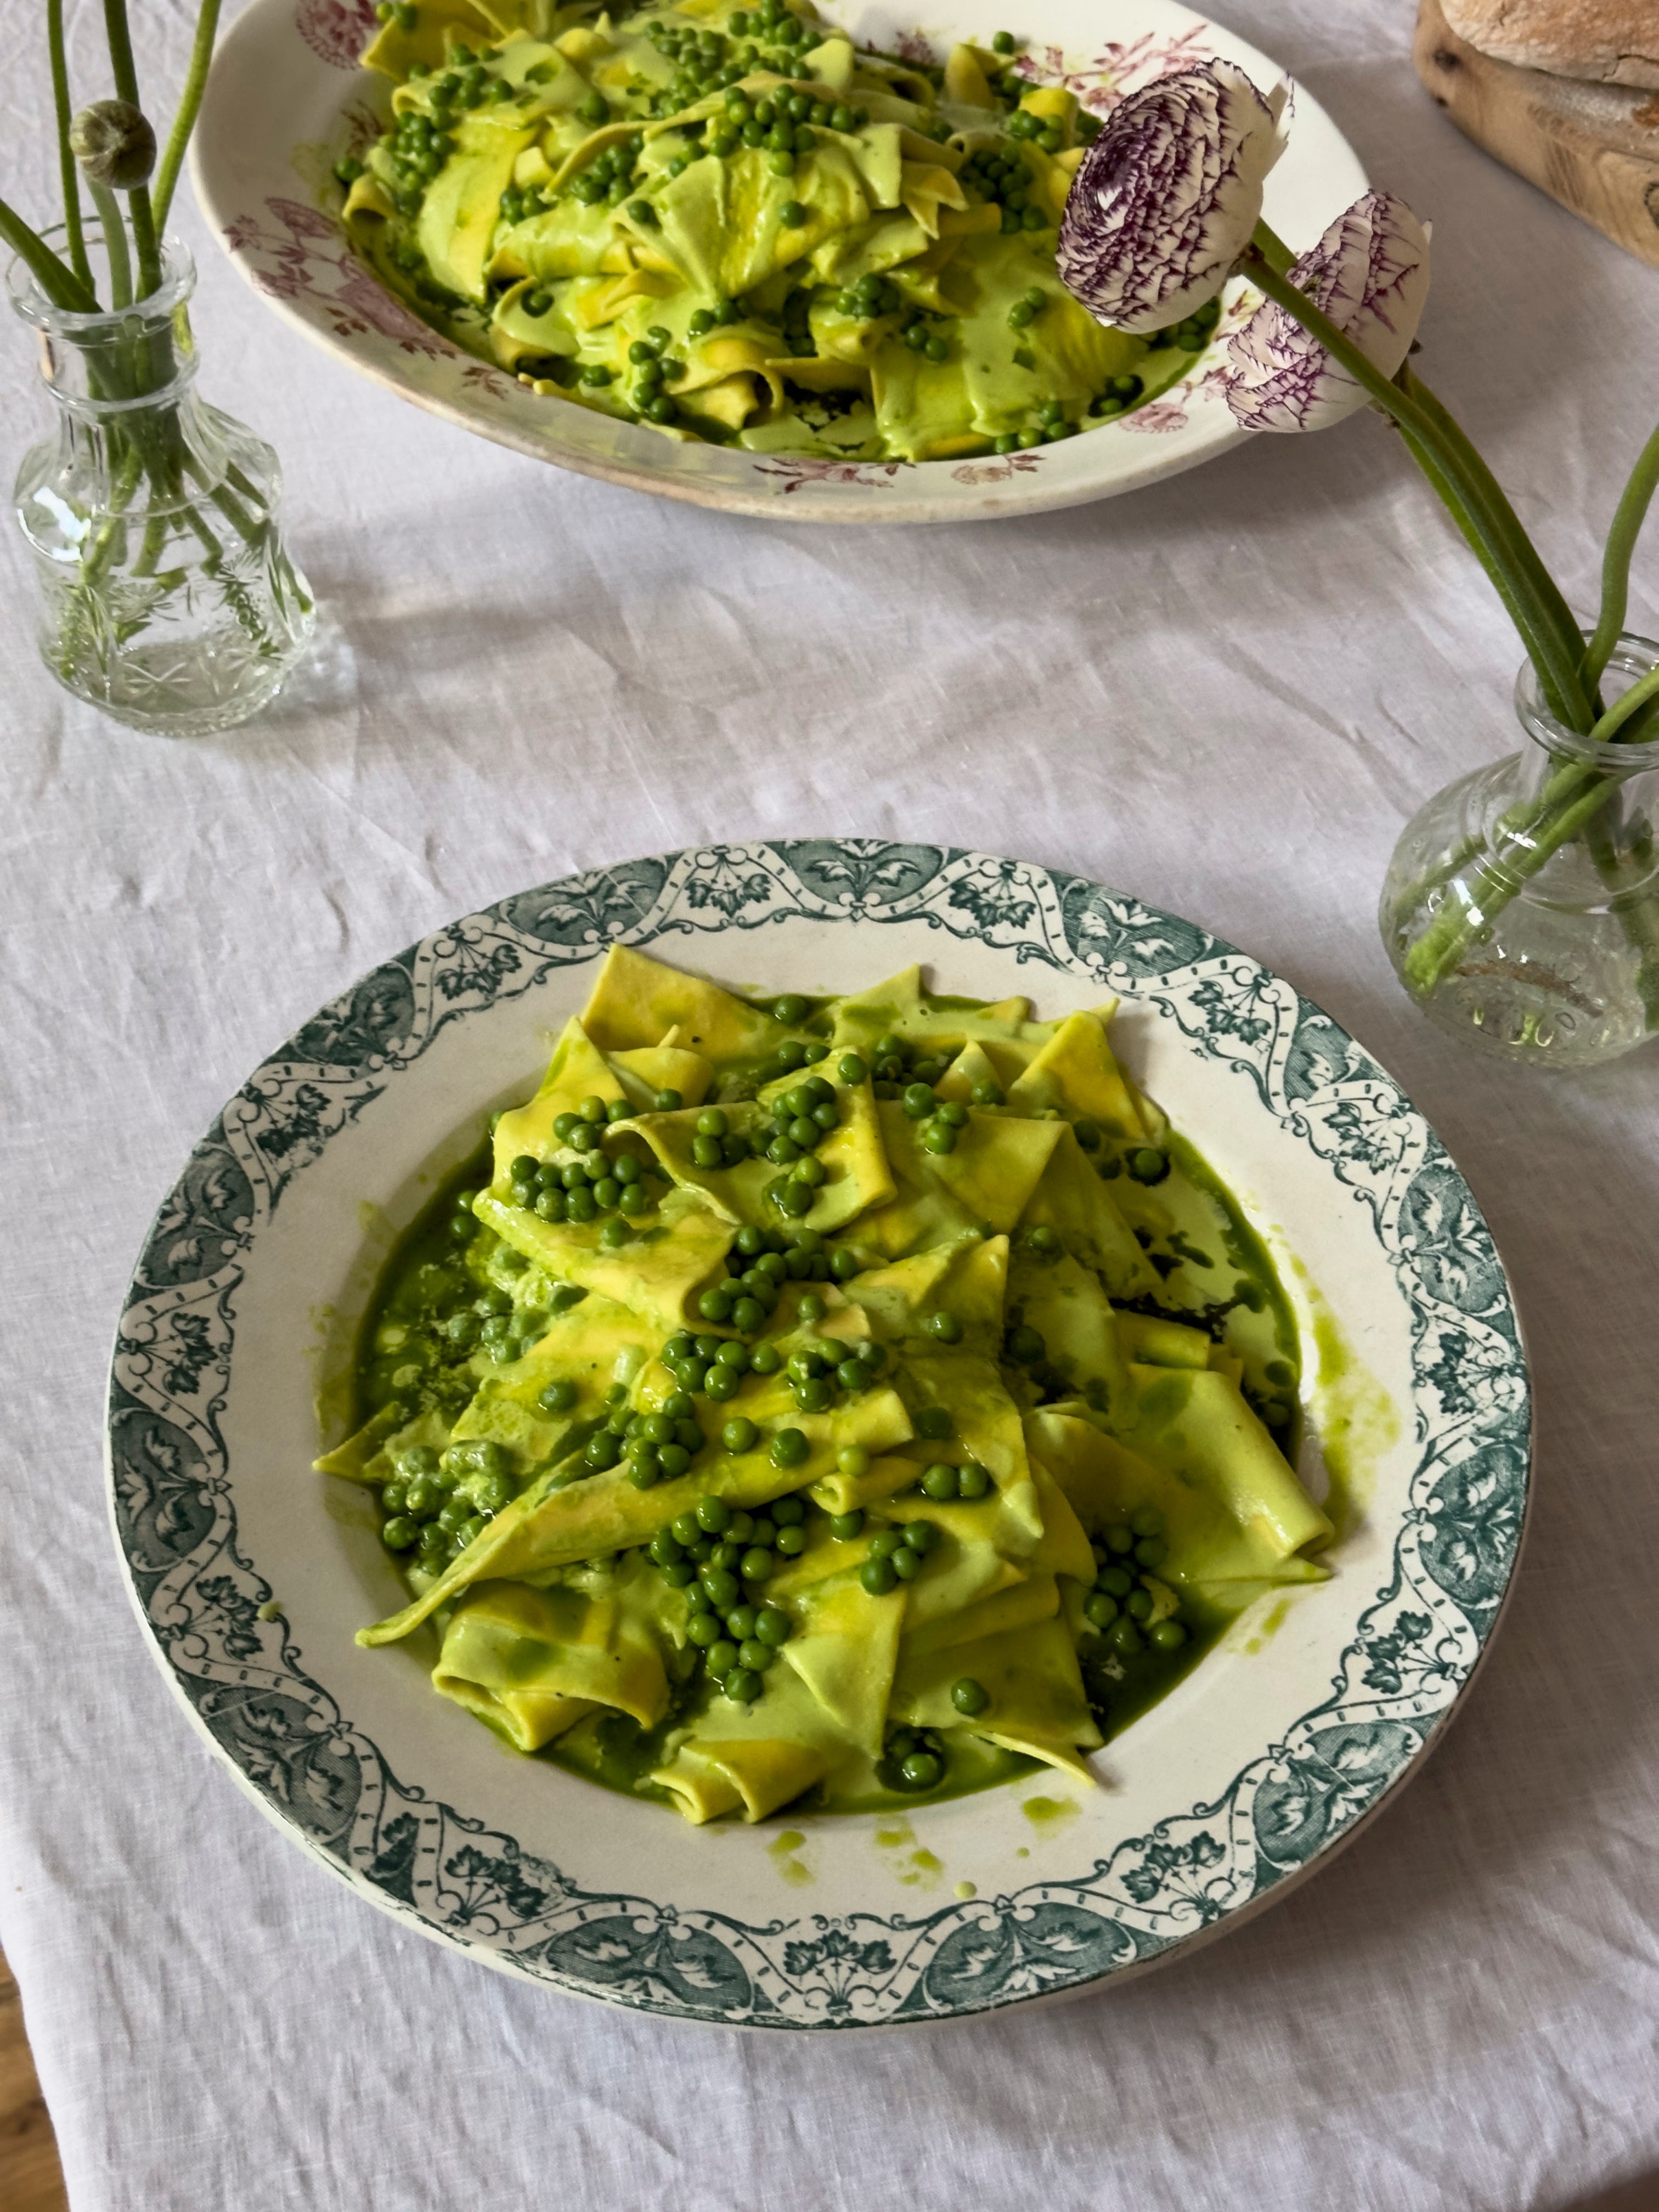
MAIN INGREDIENTS - WILD GARLIC, PEAS, PARMESAN, CREAM, LASAGNE SHEETS
For the wild garlic oil
75g wild garlic, washed and dried
120ml extra virgin olive oil
For the Pea sauce
500g frozen petit pois
50g butter
200ml double cream
50g finely grated parmesan
Salt and pepper
700g fresh lasagne sheets
For the wild garlic oil carefully wash and dry your wild garlic leaves. Set aside ¼ of the leaves and roughly chop them - we want to keep a small proportion raw to make the oil extra intense. Bring a saucepan of water to the boil and prepare a bowl filled with iced water. Drop the rest of the wild garlic into the boiling water and cook for 20 seconds before immediately shocking the leaves in the iced water - this will stop them from cooking and hold their colour. Drain and squeeze out the cooked leaves really well. Pop them in a high powered smoothie blender - I use a nutribullet - with the chopped leaves and olive oil. Blend for around 1 minute to make a bright green sauce. Now line a sieve with a jay cloth or piece of muslin if you have it and place over a clean bowl. Strain the wild garlic oil through the cloth and sieve to catch the mulch and for the wonderful green oil to pass through into the bowl. I like to squeeze the cloth with my hands to get as much oil out as possible, twisting it out a bit like a sponge. Set the oil aside until needed and discard the mulch.
To make the pea sauce you will need your blender again. Bring a medium saucepan filled with water to the boil. Season the water generously with salt, and then pour in the frozen peas. Cook the peas until they are soft and sweet, no more than 3 minutes; I usually find they are ready when the water comes back up to a gentle boil. Reserve a ladle of the cooking water then drain the peas. Set aside around ¼ of the cooked peas, then put the rest, while still hot, into a blender with the water, cream, butter and parmesan. Blitz until you have a smooth, thick sauce. Check and adjust the seasoning and set aside, along with the whole cooked peas, which you should dress with a little olive oil.
For the maltagliati, pop a lasagne sheet onto a board and use a knife or pastry cutter to chop it into rough and random triangular shapes - this is a great thing to do with kids. Put the cut maltagliati uncovered in the fridge until needed.
To serve, bring a large saucepan of water to a rolling boil. Gently heat the pea sauce in a large pan, keeping it on a low heat so it doesn’t boil. Do the same for the wild garlic oil in small pan on a very low heat and add in the saved cooked peas. Season the pasta water like you would a soup - don’t forget to taste it. Drop in the maltagliati, stirring really well so that they don’t stick together. Fresh pasta cooking times will vary depending on where it is from and how thick it is, I would advise around 5 minutes but make sure you are tasting it all the time. When the pasta is just al dente, use a slotted spoon or kitchen spider to transfer it directly to the pea sauce along with a ladleful of pasta water. Mix the pasta and sauce really well and check the seasoning. To plate, spoon a layer of the pasta and sauce over a couple of platters, then drizzle with the pea and wild garlic oil, then repeat and drizzle again. Serve with grated parmesan or pecorino cheese.
MAKE AHEAD -
The pea sauce can be made up to 3 days ahead and kept in the fridge. Be aware that the pea sauce has lots of fat in it so it will solidify, make sure to reheat it really well before tossing with the pasta and don’t worry if it needs a little bit of extra water.
The wild garlic oil is best made fresh on the day as the flavour can drop out over time.
SUBSTITUTIONS -
If you can’t get hold of wild garlic, use another strongly flavoured herb like basil or chives to make an oil.
Use any long dried pasta or any fresh pasta shape here.
ORANGE JELLY, CARDAMOM CREAM
I am a firm believer that no one is ever too old for jelly. These little orange beauties are super vibrant and refreshing, exactly like the gulps of juice that made them. This may seem to be a very, very paired back dessert but it is so joyful, and the mellow, sweet cream with the cardamom works astonishingly well with the sharp jelly. Plus, jelly is such a glorious pudding for a dinner party, it’s made well in advance and is such a crowd pleaser when it comes to the table.
MAIN INGREDIENTS - ORANGES, SUGAR, GELATINE, CREAM, CARDAMOM
For the jellies
12 medium sized ripe oranges
100g caster sugar
100ml water
8 leaves of gelatine - I use these
For the cream
200ml double cream
3 tbsps caster sugar
3 green cardamom pods, crushed but still whole
Pinch of salt
6 dariole moulds, roughly 170ml capacity
You should aim to make the jellies the night before. For them, you will need to zest 6 of the oranges into a pan, and then juice all 12. You should end up with around 1.1l-1.2l of juice. If you have substantially more than that, do not add any extra water to the mix. Stir the sugar and water into the juice and then pop it onto a low heat. Heat the mix until it is just steaming - you want the sugar to have dissolved but you don’t want it to boil. Meanwhile, bloom the gelatine leaves in a bowl of cold, iced water. This softens the leaves without risking them dissolving. When the orange juice is steaming and still on a low heat, whisk the gelatine leaves into the mix one by one, squeezing out any excess water before you add them. Once all the gelatine has been incorporated, strain the mix into a jug through a fine sieve to get rid of the zest and any bits of pith or seeds. Very lightly grease your moulds with a small amount of flavourless oil on kitchen paper - I use veg. Put the moulds into a tray and then carefully fill them with the hot orange jelly. Pop the tray of jelly into a CLEAN and NON- SMELLY fridge to set for at least 8 hours, ideally overnight.
The next day, pour the double cream into a pan with the sugar, crushed cardamom pods and a small pinch of salt. Pop onto a low heat and leave to infuse for around 10 minutes - like the jelly, the mix should never boil but it should heat enough for the sugar to dissolve and for the cardamom’s fragrance to seep into the cream. Leave to cool to room temperature and then chill. If the cream has thickened up substantially, let it down with a tablespoon or two of normal, unheated cream.
To serve the jellies, fill a bowl with hot tap water. Dunk each mould into the water (taking care not to totally submerge them) for around 30 seconds or so. Then pop a plate on top of the mould and invert the whole thing, so the jelly comes out onto the plate. Serve drizzled with the cold, spiced cream.
MAKE AHEAD -
The jellies are best made 24 hours in advance.
The cream can be made up to 6 hours in advance.
SUBSTITUTIONS -
Serve the jellies with squirty cream, fresh orange slices or even with raspberry fool.
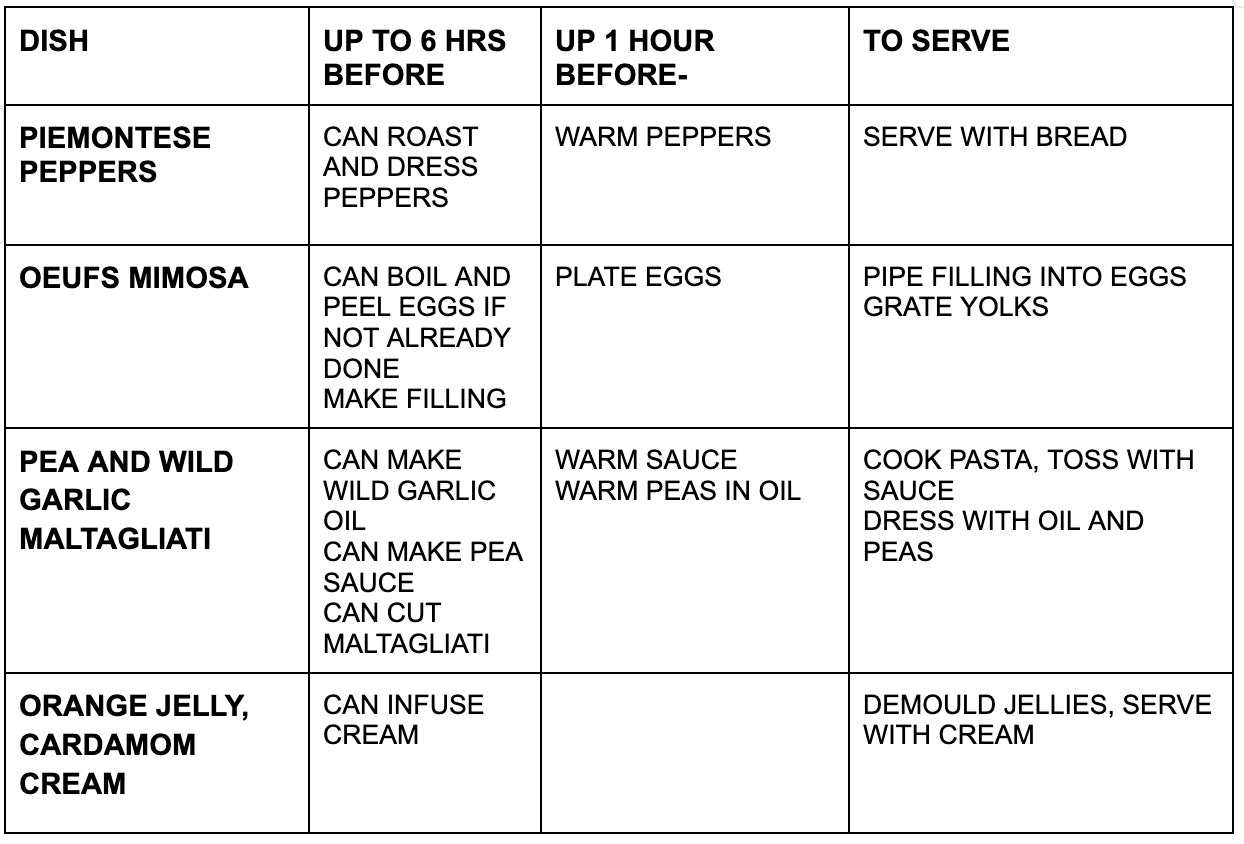
TIMEPLAN
This first plan should help you see what you can get done in advance, so that for each course on the day you have at least 1, maybe 2 major parts of it taken care of. I appreciate that not everyone’s weeks are easily peppered with dinner party prep, but if you’re hosting after work or on a day where you can’t be in the kitchen, getting ahead is going to save your arse.

MISE-EN-PLACE
This is the fancy name we give to the food prep each section in the restaurant needs to do for their dishes. Hopefully breaking down each dish like this will help you feel organised.
Use the hour before your guests arrive to organise your space too- I find it helpful to group ingredients by dish so it is all in the same place. Little ramekins are really useful for this.
STYLING
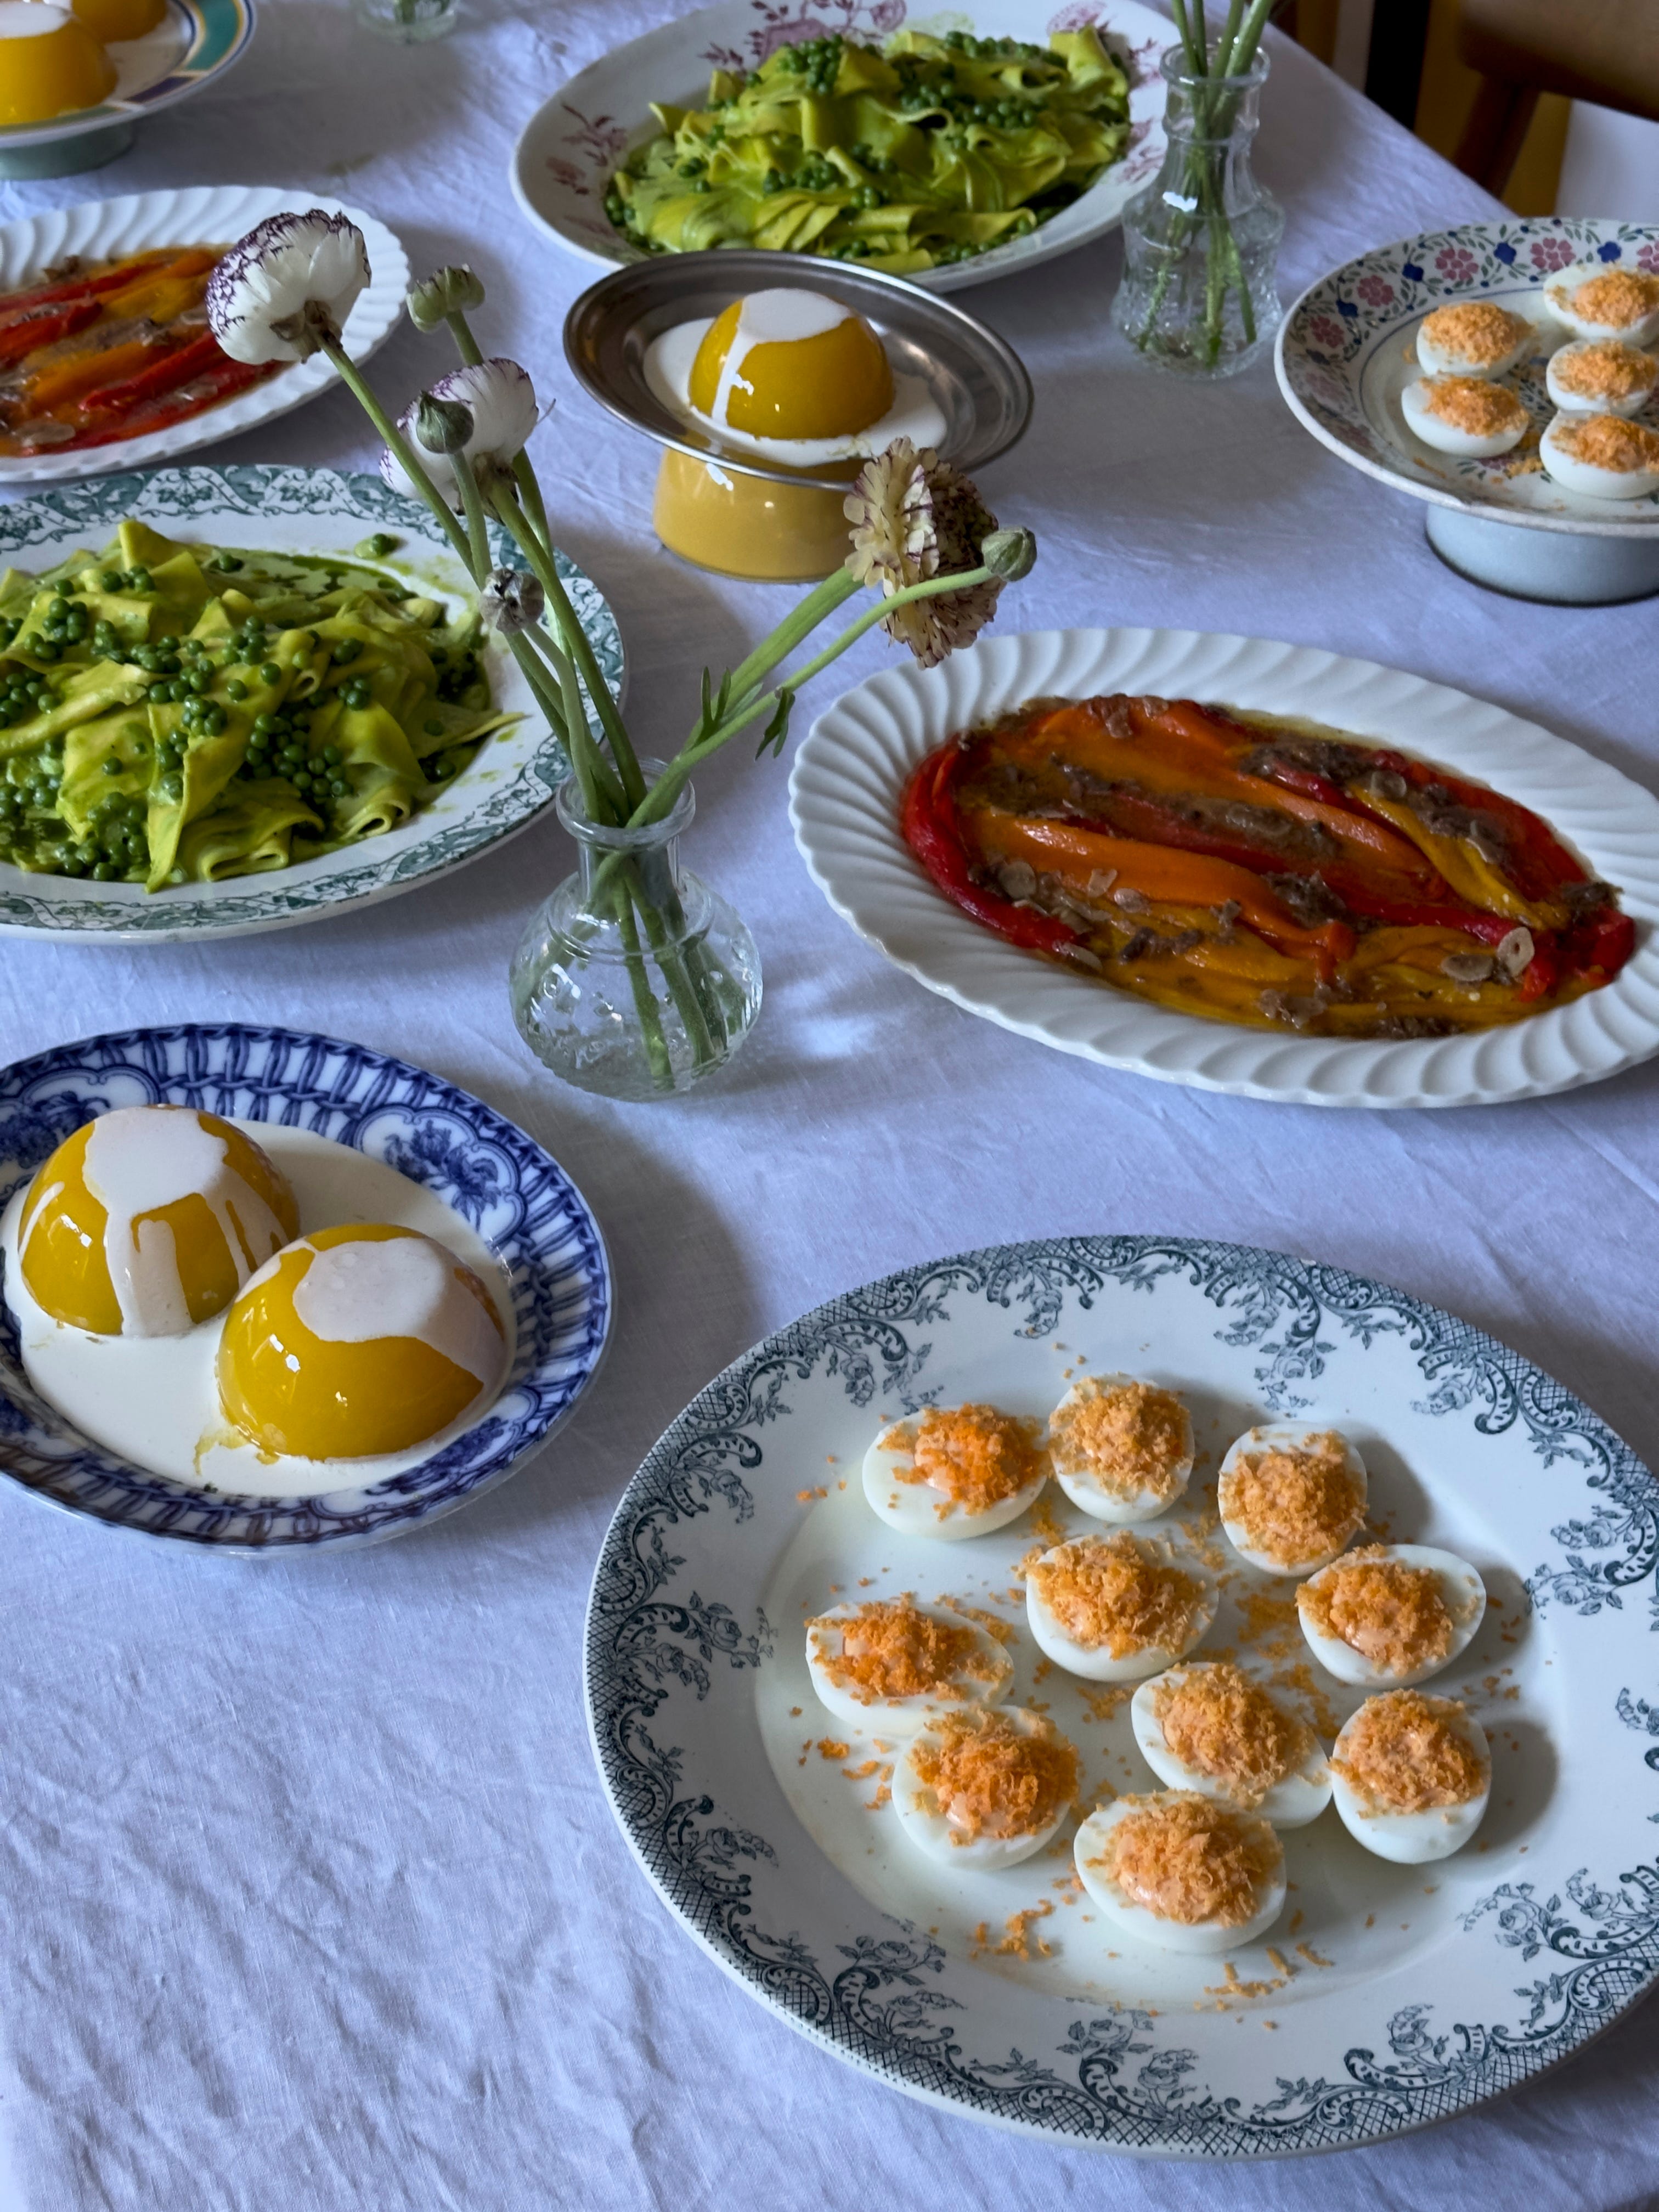
This is such a gloriously colourful menu, with each dish having its own colour theme really
I also think, with this in mind, the food is all quite retro and so I do love the idea of plating this all on vintage crockery, but to be fair I do always do that.
The rich reds, oranges and yellows of our peppers are best on plain white where they can really shine, or any crockery that is mostly a white background. I love them on oval platters too, as it emphasises the length of the peppers. The eggs are a white and yellow affair that look great with a touch of blue or pink (it’s giving Easter eggs).
For our main I never tire of heaping plates of pasta to share - if you have platters then go for it, if not then do two or three extra large main course plates for the table. Make sure to leave a space between the edge of the plate and the food, so your guests can see the beautiful pooling of the pea sauce and wild garlic oil. White plates with blue, green or red accents are lovely here.
Finally our jellies! The fun one! These are easiest when served individually (you can’t invert a plate when it already has another jelly on it) but if you want to do what I did and serve 3 on a plate, just be bold and flip your mould decisively. I love these on metal or glass for a bit of drama, or white plates with brightly coloured borders. It’s also fun to use height here, either with plates with feet or plates on top of bowls.
For flowers, I’ve used ranunculus which is SO BEAUTIFUL - like a peony meets a rose meets an anemone. It is just coming into season here in the UK and it’s going to be on my table a lot more for the time being.
Yummmmm!
Sooo dreamy!